Dragon Age logo

BioWare


Dragon Age: Origins Online Walkthrough by David Milward


INTRODUCTION  |  GETTING STARTED  |  NPCs  |  ORIGINS  |  RECIPES |  ITEMS   
Areas in the original game:  
Brecilian Forest  |  The Camp  |  Circle Tower  |  Denerim  |  The Final Battle  |  Haven  |  Landsmeet  |  Lothering  |  Orzammar  |  Ostagar  |  Redcliffe  |  Ruined Temple  
Areas available as Downloadable Content:  
Honnleath  |  Return to Ostagar  |  Warden's Keep 
About the Walkthrough  |  About the Maps  |  About the Author  |  About Playing the Game  |  Where to Begin
Disable all ads!

Ostagar: 
Korcari Wilds  |  Ostagar  |  Ostagar - The Battle  |  Tower of Ishal - First Floor  |  Tower of Ishal - Second Floor  |  Tower of Ishal - Third Floor  |  Tower of Ishal - Fourth Floor  

Ostagar

Ostagar

King Cailan
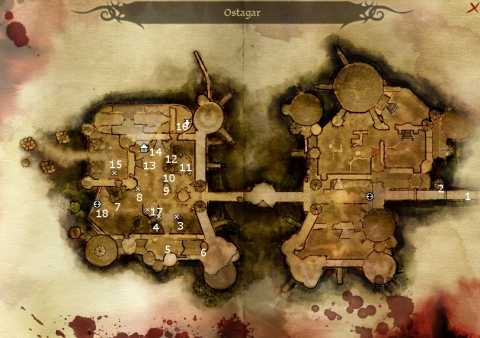
When you arrive here, you are greeted to a cutscene where King Cailan brims with an enthusiasm for a coming victory that Duncan, and Teryn Loghain, do not seem to share. You are then welcomed as the newest Grey Warden recruit. Duncan informs you that you are not to leave the camp until you've undergone a rite of passage with him. You otherwise have free run of the camp.

  1. Here is the gate to the King's Highway, which is closed off because of the coming battle with the Darkspawn.

  2. Here is the entrance to the Tower of Ishal, which is also closed off because Teryn Loghain's men want to investigate it further in preparation for the coming war.

  3. Here is King Calain's tent. The Guard won't let you in, but you can Persuade him to divulge a little extra info.

  4. Teryn LoghainHere is Teryn Loghain's tent, with a Guard standing outside. One Persuade check convinces him to share some info. Another Persuade check convinces him to let you speak with Teryn Loghain himself. Loghain will illuminate a little on his attitudes towards King Cailan and the Grey Wardens, but otherwise not a lot.

  5. Here are several soliders, either speaking with each other socially or speaking out potential dangers involved with the Darkspawn.

  6. If you spoke with the Ashen Warrior leader at #7, you may have noticed that he told an Elven Messenger to deliver a message beforehand. Here is where you can find the Elven messenger afterwards. If your coercion skill is good enough, you can bluff him into giving you Ser Garlen's Sword (Grey Iron). Incidentally, there will also be a couple of sacks nearby with random items.

  7. Here are the Ashen Warriors. Their leader will not be very disposed towards speaking with you if you're an Elf. But otherwise, he's willing to speak quite a bit about the Ashen Warriors and their history.

  8. Here is the Kennel Master. One of his hounds has taken ill from having swallowed Darkspawn blood. He wants you to muzzle it so that he can treat it. You can, if you want the Mabari War Hound to join you later on as a companion. Or you can kill it as well if you want to. Note that this Mabari Hound is potentially a joinable companion afterwards, so if you want that then try to help heal it instead of killing it. After the muzzling, the Kennel Master will also want you to find a special type of flower in the Korcari Wilds that he can use to treat the dog, which is also necessary if you want the dog to join you as a companion later on.

  9. Here you'll find a Chantry sister leading some soldiers in prayer.

  10. Here you'll find Wynne, who will be a joinable companion significantly later on. For now, you have a chance to converse with her, and your choices may affect her opinion of you later on.

  11. Here are a few Circle Mages who have partially entered the Fade in the hopes of divining information regarding the Darkspawn. The Templars won't let you speak to them.

  12. Here is a Tranquil, who offers information on the processes of enchanting weapons with runes.

  13. Here is Daveth, one of the other Grey Warden recruits, who is apparently trying to hit on a woman who's not at all interested.

  14. Here is the Quartermaster, who sells a variety of wares, including armors made of leather or steel, potions, herbs, and roots. He also sells various recipe components, and recipes for Acid Flask, Concentrated Venom, Lesser Injury Kit, Health Poultice.

    He is also willing to let you look at some of his special stuff, which will include heavier but mundane armors and weapons, as well as various arrows and bolts. His inventory will also include Enchanter's Footing (Cured) and an Enchanter's Staff (Iron). He also sells recipes for Fire Bomb, Concentrated Deathroot Extract, Mild Sleeping Gas Trap, Rock Salve, Mild Lure, and Concentrated Venom.

  15. Here is the Infirmary. It includes a wounded soldier who despairs that the Darkspawn will soon overrun Ostagar, a Sister of the Chantry who is anxious to bestow the Maker's Blessing on you, and Jory, another Grey Warden Recruit.

  16. AlistairHere is Alistair. He has a rather unpleasant conversation with a Circle Mage. When you talk to him, one thing is inevitable, meeting Duncan at his campfire. Incidentally, Alistair now joins your party for the first time as a companion.

  17. Here is Duncan's fire. When you come here, you'll be joined by Alastair, who's a Templar, Daveth, who's a Rogue, and Jory, who's a Warrior. Duncan has two tasks for you in the nearby Korcari Wilds. One is to bring back 3 vials of Darkspawn blood for the upcoming rite of passage. The other is to find ancient treaties that the Grey Wardens can use to assemble an army against the Darkspawn.

    The Joining
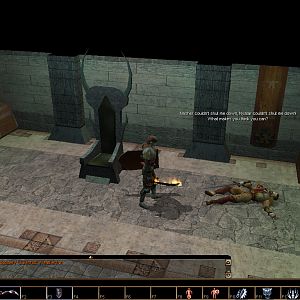
When you come back to Duncan with both tasks completed, Duncan then forces you and the other two recruits to undergo The Joining. Daveth proves what the outcome of not passing is, he'll die of poisoning from the Darkspawn blood. Jory decides he wants to bail, but Duncan kills him instead. You take the blood, and of course, you survive and end up acquiring some of the key abilities of the Grey Wardens, immunity to Darkspawn blood and the ability to sense their presence. You are also treated to a vision of their leader.

    Now Duncan wants you to prepare for the coming battle. You'll meet him and the leaders of Ferelden near the north side of the camp, close to where you first met Alastair. The task that the King and Teryn Loghain have for you is to make sure the beacon on the Tower of Ishal is lit, giving Loghain the signal to attack the Darkspawn horde from the flank to ensure victory. Now head eastwards to progress the game towards Ostagar the Battle.

  18. Here is the exit to the Korcari Wilds.


Amazon.com
Amazon.ca
Amazon.co.uk
Sorcerer's Place is a project run entirely by fans and for fans. Maintaining Sorcerer's Place and a stable environment for all our hosted sites requires a substantial amount of our time and funds on a regular basis, so please consider supporting us to keep the site up & running smoothly. Thank you!

Disable all ads!