-

- Forums
- Chatrooms
- Gallery
- Gameplay Videos
- Upload
- Articles
- Mod Reviews
- Shop SP: Games, Movies, Books
|
|
Brecilian Forest | The Camp | Circle Tower | Denerim | The Final Battle | Haven | Landsmeet | Lothering | Orzammar | Ostagar | Redcliffe | Ruined Temple Areas available as Downloadable Content: Honnleath | Return to Ostagar | Warden's Keep |
Redcliffe Village
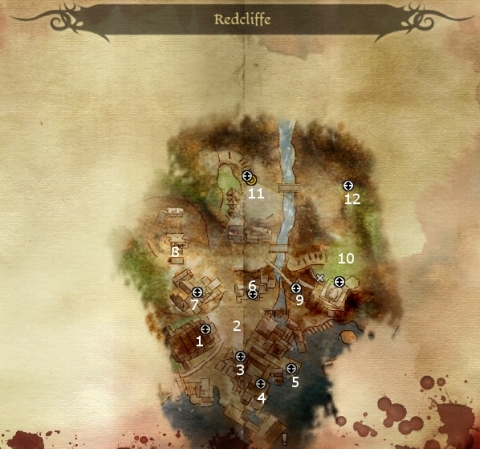
 Here you'll find the militia, along with their leader, Murdock. Murdock will be able to answer some questions, the answers to which may be helpful in conversations with other village residents.
 Here is the home of the Dwarf named Dwyn. A successful Intimidation check can persuade him to join the militia outside. Report your success back to Murdock.
 Here is the Blacksmith shop, where Owen has holed himself up. You'll need to make either a successful Persuasion or Intimidation check to get in through the front door. Once inside, only a promise to find his daughter, who has gone missing inside the castle, will suffice to convince him to repair the arms and armor of the militia. Report back to Murdock for an xp reward. Once you get Owen back in line, he then offers goods for store. They are mostly weapons and medium/heavy armors made of Steel, Veridium, or Red Steel, but with a high enough level can end up including items made from Silverite or Dragonbone. He also sells recipes for Large Shrapnel Trap, and Large Caltrop Trap.
 Here is the Tavern. The keeper is Lloyd, who will sell Ale as well as a few other basic items. He also sells recipes for Lesser Injury Kit, Health Poultice, and Double Baked Mabari Crunch.
 Here you'll find Ser Perth and the other remaining Knights of Redcliffe Village. Ser Perth is the first line of defense against the undead when they'll swarm from the castle. As such, he wants a little extra assurance. More specifically, he wants Revered Mother Hannah to confer upon him and his knights a blessing from the Maker that will result in tangible magical protection. When you speak to Hannah in the Chantry, she is reluctant to giver her blessing because only the Maker can confer actual protection. You can Persuade or Intimidate her to fall in with the request though on the understanding that it will boost the morale of the Knights. She'll give you silver amulets 'with the Maker's Blessing' to give to the Knight. Bring them back to Ser Perth for xp. Note that this will result in disapproval from Leliana since she considers it a misuse of the Maker's name.
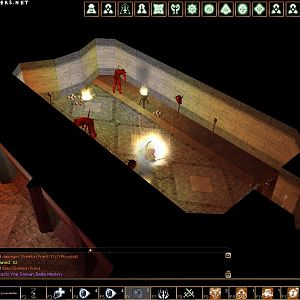
 When you're ready to participate in the fight, speak to either Ser Perth or Murdock. Once you do, you'll be treated to a cutscene of the undead marching down upon the village from a high bridge. Now keep in mind that this battle comes in two distinct stages. 1) The first part is where you help Ser Perth and his Knights hold the high ground near the mill against the undead. If you convinced Dwyn and Berwick to join, they'll be here as well. 2) Once you defeat the undead here, a messenger will come and inform you that the undead have found a way over the lake and are now attacking the village at its center. This means you'll have to travel back to #2 to help the Militia against the undead. If you managed to convince Lloyd to join, he'll be here as well.
 When the battle is done, you will move forward to Redcliffe Village - Post Battle, where there will be a celebration. If however you managed to win the battle without any casualties, then Bann Teagan will then offer the Helm of the Red (Steel) as a reward.