-

- Forums
- Chatrooms
- Gallery
- Gameplay Videos
- Upload
- Articles
- Mod Reviews
- Shop SP: Games, Movies, Books
|
|
Brecilian Forest | The Camp | Circle Tower | Denerim | The Final Battle | Haven | Landsmeet | Lothering | Orzammar | Ostagar | Redcliffe | Ruined Temple Areas available as Downloadable Content: Honnleath | Return to Ostagar | Warden's Keep |
Redcliffe Castle - Courtyard
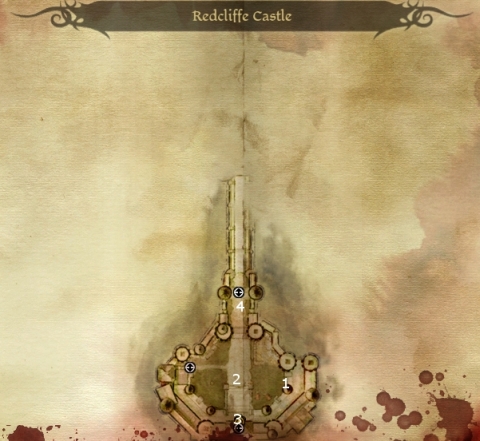
 Waiting for you at the west side of the courtyard will be a Revenant and a horde of skeletons. There will also be a few Skeleton archers north towards the entry to the castle itself. A Revenant is an incredibly powerful opponent in its own right. It can swing its weapon in an arc, causing lots of damage to multiple nearby enemies. It can also use Telekinesis to pull opponents within melee range. To defeat a Revenant, it helps to have a healthy mix of 2 or 3 types of talents. One type of talent is spells that can hold the Revenant still. Spirit Prison, Cone of Cold, and Petrify qualify. Another type is spells that while not immobilizing the Revenant, will reduce its ability to fight. These include Misdirection Hex, which can cause the Revenant to miss its blows, and Curse of Mortality, which will negate its regeneration ability. Another type is abilities that will increase the parties capacity to inflict damage on the Revenant. These include Critical Strike, Deadly Strike, Death Hex, Flaming Weapons, and Telekinetic Weapons. The idea is to keep his actual participation in the battle to an absolute bare minimum if you can manage it. In this instance, you're fighting not just a Revenant but also several of his buddies. A recommended strategy is to make use of your missile weapons and staves. First, take out the archers to the north from a distance. Now, with some careful placement and a little luck, you can use your missile weapons and staves to tease the other skeletons forward without actually bringing the Revenant into it. If this goes well, hopefully you can get the Revenant by himself, or at most with one or two Skeletons. Now let loose with all the spells and abilities you have that are designed for singularly powerful opponents. When all is said and done, the corpses and a couple of barrels will have some random items for the looting.


