-

- Forums
- Chatrooms
- Gallery
- Gameplay Videos
- Upload
- Articles
- Mod Reviews
- Shop SP: Games, Movies, Books
|
|
Brecilian Forest | The Camp | Circle Tower | Denerim | The Final Battle | Haven | Landsmeet | Lothering | Orzammar | Ostagar | Redcliffe | Ruined Temple Areas available as Downloadable Content: Honnleath | Return to Ostagar | Warden's Keep |
Ortan Thaig
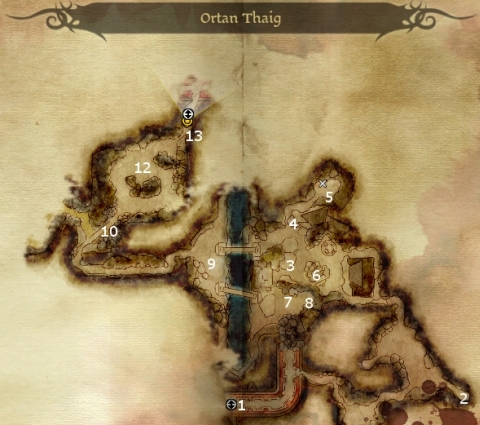
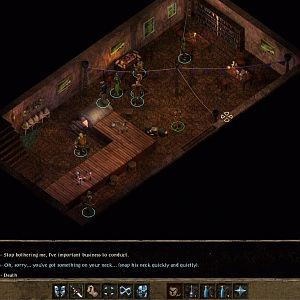
 Here you will find a rather raving and paranoid Dwarf named Ruck. When you first meet him, he will blather on about how he found it so it's his. He then bolts down the tunnel, leaving you to deal with a large number of spiders.
 Here is the Altar of Sundering. If you bring the Bag of Limbs, the Head in a Bag, and the Torso in a Bag, and place them on the Altar, then a Fade Beast resembling a Pride Demon will appear. You now have two choices. One is to kill it. Another is to let it go free in return for about 25 gold, though this implies that it will cause harm to others.
 Here you will have to fight several more spirits, as well as a couple of Golems that patrol the area. Chests in both the north and south corners of this area will have random items.
 Here you will have to fight the Corrupted Spider Queen, who presents a challenge even for high level parties. She can use powerful poison spit attacks at a distance, web from a distance, and can overwhelm a character for massive damage. She'll start off with several other Corrupted Spiders to help her. If you surround her, she will often use a silk thread to climb up and then appear at a distance in order to use her ranged attacks. When she gets low on hit points, she'll start climbing and appearing away more frequently, and call in more Corrupted Spiders to help. The key to this fight is to take out the rank-and-file spiders as quickly as you can whenever they appear, and persistently pursue her for opportunities to score melee damage. Also, keep a diligent eye on your hit points. She'll leave behind Bloodline (Red Steel) and the Silk Weave Gloves (Inscribed). A cocoon nearby holds the Smith's Heart.