Baldur's Gate logo

Tasloi Black Isle BioWare TSR Xvart


Siege of Dragonspear Online Walkthrough by Beren


INTRO & ABOUT | CHARACTERS | ITEMS | SHOPS
AREAS | QUESTS | IMPORTING ITEMS TO BG2

Disable all ads!

Areas: Prologue | Chapter 7 | Chapter 8 | Chapter 9 | Chapter 10 | Chapter 11 | Chapter 12 | Chapter 13

Prologue: Korlasz's Tomb, Level One | Korlasz's Tomb, Level Two

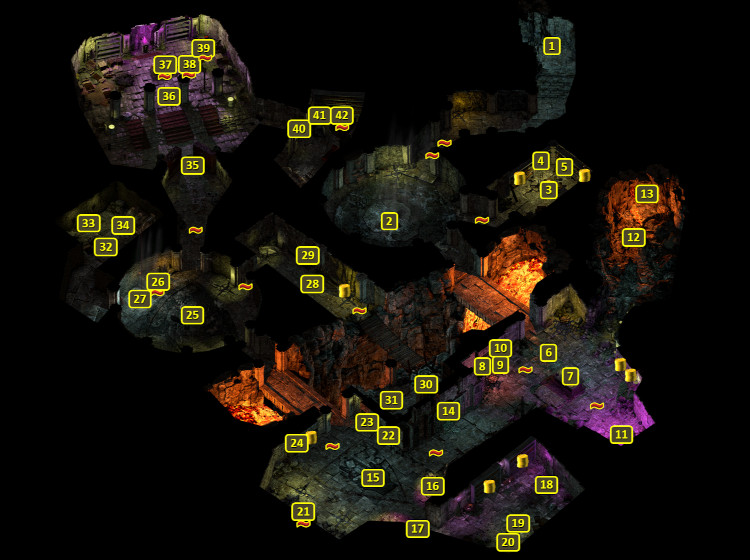
KORLASZ'S TOMB, LEVEL TWO

The party will eventually find Korlasz, one of Sarevok's last minions, hiding here. Dealing with her leads to a brief return to the city of Baldur's Gate.

Korlasz's Tomb, Level Two

  1. These stairs lead back up to the first level of Korlasz's Tomb.

  2. There will be several Tattered Skeletons, Skeleton Archers and Armored Skeletons in the room here. They are led by a Shadowed Soul that can both protect itself with Improved Invisibility and attack with Larloch's Minor Drain. The Skeleton Archers leave behind Arrows of Ice.

  3. The table here will have a Crusader's Pamphlet, which sheds some light on recruiting efforts on behalf of Caelar.

  4. This bookshelf has a Scroll of Protection from Poison (Green).

  5. This bookshelf has a Scroll of Free Action.

  6. The room here has a lot of Ghasts, Wights and Zombies.

  7. A sarcophagus in the middle has a Wand of Fire and a Potion of Defense.

  8. This shelf has a Cursed Potion of Healing plus another random item.

  9. This shelf has 20 Arrows +1 plus another random item.

  10. This shelf has a Splint Mail +1 plus another random item.

  11. There will be a brazier of purple fire here. You can use it to light the Burnt-Out Torch from 16.

  12. There will be several Fire Beetles and a few Boring Beetles here. A corpse on the ground has two items. One is a Morning Star +1. The other is a Wooden Staff, which is relevant to The Shattered Staff Quest.

  13. A niche here will have 10 Zircon gems. Approaching it will result in a few Magma Mephits appearing and attacking.

  14. Click on this globe and two Ochre Jellies will attack. One of them will leave behind an Amulet of Protection +1.

  15. There will be a large group of Shadows to fight here, along with an Unyielding Guardian. They aren't particularly difficult, especially if you get the jump on them with something like a Fireball. The real annoyance is a Wraith that will attack from Invisibility, and can Level Drain. The Flaming Fist Healer will be willing to undo that after the battle.

  16. There will be a Burnt-Out Torch here. You can light it on the Brazier at 11 to get a Lit Torch (Purple). And the Lit Torch (Purple) can be put back in this niche to open the door at 17.

  17. The door here cannot be detected or opened until you take the Burnt-Out Torch from 16, light in on the purple brazier at 11 to get the Lit Torch (Purple), and then place the Lit Torch (Purple) back in the niche at 16.

  18. The table has a Page from Sarevok's Notes, which is relevant to the Sarevok's Secret Quest.

  19. This locked sarcophagus has a Helm of Unwavering Purpose and a Full Plate Armor. Trying to take the Helm of Unwavering Purpose results in a battle against several Skeletons, Skeleton Archers, Armored Skeletons, and Bonebats led by a Shadowed Soul. They won't attack if you previously fought them after looting the chest at 20.

  20. This locked chest has the Sword of Ruin +2 as well as a Potion of Fire Giant Strength and a Potion of Invulnerability. Taking the Sword of Ruin +2 will result in battling the undead if you already haven't by looting the sarcophagus at 19.

  21. This trapped shelf has a Scroll of Chaotic Commands, an Emerald and random treasure.

  22. This shelf has a Cursed Scroll of Weakness and another random item.

  23. This shelf has a Cursed Antidote and another random item.

  24. This shelf has 20 Bolts +1 and a Buckler +1.

  25. There will be a few Mercenaries here. Some of them carry Potions of Healing. A couple of them carry Potions of Fire Resistance while their thief carries a couple of Potions of Invisibility. One of them also has Arrows of Biting.

  26. This trapped sarcophagus has a Scroll of Hold Undead and a Wand of the Heavens.

  27. There is a rope here. Climbing it leads to the first level of Korlasz's Tomb at 14.

  28. There will be several Burning Skeletons here, who are immune to fire damage. They are also lead by a Skeletal Mage that typically tries to lead off with a Stinking Cloud spell on the party.

  29. This weapon rack has a Battle Axe +1.

  30. This coprse has a Potion of Clarity and a Potion of Defense.

  31. Clicking on this sarcophagus causes a Restless Spirit to appear. You can attack it, and it will call several Bonebats to its aid. There won't be any special treasure, but you will get some xp out of it.

    It gives The Shattered Staff Quest.

  32. There will be two Mercenaries here. It's actually pretty easy to talk them into leaving. Or you can kill them, in which case they'll leave behind Potions of Healing, Potions of Invisibility, Darts +1 and Darts of Wounding.

  33. This table has a Crusader's Pamphlet, 3 Potions of Healing and an Elixir of Health.

  34. This dial opens the door at 35.

  35. This door can only be opened by using the dial at 34.

  36. Korlasz
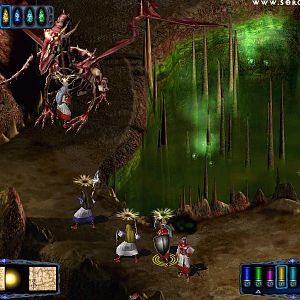
Korlasz will be here. You can talk her into surrendering willingly to the Flaming Fist, and she and her minions will leave all of their loot for you. Or you can attack her. The battle won't actually be that difficult, since you can place a spell like Web from behind the narrow opening leading to her, and then blast away with offensive spells. She'll leave behind a Quarterstaff +1, 80 Darts +1, a Knave's Robe, Bracers of Defense AC 6, Cloak of Protection +1 and Korlasz's Key in either scenario. If it's a fight, the Mercenaries will leave behind Potions of Healing, Arrows +1 and Arrows of Biting.

    Korlasz, if she's taken enough damage in a battle, will herself bring up the possibility of surrender which provides another opportunity to talk her into submitting to arrest. Arresting her instead of killing her here and now opens up a greater number of possibilities for The Fist Restrained Quest during Chapter 7.

    Everyone in the party will get 5,000xp at the conclusion of the encounter, however it went.

    Imoen will announce that she's returning to the first level of Korlasz's Tomb by way of the rope at 27. You can go with her now, which is not recommended since it loses an opportunity to keep the equipment you've imported from Baldur's Gate 1. That opportunity is explained in the note for 1 in the first level of Korlasz's Tomb, and begins by telling her you'd like to explore a little more. Reporting back to Imoen, whether by following her up the rope now or later by speaking to her again at 1 in the first level of Korlasz's Tomb, starts Chapter 7 in the Ducal Palace.

  37. This trapped table will have:

  38. This trapped table will have:

  39. This locked and trapped chest will have the Ornate Headpiece, which is relevant to The Shattered Staff Quest.

  40. This door can only be opened with Korlasz's Key. You'll have to fight Korlasz's Familiar on the other side.

  41. A locked and trapped chest here will have Korlasz's Journal and Bhaal Research. The latter item can be given to Imoen when you return to 1 in the first level of Korlasz's Tomb.

  42. This trapped and locked chest will have:

Amazon.com
Amazon.ca
Amazon.co.uk
Sorcerer's Place is a project run entirely by fans and for fans. Maintaining Sorcerer's Place and a stable environment for all our hosted sites requires a substantial amount of our time and funds on a regular basis, so please consider supporting us to keep the site up & running smoothly. Thank you!

Disable all ads!