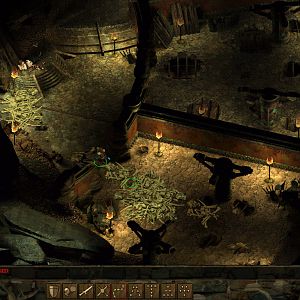
You start off here with the same party you had when you defeated Sarevok in BG1. Imoen will explain that your next task is to hunt down one of Sarevok's last minions, Korlasz.
This is there you start the expansion. Imoen, although not available as a joinable companion, will give you a low down.
A Healer will also be nearby, and provide basic Temple services should you need them. They will gradually follow you as make progress through both levels of the Tomb.
*NOTE* There are a few possibilities to be aware of once Korlasz has been defeated in the second level of Korlasz's Tomb.
One possibility is to take up Imoen on her offer to leave the Tomb with her immediately to start Chapter 7 in the Ducal Palace. I do not recommend this as it means losing out on an opportunity to keep a lot of the items you found in Baldur's Gate 1. Your Hero of Baldur's Gate will keep all the items he or she has equipped, while the items in his or her swag inventory will appear in a chest in the Ducal Palace. It's somewhat different for your other party members. Any items that were in their swag inventories will also end up in the chest. BUT any items they have equipped will disappear for good, FOREVER and for the rest of Siege of Dragonspear. So the recommendation is that any items that your other party members have equipped and you want to keep should be unequipped and moved into their swag inventories. That may lead to some difficult decisions about what you really want to keep and what you can part with. The items in their swag inventories will now appear in the special chest. That chest in fact will be a traveling chest that starts off in the Ducal Palace but will travel with the Coalition as you make progress against the Crusade. The chest is thus a convenient storage for until you have some of your old companions back or have new ones join you.
Another possibility is that if you found the Bhaal Research you can now give it to Imoen, who in turn will give it to Duke Jannath.
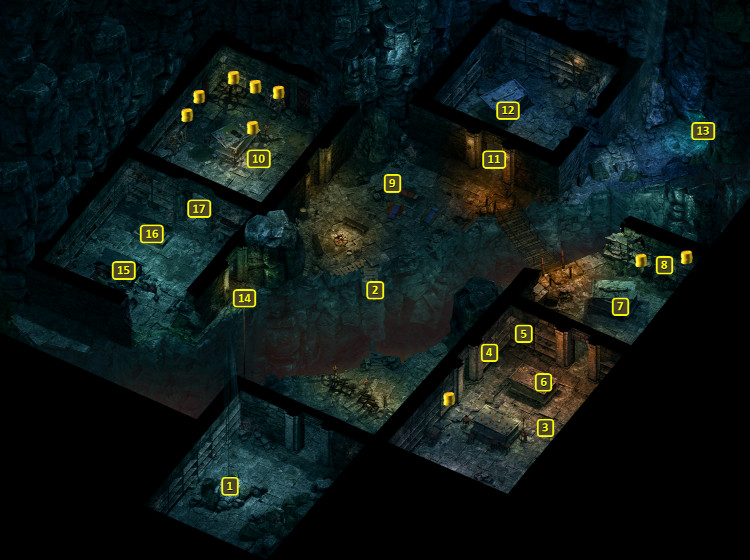
Somebody named Porios will taunt you from here across the chasm about how "it's too late" and "it's gone". He'll reveal that it's Sarevok's sword if you press him before teleporting away.
The Cobalt Moss is in a tomb at 15. But getting across the chasm will involve finding your way underneath through the second level.
Ammon at 3 give you 3,000xp and 50gp if you bring the Cobalt Moss to her. She explains that she wants to find a tome in Candlekeep that has invisible writing on it. The Cobalt Moss is for a potion that will reveal that writing. But she's feeling frustrated as she can't find a tome of great value to gain entrance. She'll give you her Wand of Monster Summoning if you sign a letter for her pleading with the Candlekeep Guards to let her in.
A large group of Followers of Sarevok and Iron Throne Soldiers will be here, but you can avoid hostilities with them if you quickly bring Porios (at 10) into view and secure his agreement to leave the area willingly.
They'll leave behind mostly mundane equipment if you decide to fight and kill them. Two of the Iron Throne Soldiers leave behind Bolts +1 while the Iron Throne Commander leaves behind a Potion of Healing.
Porios will be here. He'll leave willingly, after indicating that he stole Sarevok's sword for Korlasz, who wants to sell it for a vast sum. Korlasz is waiting below.
You could also pick a fight with him and his remaining Followers of Sarevok. You'll get the Cloak of Minor Arcana and give you the Tomb Key all the same. One of the Followers will leave behind a few Arrows +1 while another will leave behind a few Arrows of Biting.
This door can either be picked by a Thief or opened with the Tomb Key given by Porios at 10.
Opening the sarcophagus within causes a Mummy named Fanegonorom to appear. He won't attack initially, but he will if you try to take the Emerald and Pearl Necklace from the sarcophagus. He has a fear aura, and his touch can also causes a temporary drain that imposes -2 Charisma and a little bit of damage every few seconds. It won't require Cure Disease, and it will expire on its own after long enough. He is worth 5,000xp while his Skeleton Archers are worth 250xp each. You may decide to prefer this route, but it also means you won't be able to complete his quest and obtain a unique reward as a result.
He'll offer The Mummy's Orders Quest if you avoid taking the gems from his sarcophagus and choose a dialogue option that makes it clear your only interest is pursuing those who previously arrived to disturb the tomb. The Quest itself amounts to killing Korlasz at his behest, and can lead to obtaining the Shield of Egons as a reward.
This sarcophagus will have the Cobalt Moss Moss that Ammon wants as part of the Tome of Great Value Quest. A Tattered Skeleton will attack if you open the sarcophagus.
This tomb will have a Cursed Scroll of Clumsiness and a Potion of Fire Resistance. But clicking on it will cause several Angry Spirits and an Unsleeping Guardian to attack. They can drain Strength with their touch attacks.
Sorcerer's
Place is a project run entirely by fans and for fans. Maintaining
Sorcerer's Place and a stable environment for all our hosted sites requires a substantial amount of our time and funds on a regular basis, so please consider supporting us to keep the site up & running smoothly. Thank you!
Supporting Sorcerer's Place
Has Sorcerer's Place been useful? If you'd like to show your appreciation
for our hard work on the site, and help us pay the bills the site generates
every month, please consider helping support SP.
Thank you!