Baldur's Gate 2 Online Walkthrough by Montresor


CREATING A CHARACTER  |  GENERAL TIPS AND TRICKS  |  NPCs  |  ITEM LISTS  |   SHOPS   
Shadows of Amn: Chapter 1  |  Chapter 2  |  Chapter 3  |  Chapter 4  |  Chapter 5  |  Chapter 6  |  Chapter 7  
Throne of Bhaal  |  Watcher's Keep  
About the Walkthrough  |  Organization of the Walkthrough  |  About the Maps  |  About the Author  |  Where to Begin
Disable all ads!

Overview of Chapter 2  |  Quests in Chapter 2 
Areas in Chapter 2: Athkatla
Waukeen's Promenade  |  The Bridge District  |  The City Gate District  |  The Docks District  |  The Government District  |  The Graveyard District  |  The Slums  |  The Planar Sphere  |  The Temple District  |  The Temple District Sewers  
Areas Outside Athkatla
De'Arnise Keep  |  Trademeet  |  The Druid Grove  |  The Umar Hills  |  The Temple Ruins  |  The Windspear Hills

THE SLAVES IN THE COPPER CORONET

To get this quest, you must gain entrance to the back rooms of the Copper Coronet. Speak to Lehtinen at the bar at 2 and let him understand that you are very interested in the entertainment the back rooms have to offer. The guards at the doors at 11 will now let you enter the back rooms.

Go to the fighting pits at 15 and watch the fight where a gladiator slave is killed by a Troll. By now it should be clear that a righteous party ought to do something!
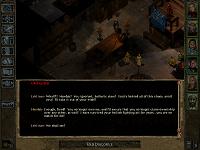
  1. Take the hallway down to the closed door at 16 and enter. You will be stopped by the guards who are not very interested in your explanations. You'll need to kill two Guards and two Mages.

  2. Approach the middle cell and Hendak will speak to you. He begs you to release him and the rest of the slaves. Hendak suggests that you should get the cell key from the Beastmaster.

  3. Pass the fighting pits at 17, killing a Winter Wolf on your way.

  4. The Beastmaster can be found at 18. Surprise, surprise, he won't hand over the Beastmaster Key peacefully. Instead, he releases his pet cat Tabitha plus a couple of Mutated Gibberlings, a Panther, a Leopard, a Black Bear, a Grizzly Bear, and a Minotaur – and of course attacks you himself!

  5. Kill the Beastmaster and his pets and loot him for the Beastmaster Key and whatever else you can use from his body. The Tuigan Bow +1 is particularly valuable, either as a weapon for a party member, or as sellable loot!

  6. Go back to the cells at 16. Open the leftmost and rightmost cell first and speak to the inmates for 2,500 XP each. Then open the middle cell. Hendak thanks you profusely before making a beeline for the bar to settle matters with Lehtinen. The party gains 7,500 XP for freeing Hendak.

    Of course you can free Hendak first. But if you do that, he automatically frees all the slaves and you miss out on the experience for opening the other two cells.

  7. Follow Hendak back to the bar at 2, killing and looting any hostile Guards you come across on the way.

  8. When you reach the bar, you will witness a fight between Hendak and Lehtinen, which Hendak is scripted to win. The party receives 48,750 XP for freeing the slaves.

  9. However, Hendak tells you there are more slaves being held in the Slums. If you wish, you can now accept the Slaves in the Slums quest from him.


Amazon.com
Amazon.ca
Amazon.co.uk
Sorcerer's Place is a project run entirely by fans and for fans. Maintaining Sorcerer's Place and a stable environment for all our hosted sites requires a substantial amount of our time and funds on a regular basis, so please consider supporting us to keep the site up & running smoothly. Thank you!

Disable all ads!