Pillars of Eternity logo


Pillars of Eternity Online Walkthrough by David Milward


INTRODUCTION & ABOUT  |  WORLD MAP  |  WHITE MARCH MAP
General:  
Quests  |  Tasks  |  Bounties  |  Items  |  Characters
Areas:  
Act 1 Areas  |  Act 2 Areas  |  Act 3 Areas  |  Act 4 Areas  |  Caed Nua  |  White March - Part 1  |  White March - Part 2  | 
Disable all ads!

Stronghold:   Caed Nua  |  Great Hall  |  Dungeons  |  Upgrades  |  Hirelings  |  Visitors  |  Companion Adventures  | 
Endless Paths:   Level 1  |  Level 2  |  Level 3  |  Level 4  |  Level 5  |  Level 6  |  Level 7  |  Level 8  |  Level 9  |  Level 10  |  Level 11  |  Level 12  |  Level 13  |  Level 14  |  Level 15  | 

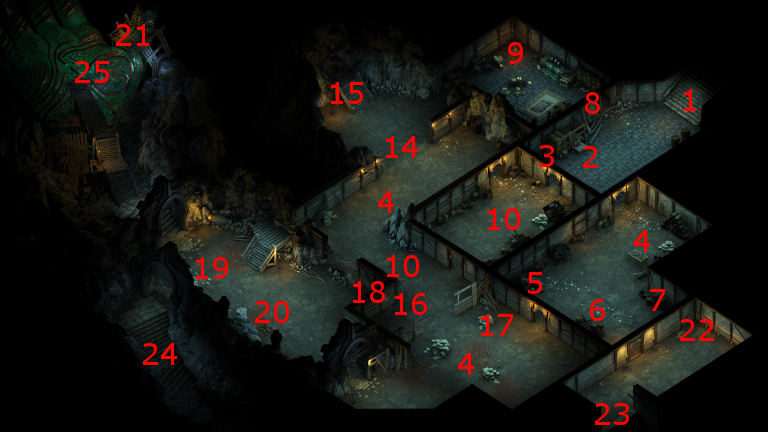
Endless Paths - Level 1

Endless Paths, Level 1

  1. Here are the stairs back up to the Dungeons, whether it's the ruined version before you obtain the Stronghold, or the fixed up version after obtaining the Stronghold.

  2. Here you'll encounter the spirit of a Glanfathan raider who savors the chance for revenge against the Aedyr colonists.

  3. There will be a random weapon in this weapon rack.

  4. There will be Ivory Spiders and Spear Spiders at spots marked #4. The Spear Spiders will leave behind Spear Spider Legs when killed.

  5. There will be an item from the "Endless Paths - 1st Old Watcher - Spider Room Close to East Entrance" section of the random drop list in this crate.

  6. There will be a few Xuarips in this corner, led by a Xuarip Priest. They shouldn't be difficult for any party to kill. The rank-and-file Xuarips will each leave behind a Xuarip Spear and a Medium Shield. The Priest will leave behind:
    The key can be used to open the door at #8.

  7. The crate here will have some coins.

  8. This door requires either a rank of 4 in the Mechanics skill to open, or the Heavy Iron Key from the Xuarip Priest at #5, to open.

  9. Maerwald
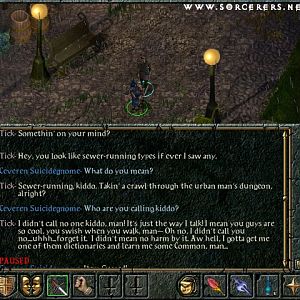
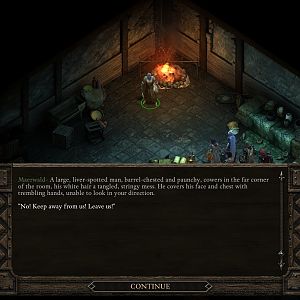
Here the party will encounter Maerwald, whose defeat is necessary to complete The Old Watcher quest. There will first be a lengthy conversation. Early on in the conversation there will be an opportunity to select an Honest, Diplomatic, Stoic, Rational or Aggressive response. There will also be an opportunity to make a Lore check to realize what Maerwald means when he says that an event called an Awakening is responsible for his current condition. There is also a branch of the conversation that opens up when you ask him if his past lives trouble him. There will opportunities to select two of Benevolent, Cruel, Passionate or Stoic responses.

    As the conversation winds down, the Raider spirit you previously encountered will take over and force combat with you. Maerwald will attack along with a Flame Blight. Maerwald is capable of casting Wizard spells, and can prove quite dangerous. It's best in my opinion to have a tank character like Eder or Kana hold up the Flame Blight, and have the rest of the characters keep pressure on Maerwald with melee and missile attacks with a view towards taking him out as quickly as possible.

    Once he falls, you have a choice that may have repercussions for your stronghold. They are as follows:
    The Blight will leave behind 3 Primal Flames. Maerwald himself will leave behind Maerwald's Grimoire.

    Going back up to the Great Hall will now result in the Steward making Caed Nua your stronghold, as well as starting the next main quest, Never Far from the Queen.

  10. There will be a few Wood Beetles led by a Stone Beetle at spots marked #10. A Stone Beetle is capable of burrowing underground and appearing elsewhere, much like an Aadvark from D&D games. All the Beetles will leave behind Beetle Shells when killed.

  11. There will be coins in this barrel.

  12. A random food item will be in this crate.

  13. There will be a random scroll and some coins in this crate.

  14. There will be several Looters here led by a Goldpact Knight. They leave behind the odd Helm or Hood when killed.

  15. A corpse here will have a random armor item and some coins.

  16. There will be a few coins that can be looted from this corpse.

  17. A skeleton here will have a random weapon.

  18. A web sac here will have a random armor and some coins.

  19. The web sac here will have some coins.

  20. Here you'll have to fight a few Ivory Spiders, a few Spear Spiders, and a Spider Queen. The Spear Spiders will leave behind Spear Spider Legs when killed. The Spider Queen will leave behind two Spider Venom Sacs, plus a unique Stiletto called Oidreacht when killed.

  21. This ladder leads to Caed Nua on the other end of a trap door near the Chapel, at #4.

  22. This bone pile will have an item from the "Endless Paths - 1st Old Watcher - Exit to 2nd" section of the random drop list and some coins.

  23. The stairs here lead down to the second level of Endless Paths at #1. If Kana is in the party, he will at this point explain in more detail his pursuit of the tome penned by a famous historical Wizard as part of his Time and Tide quest.

  24. This point provides access to the World Map.

  25. Here is where the party can bring The Dragon's Amulet if they sided with the Adra Dragon as part of The Master Below quest.


Amazon.com
Amazon.ca
Amazon.co.uk
Sorcerer's Place is a project run entirely by fans and for fans. Maintaining Sorcerer's Place and a stable environment for all our hosted sites requires a substantial amount of our time and funds on a regular basis, so please consider supporting us to keep the site up & running smoothly. Thank you!

Disable all ads!