Baldur's Gate 2 Online Walkthrough by Montresor


CREATING A CHARACTER  |  GENERAL TIPS AND TRICKS  |  NPCs  |  ITEM LISTS  |   SHOPS   
Shadows of Amn: Chapter 1  |  Chapter 2  |  Chapter 3  |  Chapter 4  |  Chapter 5  |  Chapter 6  |  Chapter 7  
Throne of Bhaal  |  Watcher's Keep  
About the Walkthrough  |  Organization of the Walkthrough  |  About the Maps  |  About the Author  |  Where to Begin
Disable all ads!

Overview of Chapter 4  |  Quests in Chapter 4 
Areas in Chapter 4
Brynnlaw  |  The Asylum  |  The City of Caverns

The Asylum
Outside Area  |  First Floor  |  Irenicus' Laboratory  |  Candlekeep - The Dream  |  The Dungeon, First Level  |  The Dungeon, Second Level  |  The Dungeon, Third Level  |  The Dungeon, the Tests  

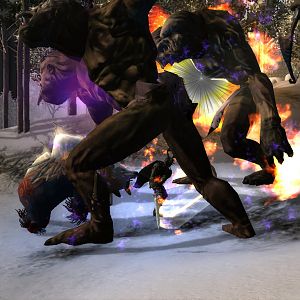
ASYLUM DUNGEON, LEVEL 3

This is the final level of the dungeon – well, almost – and the place where you will once again run into Bodhi, and learn a new ability.

  1. This is where you arrive from Level 1 of the Asylum Dungeon.

  2. Lockpick the door into this room, then use the horseshoe-shaped wheel to open the door into the room at 3.

  3. In this room you will have to fight three Trolls and a Spirit Troll.

    The vase at (x=170, y=1020) contains 2 Mithril Tokens, a Scroll of Breach, 40 Arrows, and 432 GP.

  4. In this room you will have to fight four Minotaurs.

    The lamp at (x=620, y=1570) contains 2 Mithril Tokens, 40 Bolts +2, a Scroll of Sunfire, and 78 GP.

  5. In this room the three statues and the central pool can all be looted. However, the statues all cast a spell, so whoever does the looting should have high magical resistance and/or be protected by a Death Ward.

    The statue at (x=1070, y=1250) casts a Disintegrate spell (hence the Death Ward!). It gives you the Troll Painting.

    The statue at (x=1170, y=1220) casts a Cloudkill spell. It gives you the Umber Hulk Painting.

    The statue at (x=1270, y=1250) casts a Fireball spell. It gives you the Djinni Painting.

    Finally, the pool in the middle of the room can be looted for a Minotaur Horn, 2 Mithril Tokens, the Mind Flayer Painting, 40 Bolts +1, and 40 Bolts of Lightning.

  6. Here is a Troll waiting for you.

  7. Another Troll waits inside this room.

    There are four globes on the left and upper walls of the room. Each has a different effect:

    - The globe at (x=1410, y=1580) slows the party unless they save vs. spells.

    - The globe at (x=1510, y=1510) heals the character standing in the middle of the room.

    - The globe at (x=1750, y=1520) hastes the party.

    - The globe at (x=1860, y=1900) releases a Lightning Bolt.

    Before proceeding north, I recommend that the party rests. You won't be able to rest uninterrupted again before you are out of the dungeon.

  8. Here you will meet Bodhi and some of her Vampire friends. However, when they attack you, the protagonist turns into the Slayer, an avatar of Bhaal. Bodhi and her friends flee in horror, and the protagonists attacks anyone in sight until the transformation wears off. It is therefore recommended to send the protagonist forth alone and protected from Level Drains first.

    Moreover, if the party rests from now on and until you have escaped the dungeon, you will again turn into the Slayer and attack your party members.

    Here is also the exit to the Asylum Dungeon Tests. But the door is closed for now.

    When you have found both Minotaur Horns on this level (one is at 5 and the other is at 11), click the Minotaur statue in the middle of the room to open the door and gain access to the Asylum Dungeon Tests. For opening the door, each party member gains 29,500 XP.

  9. Here is a single Minotaur to fight. Once done, loot the little pool at (x=1890, y=1020) for 4 Mithril Tokens, a Scroll of Chain Lightning, 40 Bullets +1, 40 Bullets +2, and 365 GP.

  10. Here is a Gauth and three Minotaurs.

  11. In this room are four Minotaurs.

    Once they are killed, loot the vase at (x=2140, y=1770) for a Minotaur Horn, 2 Mithril Tokens, a Scroll of Limited Wish, 40 Arrows +1, 40 Acid Arrows, and some gold.

  12. In this room awaits a Yuan-Ti War Party.

    Once they have been killed, you can open the four doors in the room if you have the corresponding paintings from 5:

    Behind the leftmost door is an Ulitharid (a high-level Mind Flayer). He drops the two-handed sword Flame of the North +2.

    Behind the next door is a Spirit Troll. It drops the katana Malakar +2.

    The third door hides an Umber Hulk, and also a passage further on.

    Finally, behind the fourth door is a Noble Djinni (though not too noble to attack you!) He drops a Black Opal.

  13. Here four Wolfweres will attack you.

  14. The vase here contains Scrolls of Mislead and Phantom Blade, 40 Bullets +1, 40 Darts +1, an Arrow of Biting, a Bolt of Biting, and a Diamond.

  15. The chest in this room contains a Star Sapphire, 4 Mithril Tokens and the Gesen Bow String. When you take the Gesen Bow String, the door slams shut and the three Clay Golems come to life! So I recommend to leave everybody outside who hasn't got access to magical blunt weapons and prepare everyone else against a fast and furious Golem battle.

    Once the Golems are dead, the door opens again.

  16. In this room is a Stone Golem, so this time have your cutting weapons ready.

    The vase at (x=1950, y=500) contains 2 Mithril Tokens, a Diamond, Scroll of Maze, 40 Darts of Wounding, and 40 Darts.

    The table at (x=2070, y=600) contains 3 Mithril Tokens, 213 GP, and a bunch of Throwing Daggers and Throwing Axes.

  17. If you have searched the level thoroughly, you should have found 21 Mithril Tokens. Now the time has come to decide how to spend them. The machine in this room will sell you various kinds of Boots or Armor:

    For 20 Mithril Tokens you will get the Jester's Chain.

    For 15 Mithril Tokens you will get a pair of Boots of Speed.

    For 10 Mithril Tokens you will get a pair of Boots of Grounding.

    For 5 Mithril Tokens you will get a pair of Boots of the North.

    Since the Mithril Tokens have no other use, you may as well spend as many as possible. My preferred way is to buy Boots of Speed and Boots of the North. It's always nice to be able to Haste one party member permanently.


Amazon.com
Amazon.ca
Amazon.co.uk
Sorcerer's Place is a project run entirely by fans and for fans. Maintaining Sorcerer's Place and a stable environment for all our hosted sites requires a substantial amount of our time and funds on a regular basis, so please consider supporting us to keep the site up & running smoothly. Thank you!

Disable all ads!