Baldur's Gate 2 Online Walkthrough by Montresor
THE CITY OF CAVERNS
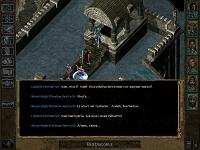
To get here, you must have completed the Asylum Dungeon and accepted Saemon Havarian's help in getting out of Brynnlaw. On your way back towards Amn, the ship is boarded first by Githyanki and then by Sahuagin.  The ship capsizes, and your party wake up to find themselves in this Sahuagin city, far under the sea. Their High Priestess makes it abundantly clear that under normal circumstances you would be their main course the same evening, except that she has had a revelation about you – you are the one prophesized to settle their civil war.
If you accept the quest to help the Sahuagin, you are brought before the king. If not ... well, you'll just have to hack & slash your way out of the city! So, to improve your own chances and also gain a fair bit of XP, I suggest that you accept the quest!
A little tip: You will occasionally have to fight large numbers of Sahuagin. But since they are fairly susceptible to the Death Spell, if you have a high-level Mage in your party, he or she can help you eliminate most of their numbers.

- Here is where you arrive in the City-of-Caverns. High Priestess Senityili greets you and claims she has had a prophesy about you.
After you have accepted the king's quest, the priestess asks you to come back here for a little briefing. Turns out she wants you to speak to the rebel prince and help him rid the Sahuagin of their mad king! She gives you the Rebel's Orb as a token of peace.
 Here you will meet the mad King Ixilthetocal. Before he accepts that you are the chosen one who is to bring the Sahuagin strife to an end, he demands that you accept a challenge. Accept the challenge and you will find yourselves at 3, confronting a Two-headed Ettin.
Once you have fought the ettin, the king sends you to kill the rebel prince.
If you return here with a Fake Heart, or for some other reason you initiate hostilities, the king drops the Sahuagin Treasury Key, the spear Impaler +3, and some minor treasure.
Using the Treasury Key, you can loot the treasury at (x=460, y=680) for a Magical Rope, a Rod of Lordly Might, a Scroll of Protection from the Elements, and a Sahuagin Scribe's Notes.
- Here is where you have to satisfy the king that you are indeed the chosen one by fighting an ettin. Don't worry, it is a fairly easy battle.
- Here is a Priestess of Sekolah who sells temple services and a few magical weapons, some potions and a lot of scrolls. Click here for shop inventory.
- Here a Sahuagin Royal Guard warns you that you must be careful if you enter the southern part of the city which was once in the possession of the "Blackened Elves" (Drow). They left behind a lot of traps and monsters. Heeding this warning is recommended.
- Watch out for a trap at (x=1650, y=2730), just south of the little round area.
- Here you will be attacked by a couple of Ettercaps and a couple of Sword Spiders.
- Here a Bone Golem will attack you.
- Just west of the round area, at (x=750, y=3420), is another trap.
- Here are two Imps who want to play a little game with you. If you win the game, they will open the chest at (x=620, y=3070) for you and lure out the Spectre that is guarding it. If you try to loot the chest without their help, the Spectre will kill you, so accept to play their game – but make sure to have your Thief sweep the area for traps first! There are six traps in the area, at least some of which can prove lethal.
For the Imps' game, there are also five famous characters who will each give you an item and a tip on which item they need. Your job is to place each item in the chest behind the person it belongs to.
- Elminster: Gives you a Scimitar for Drizzt do'Urden. Give him the Pipe you get from Alustriel.
- Khelben Blackstaff: Gives you a Pendant for Alustriel. Give him the Quarterstaff you get from Piergeiron.
- Alustriel: Gives you a Pipe for Elminster. Give her the Pendant you get from Khelben.
- Piergeiron: Gives you a Quarterstaff for Khelben. Give him the Helmet you get from Drizzt do'Urden.
- Drizzt do'Urden: Gives you a Helmet for Piergeiron. Give him the Scimitar you get from Elminster.
For winning the game, each party member receives 18,500 XP and the Imps open the last chest and dispose of the Spectre. You can now loot the chest for a pair of Boots of Etherealness and a Cloak of Protection +2.
 Here is a Spectator Beholder guarding a chest. The chest just happens to contain Sekolah's Tooth which you need to open the door at 23 and get to the Rebel Prince.
Of course you *could* kill the Spectator for 4,000 XP. You can then loot the chest in peace.
But it is more satisfying to convince the Spectator to interpret its contract to guard the chest rather loosely. Have your wisest party member talk to the Spectator and choose the conversation options that reveal that the Spectator was summoned to guard the *chest*; not its *contents*. It will allow you to loot the chest for the Tooth of Sekolah. You gain 15,000 XP for this peaceful resolution.
- Here you will be attacked by a small band of Sahuagin Rebels. Among the loot may be some Bolts of Biting and some Paralytic Bolts.
- Here you will be attacked by a Sahuagin Priestess and another Sahuagin Rebel. When you spot them, more Sahuagin will attack you back at 13A, some of them from the water.
The Priestess is wearing a cloak that reflects all spells, so don't use targeted spells on her! Send some fighters to kill her and let the magic-users expend their forces on the other enemies.
The Priestess drops some minor treasure and the awesome Cloak of Mirroring. The other Sahuagin may drop a few Bolts of Biting or Paralytic Bolts.
- Here are two groups of Sahuagin fighting each other. Both of them will end up being your enemies, so help them thin out each other's numbers. ;-)
Try to get rid of the magic-users, or they will summon numerous sea undead, and things could get seriously out of hand.
- Here are a few more Sahuagin to fight.
- Here are another few Sahuagin to fight.
- Here is a Sea Zombie Lord and a few other maritime undead: two Sea Zombies, two Lacedons, and two Greater Lacedons. The Sea Zombie Lord is particularly bothersome: He can drain levels from a distance and when he dies, he releases a Cloudkill-like spell. He drops a Potion of Extra Healing and two Antidotes.
- Here is another large Sahuagin party to fight, including Sahuagin Priests who summon in Undead to join the fray.
- Here is another small Sahuagin party.
- Here is another small Sahuagin party.
- Here is a single Sahuagin Rebel.
- Before descending the stairs to this place, have as many your party members as possible use ranged weapons. You will come under attack from several Sahuagin, some of them firing at you from the water where melee fighters can't reach them.
- To open this door, you must have the Tooth of Sekolah from 11. If you have the Rebel's Orb from the Priestess at 1, you will be received with friendship and taken to the Prince. If not, you'll have to cut your way through.
- Here you will find Prince Villynaty. If you agreed to negotiate with him, he gives you a Fake Heart to take back to King Ixilthetocal.
Here is also the entrance to the Underdark. To use it, you must have the Magical Rope which you will get from Prince Villynaty or King Ixilthetocal once you have resolved their dispute.
Prince Villynaty can be killed or pickpocketed – now or later, when he takes over the rule of the city – for the Wave Blade which Cromwell can use to forge the Wave Halberd – once you are back in Athkatla, that is...
| Sorcerer's
Place is a project run entirely by fans and for fans. Maintaining
Sorcerer's Place and a stable environment for all our hosted sites requires a substantial amount of our time and funds on a regular basis, so please consider supporting us to keep the site up & running smoothly. Thank you! |


 The ship capsizes, and your party wake up to find themselves in this Sahuagin city, far under the sea. Their High Priestess makes it abundantly clear that under normal circumstances you would be their main course the same evening, except that she has had a revelation about you – you are the one prophesized to settle their civil war.
 Here you will meet the mad King Ixilthetocal. Before he accepts that you are the chosen one who is to bring the Sahuagin strife to an end, he demands that you accept a challenge. Accept the challenge and you will find yourselves at 3, confronting a Two-headed Ettin.
  Here is a Spectator Beholder guarding a chest. The chest just happens to contain Sekolah's Tooth which you need to open the door at 23 and get to the Rebel Prince.

