-

- Forums
- Chatrooms
- Gallery
- Gameplay Videos
- Upload
- Articles
- Mod Reviews
- Shop SP: Games, Movies, Books
|
|
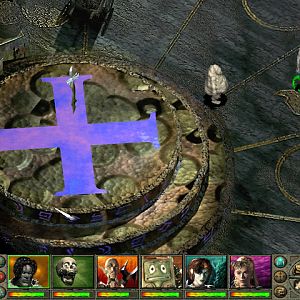
Githyanki Base - Level 1
Githyanki Sword Stalker
I enter the base, and immediately get confronted by a large force of Githyanki led by a Sword Stalker. Combat is inevitable after some dialogue. Given the sheer numbers, Casavir protects himself with Divine Shield and Valeria protects herself with Greater Invisibility. Valeria protects herself further with Mirror Image, and then hits the Githyanki with a Slow spell. Grobnar adds in a Curse Song. The battle pretty much takes care of itself after that.
The Sword Stalker leaves behind the Sword Saint Legacy (Katana +1, +1d6 sonic damage vs. evil) and the Scales of Truth (Scale armor +1, +1 Fortitude saving throws, See Invisibility (3) 1/day). I won't have much use for either though, so I'll sell them once Act II starts.
Warlock and Succubi
I continue on, and soon run into a couple of Githyanki defending themselves from a couple of Charmed Githyanki and a couple of Succubi. I go for the non-charmed Githyanki first, as I want to collect the xp for landing the killing blow on them. I then take out the Charmed Githyanki, and then go to work on the Succubi. The Succubi are capable of Charming party members if a Will saving throw is failed, and they can protect themselves with Ghostly Visage, which will give them damage reduction 5/-. Weapons with the Holy Weapon property, however, are good for making relatively short work of them. Valeria then disarms a trap.
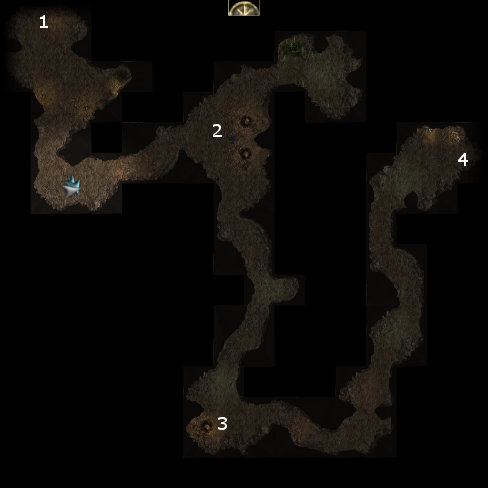
Now I rest up and change Valeria's spell configuration to include a Haste spell. I inch towards #2 on the map. Now I add buffs like Ghostly Visage and Mirror, plus a Haste spell.
I continue on to #2. A warlock commands a Hezrou demon named Zaxis to wipe out the Githyanki and retrieve the silver shards in their possession before leaving. Several Succubi and Charmed Githyanki each attack me.
But first, I have Valeria and Casavir (aided by Haste) rush towards a small cave where Githyanki and Charmed Githyank are fighting each other. I make sure to have Valeria and Casavir land the killing blows on each of them to ensure I get the xp. Once the party manages to regroup, they continue to hack away at their enemies, aided along by Curse Songs from Grobnar. Victory is a matter of course.
Succubi and Blade Golem
I press onwards due east. I use the "follow me" command to keep the party behind the next trap. On the other side will be two Githyanki and an Imp ganging up on a Charmed Githyanki. I maximize my xp by letting the Charmed Githyanki get wounded somewhat, and then having Bishop finish him off with his Many Shot ability. The rest of my foes then come across the trap to get at me, and that's when I switch to the "attack nearest" command. That way I collect the xp as well as recover the trap so that I can sell the trap kit later on.
At #3 will be a pair of Succubi amusing themselves with the same Blade Golem that attacked me through the portal. I have little trouble wearing down the Succubi.
I keep going on ahead. A little ahead east of #3 will Succubi and Githyanki ganging up on a couple of Charmed Githyanki. I use the same theme of having Bishop use his Many Shot ability on a wounded Charmed Githyanki in order to collect the experience. I use the "follow me" command to have the party retreat once the rest of the monsters come after, and then switch to "attack nearest" once I'm well away from the trap.
Some traps can have a very high Recover Traps DC, like the one I just retreated from. Grobnar fixes that by switching from Inspire Defense to Inspire Competence, which will significantly improve Valeria's chances of recovering the trap.
I treat the last leg leading up to #4 differently. Grobnar keeps Inspire Competence active. Valeria now casts a Haste spell. She uses the "Follow Me" command, and rushes forward to recover two traps further down the tunnel. Once that is done, I rush forward (aided by Haste) and make a point of landing the killing blows on any enemies that are either "near death" or "badly wounded" so that I can collect the xp. I then mop up on the rest.
The entrance to the next level is at #4.