-

- Forums
- Chatrooms
- Gallery
- Gameplay Videos
- Upload
- Articles
- Mod Reviews
- Shop SP: Games, Movies, Books
Prologue | Chapter 1 | Chapter 2 | Chapter 3 | Chapter 4 | Chapter 5 | Tales of the Sword Coast | Chapter 6 | Chapter 7 | |
WYRM'S CROSSING
Scar
I went to Beregost briefly to sell off my booty. I then head north to the bridge leading to Baldur's Gate, Wyrm's Crossing.
I go pretty much the length of the bridge, and then speak with the head of the Flaming Fists, Scar. He has a mission for me, find out what is wrong with the Seven Suns Coster.
Imanel Silversword
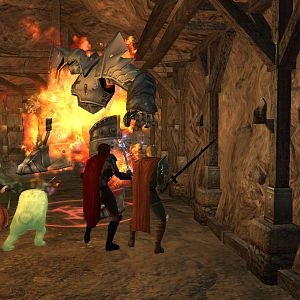
I continue on. Soon after the last gate there is an Elven woman named Imanel Silversword surrounded by a pack of wolves. A fight is inevitable (at least for me), so I have Avastrian cast Mirror Image and Haste beforehand.
I then speak with her to start the fight. Jaheira starts right away with casting Defensive Harmony. Remember, even though Defensive Harmony lasts only 10 rounds, it can make a real difference during those 10 rounds when they involve intense physical combat. It makes sense to kill off her Wolves first, especially the Vampiric Wolf, and then save her for last.
Unfortunately there's a well known bug whereby sometimes she just won't attack, which showed up here. But anyway, this fight is winnable for a 5th to 7th level party, since she relies on straight physical attacks. In my recollection Defensive Harmony plus Doom on her once I've killed her pets, sufficed even when she did attack.
She leaves behind Kivan's Bow (+1 to armor class), which I don't have any use for, and an Elven Chain Mail. Avastrian wears this for the rest of the game, and swaps out his Bracers of A.C. 6 for the Gauntlets of Weapon Expertise that Khalid had been wearing. This is one of the reasons I prefer Kivan during a run through an EasyTutu installation that includes BG1 NPC Projects. Imanel won't appear and talk to the party, and thus won't fight and leave behind her Elven Chainmail, unless Kivan is in the party.
The video concludes with me showing the location of a joinable Gnome Cleric/Illusionist named Quayle, for anyone who's interested.
Sorcerous Sundries
I enter Baldur's Gate from the bridge, but only briefly. Elminster speaks to me for a bit once I enter.
My only purpose in coming here is to prepare for a fight involving Drizzt Do'Urden, cause whether I'm good or evil I want his equipment. I can rationalize killing him even from a roleplaying perspective when I'm good (i.e. I feared him cause he was Drow).
So I head over to the Sorcerous Sundries. I buy a few things, like spell scrolls for Imoen, Potions of Mirroring (for a future fight), Potions of Agility for Yeslick, a Scroll of Protection from Fire, a Scroll of Protection from Magic.
I also load up on ammunition, including:
Now I head over to the Fisherman's Lake.