-

- Forums
- Chatrooms
- Gallery
- Gameplay Videos
- Upload
- Articles
- Mod Reviews
- Shop SP: Games, Movies, Books
Prologue | Chapter 1 | Chapter 2 | Chapter 3 | Chapter 4 | Chapter 5 | Tales of the Sword Coast | Chapter 6 | Chapter 7 | |
FISHERMAN'S LAKE
Teyngan
The party travels to the east edge of the Fisherman's Lake. I then head west for a bit, where I casually kill off a bunch of Gnolls.
I then head north for a bit, and run into a trio of Bandits led by Teyngan. This battle is distinctly easier now that I'm rather higher level and with better equipment. Indeed, Imoen pretty much dooms the mage and the archer with an early Fireball, and then finishes off the Mage with a couple of Magic Missiles. Teyngan is now easily taken down by the warriors in the party.
Drizzt Do'Urden
Now I go due west and stop just short of bringing Drizzt into view. I make the following preparations:
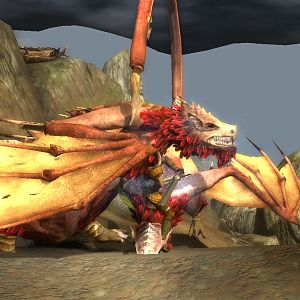
I now have the party walk forward slowly until Drizzt comes into view, and then initiate the dialogue. I choose the dialogue option that involves telling Drizzt that he's on his own. It is crucial to have your party well away from Drizzt, since taking him on in melee combat is suicide. The 'on your own' option allows the party to back away a good distance from him, leaving him to fight the Gnolls by himself. Everybody then fires away with their missile weapons, while Imoen then uses her Wand of Monster Summoning to hold Drizzt in place. Once those start dying off, she repeats over and over again. Note that most of the hits on Drizzt come from Kivan, who has advanced to 7th level, is using his Longbow of Marksmanship and Arrows of Piercing and Bracers of Archery, and has drunk a Potion of Heroism. This is what I meant when I earlier referred to my linchpin for my strategy for defeating Drizzt.
In vanilla BG1 I often fell him before the Wand runs out. He has more durability in SCS, so it's not surprising that the strategy doesn't quite work the way it used to. When I notice that Imoen's Wand has about 1 or 2 charges left, I then have Avastrian cast Haste and Mirror Image in anticipation of Drizzt coming after me. Guzzling Potions of Giant Strength may be in order as well depending on the circumstances. In retrospect, I should probably have had Jaheira cast Defensive Harmony sooner. Fortunately Drizzt was 'near death' by the time he came after me, so Kivan landed the killing shot on him with an Arrow of Piercing. Killing Drizzt gets me 12,000xp. Its cheap, but its within the rules of the game.
Drizzts body has the Scimitar +3: Defender (+2 AC), Scimitar +3: Frostbrand, and the Mithril Chain +4. Kivan wears the Mithril Chain +4 in the good party. Asteroth wears it in the evil party. Khalid wields the Defender in the good party, and he becomes a much more well protected warrior (albeit still a wuss) while using it. The Frostbrand+3 can be sold for gold. This wasnt without cost though. My reputation took a 10 point dive. But there's plenty of other quests with which I can up reputation.
Torlo
Now I head west and routinely kill a pack of Wild Dogs and then Gnolls. I then curl back north and east along the northern edge of the lake, and then briefly speak with a fisherman named Torlo.
Bjornin's Half-Ogres
Now I continue east and then waste a bunch of Skeletons, and then the four Half-Ogres that had wounded Bjornin. At this point it's a matter of routine physical combat.
I then head back to the Jovial Juggler and bring the good news to Bjornin. He rewards me with a Medium Shield +1, and +1 to reputation. I already have two Medium Shields +1 so I just sell it. The +1 reputation is the start to regain my reputation and discounts.
My next destination is the Dryad Falls.