-

- Forums
- Chatrooms
- Gallery
- Gameplay Videos
- Upload
- Articles
- Mod Reviews
- Shop SP: Games, Movies, Books
Prologue | Chapter 1 | Chapter 2 | Chapter 3 | Chapter 4 | Chapter 5 | Tales of the Sword Coast | Chapter 6 | Chapter 7 | |
SHIPWRECK
Shoal the Nereid and Ogre-Droth
I arrive at the northeast corner of the area, and start by killing a few Ghouls.
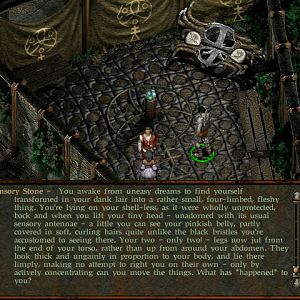
I continue in a westerly direction, and discover a Nereid. To start this quest, have a male character other than your protagonist talk to her. If your Bhaalspawn protagonist speaks to her and takes her up on her offer, your game will end. I have Khalid take the fall and die by her kiss. Note how I have my remaining warriors besides Jaheira attack her. I don't want to poison the Nereid, otherwise she may die and ruin the quest. All I have to do is land a blow, and I can convince Shoal the Nereid to bring Khalid back to life.
Ogre-Droth soon shows up, and I have to fight him as well. I had a pretty easy time of it, although he can be challenging for a lower level party. It will be crucial for a lower-level party to tear down his Mirror Images as quickly as possible with something like Magic Missiles in order to kill him as quickly as possible and minimize his spellcasting. He leaves behind the Helm of Defense (+1 to saving throws, +20% each to fire, cold, and electrical resistance). Kivan wears this for the rest of the game, largely because I have other helmets for other characters in mind. I conclude by speaking to Shoal for another 750xp.
Mad Arcand
Now I travel and a little south. I run into a Gnome named Mad Arcand, who engages in a little senseless babbling.
I continue westwards, and run into a trio of Carrion Crawlers. As much as I can, I shoot them down at a distance.
I soon find a Shipwreck that holds a cursed Ring of Folly, that wreaks havoc on its wearer's Intelligence and Wisdom. I kill another group of Carrion Crawlers to the south.
I then speak to Mad Arcand again, and I get 300xp and an Oil of Fiery Burning for giving him the ring.
Jozzi Seasnake
I start off this video by sleeping until night time, as there is a certain quest here that becomes available only by night. Once it is night, I then head east, a bit south of where I first encountered Shoal the Nereid and Ogre-Droth.
A woman named Jozzi Seasnake appears and speaks to me. Note that quest is possible through the BG1 NPC Projects mod, and only if Kivan is in the party here during night. She initially presents herself as a Sea Elf, but it becomes apparent that she's a Sahuagin spy. She helped the Sahuagin destroy an Elven village, but she still wants your help to save a Male Elven prisoner who is still alive and being held captive by the Sahuagin.
Everybody then appears by the shipwreck again, and two Sahuagin plus a Sahuagin Chieftain appear. The Chieftain will rush forward and attack close up, while the other two will fire crossbow bolts that can stun party members. Yeslick casts Hold Person to keep the missile fire to a minimum, while Jaheira casts Defensive Harmony. The party then simply gangs up on the Chieftain, and then takes out the other two afterwards.
Jozzi and the other Elf have a parting meeting of sorts, which is far from pleasant. Jozzi leaves, and the other Elf (I can't remember or spell the name) indicates that the shipwreck will have items for me. In fact, it now has a Pearl Necklace as well as the Boomerang Dagger +2. This will be Jaheira's missile weapon for the rest of the game, as she also draws on her dagger specialization from using the Dagger of Venom.
The Surgeon
Now to the south will be a large group of Ogres, Ogre Berserkers, Half-Ogres, and Ogrillons. The method of Entangle + Web + Stinking Cloud works, and should work even for lower-level parties.
A nearby grey-robed man named The Surgeon can offer to cast healing spells on wounded party members afterwards.
The Sirines
Now I head for the southwest corner of the area. At some point a trio of Sirines show up. Again, you can't get them one at a time. A couple of Fireballs from Imoen plus missile weapons suffices to bring them down.
One way out of this area is through the southeast corner. The east side of Baldur's Gate is next.