-

- Forums
- Chatrooms
- Gallery
- Gameplay Videos
- Upload
- Articles
- Mod Reviews
- Shop SP: Games, Movies, Books
Prologue | Chapter 1 | Chapter 2 | Chapter 3 | Chapter 4 | Chapter 5 | Tales of the Sword Coast | Chapter 6 | Chapter 7 | |
FIREWINE BRIDGE
Poe
I travel to the Firewine Bridge, having to waste a few Hobgoblins along the way. Once there I travel northeast and kill some Zombies.
I then travel east along the bridge. A Bard named Poe sings a ballad for me that provides clues as to what to expect within the Firewine Ruins themselves.
Meilum
Now I go on to the end and travel northwards, killing several Kobolds along the way.
I run into a rather egotistical swordsman named Melium, whom I deliberately pick a fight with. He's by himself, and made that much easier with spells like Doom and Blindness. He leaves behind the Gauntlets of Weapon Expertise, which Avastrian will eventually wear, but I have Khalid don them for now.
Carsa and Kahrk
There will be a narrow ravine leading westwards. Note how I don't have everyone go down it just yet. Instead, I have Avastrian go down. I then have Kivan and Imoen split up the Invisibility Potions and go part way down the ravine and then stand abreast so that between them they will block the ravine completely. There is a specific reason for this arrangement.
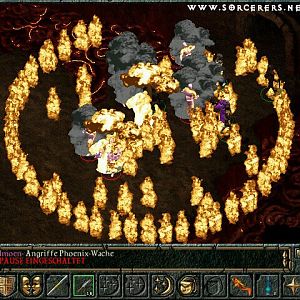
Avastrian goes west a bit more and finds a mage named Carsa. I choose the responses that involve demanding that she give the jar to me. She dies. I quick-save. Now I edge westwards a little more and discover the cause, an especially powerful Ogre-Mage named Kahrk. Combat is inevitable. Kahrk starts off with a LOT of magical protections in place, including Fire Shield: Blue, Protection from Magical Weapons, Stoneskin, Shield, Minor Globe of Invulnerability, and Mirror Image. Any hopes of killing him right away are pretty much zero. He'll also start to go crazy with spells like Spook, Chaos, Sunfire, etc.
The first goal of progress is to let some of his protections expire over time. Problem is, he can persistently follow a party, even from off-screen. Here is the point behind having Kivan and Imoen stand abreast at the ravine. Kivan goes into hiding, and Imoen gulps a Potion of Invisibility. Avastrian runs back up the ravine and regroups with the members of the party that I had left behind. Kahrk sends a Spook spell after him, but Yeslick casts Remove Fear on the party. But after that, Kivan and Imoen's blocking of the ravine will throw off Kahrk's AI and he can't find a path to the party itself. I simply let some of his spell protections like Fire Shield: Blue and Mirror Image wear off. At one point Kivan's stealth fails. Also, Kahrk at another point casts Detect Invisibility to blow Imoen's cover but not Kivan's, who is wearing his Cloak of Non-Detection. In either instance I simply gulp down another Potion of Invisibility in order to regain cover and maintain my blockade of the ravine.
This battle is far from over, however. I begin the next phase of the plan. I bring the whole party down the ravine, but still beyond Kahrk's fog of war. Now I have Kivan mark Kahrk's location, and Jaheira unsuccessfully attempts to remove his remaining protections. But then I have Yeslick cast Silence 10' Radius from just beyond the fog of war. If both his Silence spells don't work I reload. When it does work I quick-save.
I then begin the next part of the plan. Avastrian casts a Stinking Cloud, and Imoen casts 2 instances of Web, all of them beyond the fog of war. Kivan keeps track for when one of the spells work. Once it does, the party opens missile fire on Kahrk.
This, however, is not enough to kill him outright. At some point, his Stoneskin Contingency will trigger once I've brought him down to 'near death'. Once he breaks free (and he will), his first priority will be to cast Vocalize so as to regain his spellcasting ability. My plan here is to interrupt his casting of Vocalize with continued missile fire. I admit this is finger-crossing on my part, since Vocalize has a casting time of 1. I did have to do a few reloads for this phase. At one point it works though, because Kivan's Arrow of Fire still inflicts damage to interrupt the casting despite Kahrk's Stoneskin. Remember, Stoneskin doesn't block energy or elemental damage, only physical damage.
Now the end is in sight as the battle is reduced to straight physical combat. I don't take it for granted though, as Kahrk is still no slouch even when forced into melee combat. Avastrian casts Haste in anticipation. He is also forced to retreat and cast Mirror Image, while Kivan had to gulp down a Potion of Extra Healing. I eventually outlast him.
He leaves behind quite a few valuable gems. Carsa leaves behind a Knave's Robe and a scroll of Hold Person.
I head back to the entrance to the Ruins.
Ancient Armor
Now I enter the ruins of the Firewine Bridge, which can become a really annoying dungeon. Lots of Kobold Commandos here, and they often respawn like crazy. The safe method is to have my characters with the highest protection against missile weapons, Yeslick and Khalid, take the lead. Yeslick and Khalid go towards the southeast corner, and take out a trio of Commands that will often hit from the rear if I leave them unattended.
Yeslick and Khalid then journey towards the large central room, with the rest of the party following behind. Yeslick and Khalid stop themselves in the hallway just as the large room comes into view, and they can safely let themselves be targeted by the Commandos. Imoen comes up behind with the Wand of Fire that she found in Ulcaster. One thing to keep in mind is that the AI in SCS will often have archers change targets to spellcasters if the spellcasters come into view or if the archers notice the spellcasters begin their casting. If Imoen were to try a regular Fireball spell, chances are better than average that she'd get hit by the Commandos' Arrows of Fire and her spellcasting would get interrupted. She thus uses the almost instantaneous release of the Wand of Fire to blow away the Commandos. The party then gathers in the large central room.
The party then travels the hallway leading in a northwest direction, killing more Kobolds along the way. At some point they run into an Undead Knight, and manage to outlast it. It leaves behind the Ancient Armor, which is a quest item, as well as Backbiter (+3 spear, 3 points of damage on wielder with each successful strike, cursed, cannot be removed except by a Remove Curse spell).
Ghostly Knights
The party continues to make its way through the hallways on the west side. There's no monsters to be fought hereabouts, so it's entirely appropriate for Imoen to take the lead and disarm several dangerous traps.
At some point the party manages to find the Ghostly Knights that Poe had alluded to in his ballad. I get 1,500xp for giving them the Ancient Armor.
The hallways eventually form a loop that leads back to the large central room. Imoen takes care to disarm a couple more traps. The method for taking back control of the central room remains the same. Yeslick and Khalid go on ahead to absorb the initial arrow fire, and then Imoen comes up behind to deliver a blast from her Wand of Fire.
Once the party enters the central room, matters become a little more involved. I end up having to fight several Kobolds while progressing through the hallway that leads due north. But I don't mind, it's on the way to where I want to go.
Lendarn and the Ogre Mage
Now the party continues towards the northwest corner, killing more Kobolds along the way.
In vanilla BG1 I could just go to the south end of the next hallway, and blast everybody with Fireballs from outside the fog of war. In SCS, I go only halfway down the hallway. The reason being that it has the advantage of the Mage named Lendarn coming out and facing me on his own. He will start off with Teleport Field. This buys Jaheira enough time to bring down at least one or more of his protections with Dispel Magic. He then follows up with Stinking Cloud. Avastrian and Khalid go straight for him. The rest of the party fires missile weapons at him. The party is split up into two groups, but this is advantageous as the Stinking Cloud will affect only 1 group (and thus only 1 saving throw) while the Teleport Field will affect only the other group (and again only 1 saving throw). Avastrian is able to consistently interrupt Lendarn's spells with the cold damage from his Varscona sword. Eventually everyone is able to wear down his protections and kill him.
Lendarn leaves behind a few spell scrolls, including a Cloudkill which Imoen inscribes.
I then go to the end of the hallway and then take out the Kobold Commandos and Ogrillons with Stinking Cloud + Web followed by Fireball.
I then go west and north to fight the Ogre Mage. The Ogre Mage's spell protections aren't that extensive, so I'm able to bring him down rather quickly.
Now it's on to Gullykin.