Pillars of Eternity logo


Pillars of Eternity Online Walkthrough by David Milward


INTRODUCTION & ABOUT  |  WORLD MAP  |  WHITE MARCH MAP
General:  
Quests  |  Tasks  |  Bounties  |  Items  |  Characters
Areas:  
Act 1 Areas  |  Act 2 Areas  |  Act 3 Areas  |  Act 4 Areas  |  Caed Nua  |  White March - Part 1  |  White March - Part 2  | 
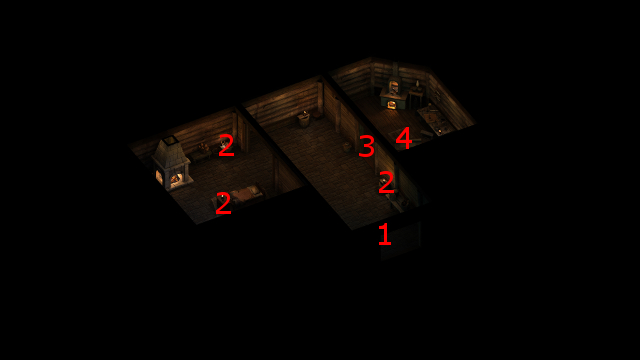
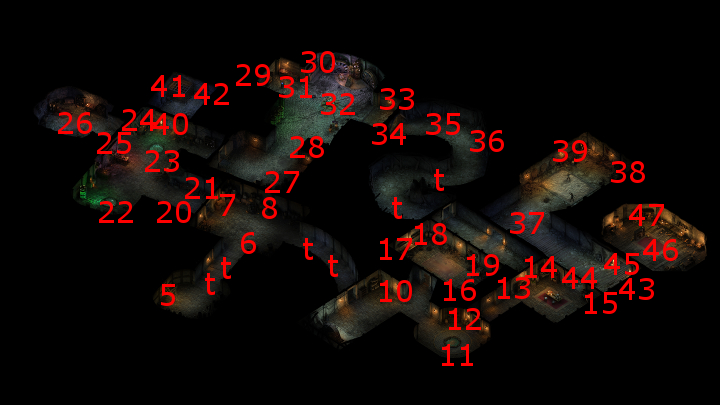
Disable all ads!

White March - Part I Areas:   Stalwart Village  |  Longwatch Falls  |  Russetwood  |  Flames-That-Whisper Caves  |  Durgan's Battery  |  Galvino's Workshop  |  Durgan's Battery - Great Hall  |  Durgan's Battery - Mines  |  Durgan's Battery - Foundry  |  Cragholdt Bluffs  |  Cragholdt

Galvino's Workshop

Galvino's Cabin

Placed with traps will be marked with a 'T'.

  1. Here is the front door to the Cabin, which leads back out to Durgan's Battery.

  2. There will be random food items in these containers.

  3. This door is both trapped and locked.

  4. There is a trapdoor here that leads to the basement, at #5.

  5. Galvino's Workshop

  6. The stairs here lead back up to the main floor at #4.

  7. Galvino's ConstructsThere will be a few Misshapen Constructs here, and a pair of Rotting Flesh Constructs. This fight can be pretty tough. The Misshapen Constructs frequently use Kalakoth's Sunless Grasp spells at a distance, while the Rotting Flesh Constructs can use Malignant Cloud and Vile Thorns. My advice here is to take out the Rotting Flesh Constructs first and foremost, and have plenty of healing resources (spells, potions if handy) available to go the distance. Any defensive buffs you can use will be well advised too.

  8. A trapped crate here has a random potion and some coins.

  9. A crate here has a random potion.

  10. There will be a few Rotting Flesh Constructs and Misshapen Constructs here too. A new enemy will be Unstable Constructs, which seek to do nothing other than to get close enough to the party in order to self-detonate and unleash a Fireball effect that will inflict massive damage on the party. There are at least two ways to deal with this.

    One method involves luring an Unstable Construct away from the others, and then pelting it with missile fire. The idea is to kill it at a safe distance, retreating repeatedly if you have to.

    The other method is to bring it into view to start combat, but then using a figurine to place a meat shield near it. The Unstable Construct will detonate after approaching your figurine ally, and possibly kill some of its own allies in the process. Chanters summons will be good for this tactic as well.

  11. There will be random potions and coins in this crate.

  12. There will be a couple of Rotting Flesh Constructs here, as well as a few Iron Constructs. Iron Constructs come in more than one variety. Some can inflict electrical damage in a small radius around themselves. Others can use Malignant Cloud and Vile Thorns like the Rotting Flesh Ones.

  13. A shelf here will have random alcoholic drinks.

  14. The party will find Experimental Notes and a Workshop Key here.

  15. There will be Camping Supplies in this crate.

  16. There will be random food items in this container.

  17. There will be a few Iron Constructs plus a couple of Unstable Constructs in this room.

  18. There will be some coins and Experimental Notes in this container.

  19. There will be a random scroll and some Lockpicks in this crate.

  20. There will be a random item or two in this container.

  21. There will be a pair of Unstable Constructs here.

  22. This trapped shelf will have some coins and a random potion or two.

  23. There will be a few Iron Constructs here, as well as a Burning Flesh Construct that inflicts extra burn damage.

  24. There will be a few Iron Constructs and a couple of Misshapen Constructs here.

  25. This lever can only be uncovered while in scouting mode.

  26. This door can only be opened by pulling the lever at #24.

  27. There will be a random magical item in this container.

  28. There will be a LOT of Iron and Unstable Constructs in this room. Draw a few of them out first and away from the others if you can manage it.

  29. Here you will find a couple of Misshapen Constructs standing guard in Galvino's Laboratory.

  30. You will find in this bookshelf a book named Eir Glanfath, Part 1: Early Contact, and some notes on Subject: Baelsyr.

  31. Tripping this lever will allow you to trip the lever at #30.

  32. Tripping his lever will allow you to free Baelsyr.

  33. BaelsyrAn undead spirit named Baelsyr will be released from this receptable if you had hit the switches at #29 and #30. He'll immediately attack the party. He may summon a Shade, but otherwise shouldn't be too difficult to gang up on.

    The receptable will have a unique Pistol called Fellstroke.

  34. Hitting this lever will open the door at #34.

  35. This door will open after using the lever at #33.

  36. There will be a Burning Flesh Constructs and a few Unstable Constructs here.

  37. There will be a Burned Lady here.

  38. There will be a mixture here of Iron Constructs, Misshapen Constructs and Unstable Constructs here. One of the Iron Constructs here will leave behind Crumpled Experimental Notes.

  39. The Cell Key will be in this container.

  40. There will be a random weapon in this rack.

  41. This door needs either a Mechanics skill rank of 10 to open, or the Cell Key.

  42. There will be a Broken Construct here. It will initially converse with you. Clever, Stoic or Rational replies are possible early in the conversation. It breaks to either giving it 500cp to make it go away, or having it attack you. If it's the latter, it is functionally the same as an Unstable Construct, and should be treated accordingly.

    Going into scouting mode may also reveal a hidden cache inside the cage that has a pair of boots called Echoing Misery.

  43. There will be a Blood Moss here.

  44. Using this level will open the door at #44.

  45. This door will open after using the lever at #43.

  46. This door can only be opened by the Workshop Key.

  47. Galvino
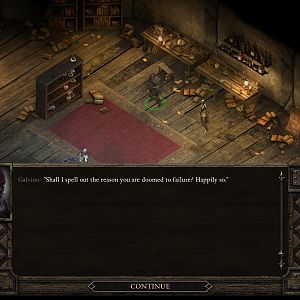
Here is where the party encounters Galvino. Aggressive, Clever, Cruel, Diplomatic, Stoic and Rational responses are available at multiple points in the conversation. A Perception check of 14, a Lore check of 4, and/or being a Mountain Dwarf may affect the particulars of the conversation, but will not otherwise affect the outcome.

    One of the points of the conversation is that you can get some limited assistance from him in entering Durgan's Battery, in the form of Galvino's Resonance Amplifier which can help you find a soul in Stalwart Village that can reveal a cantec that will allow entry. This particular point in the conversation marks the conclusion of the quest called The Recluse of the White March.

    Galvino has a task of his own, The Fisherman's Penance. He wants you to expose Grynde, who runs the Fishery in Stalwart Village, as a Ripple Sponge addict before the mayor, Renengild. He suggests that the Ripple Sponge Stash can be found in the Fishery at night.

    Lastly, making a Perception check of 12 or paying Galvino 500cp will result in the Devil of Caroc becoming a joinable companion.

  48. Most of the containers in this room will have random potions and scrolls.

  49. This book case will have The Blacksmith Knights: A Short History of the Knights of the Crucible.


Amazon.com
Amazon.ca
Amazon.co.uk
Sorcerer's Place is a project run entirely by fans and for fans. Maintaining Sorcerer's Place and a stable environment for all our hosted sites requires a substantial amount of our time and funds on a regular basis, so please consider supporting us to keep the site up & running smoothly. Thank you!

Disable all ads!