-

- Forums
- Chatrooms
- Gallery
- Gameplay Videos
- Upload
- Articles
- Mod Reviews
- Shop SP: Games, Movies, Books
|
|
Brecilian Forest | The Camp | Circle Tower | Denerim | The Final Battle | Haven | Landsmeet | Lothering | Orzammar | Ostagar | Redcliffe | Ruined Temple Areas available as Downloadable Content: Honnleath | Return to Ostagar | Warden's Keep |
Map of Denerim | Dark Alley | Deserted Building | Dirty Back Alley | Genitivi's Home | Gnawed Noble Tavern | Market District | Rundown Back Street | The Pearl | Wade's Emporium |
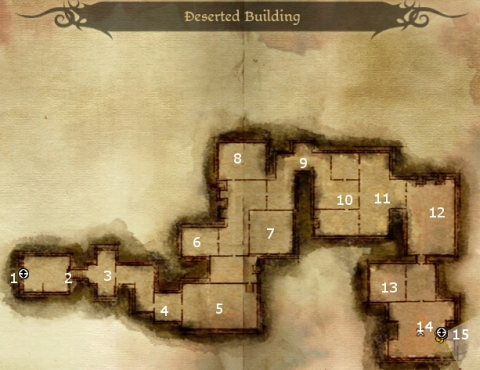
Denerim - Deserted Building