Baldur's Gate 2 Online Walkthrough by Montresor
IRENICUS' DUNGEON, LEVEL 1
This is the area where you begin the game. You wake up to find yourself in a cell in a dungeon, being tortured by a mage. Who he is, or what he wants, is a mystery. Soon a Golem arrives and announces that the complex is under attack. The mage teleports away, presumably to help defend the complex against the invaders.
Shortly after, a young woman enters through a side door and opens your cell. In case you don't remember her, she introduces herself as your foster-sister Imoen. She offers some basic advice, like that it would be a good idea to find some armor and weapons, and also that you should find some companions to help you fight your way out of the dungeon.
And thus the adventure begins.

- This is where you start the game. Imoen joins you automatically. You will also find Minsc and Jaheira in separate cells a short distance to the north.
Even if you are not planning to keep Minsc and Jaheira in your party, I recommend that you free them for the experience and keep them in the party until you have escaped Irenicus' dungeon.
 To free Minsc, just approach his cell and he will talk to you. No matter which dialog options you pick, he ends up thinking you are going to leave him, goes berserk, and breaks out of his cage – and then "realizes" that you were just trying to get him mad so he could break out. :-)
To free Jaheira, find the key to her cell in the room at 2.
- Here you will find an assortment of mundane weapons and armor, plus the key to Jaheira's cell. You will also find a trapped and locked cabinet with a Dagger +1 and three Potions of Healing. This is also where you find the Golden Pantaloons if you imported a character from the original Baldur's Gate with the pantaloons in their possession. Let Imoen search for traps and then disarm and open the cabinet.
The Jailkeep Golem is not much use for answering questions.
- Here you will find a Smoke Mephit.
- Here you will find one of the two portals to Dungeon Level 2. You'll need the Portal Key from the Mistress' room at 22 to use the portal.
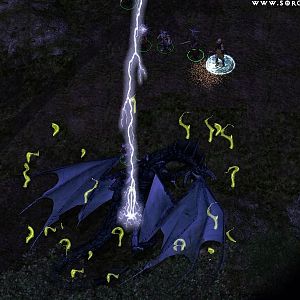
 Here you will find a machine that summons a steady stream of Lightning Mephits. Have one of your party members examine the switch in the right side of the room at (x=2820, y=3060) to turn off the machine for 2,000 XP. Look for the place where the cursor turns into two arrows forming a ring. This indicates that you can perform an action.
- The Crystal Room: Here you will meet a Genie called Aataqah who wants to ask you a question. Refusing to answer any questions has no negative effect; the Genie simply vanishes.
If you answer "I will press the button" (the Good answer), Aataqah heals the party and summons an Ogre Mage worth 650 XP. The Ogre Mage drops 20 GP and a Bastard Sword.
If you answer "I will not press the button" (the Evil answer), Aataqah summons a few mutated Gibberlings.
Once you have killed all enemies, Aataqah appears again to give you some advice: Seek out Rielev.
- Here you will be ambushed by three Goblins. Each drops a Battle Axe and some random minor treasure.
- Here you will be ambushed by six Goblins. Two of them fire arrows, the rest attack melee style. Each drops either a Composite Long Bow and up to 80 Arrows, or a Battle Axe and minor treasure.
I usually pick up the arrows and give them to Imoen; she will soon find a bow so she won't have to fight in close quarters.
 Here you will be attacked by a Steam Mephit. The crate at (x=660, y=2700) contains 5 Arrows, a Short Bow and a few GP. I usually give the bow to Imoen.
Imoen will break in to tell you she knows this room. You have both been tortured in here by your captor.
- Here you are attacked by an Ice Mephit (420 XP). The barrel at (x=820, y=3050) contains 5 Bullets. The trapped and locked crate at (x=1025, y=3020) contains a Quarterstaff +1.
 If you have the Energy Cells from Rielev's Room at 14, you can speak to the creatures in the tanks at (x=370, y=2530), at (x=750, y=2730), at (x=450, y=2920), and at (x=1210, y=3110). They all yield some vague information about the dungeon.
- In this room you will be attacked by a Mineral Mephit (420 XP).
Speak to the Sewage Golem and pretend to be its master. It will tell you it needs its Activation Stone before it can perform its functions and that Rielev has the stone. The Activation Stone can be found in the room at 14. Bring the stone back to the Golem for 3,000 XP, and the Golem will open all doors into the Sewage Room at 17.
The table in the middle of the room holds a Long Sword +1, a War Hammer, a Medium Shield, and a Scimitar.
The table at (x=880, y=2000) contains a few Arrows.
The cupboard at (x=900, y=1970) contains a Potion of Healing and a Scroll of Flame Arrow.
The locked chest at (x=1200, y=2100) contains 3 Potions of Extra Healing, a Scroll of Dispel Magic, a Scimitar and a Spear.
- In this small room you will find two Lesser Clay Golems, both inactive. You can leave them alone or kill them for 2,000 XP each. Unlike most Golems you will meet later, they can be harmed by all weapons.
If you don't kill them now, you will have to do it later instead.
- Here you will run into another Goblin war party.
 This is Rielev's Room. Rielev is the creature kept artificially alive in the tank at (x=1170, y=1500). If you agree to kill him (by taking the Energy Cells), he will be eternally grateful (albeit for a very short time;-), and the party gains 4,000 XP.
The table at (x=1270, y=1580) contains the Activation Stone you need for the Sewage Golem back at 11.
The barrel at (x=1280, y=1400) contains 2 Potions of Extra Healing, a Sling, 8 Bullets, a Halberd and a War Hammer.
- Here is another Goblin War Party.
- The Library. Here you will have to battle a Dust Mephit (420 XP) and a Goblin war party.
 Apart from the various books, which are worthless, the shelves contain a variety of minor loot:
- At (x=850, y=840) – 5 Potions of Healing and a Scroll of Larloch's Minor Drain.
- At (x=950, y=780) – an Agni Mani Necklace.
- At (x=1060, y=830) – a Scroll of Know Alignment.
- At (x=1460, y=830) – an Oil of Speed.
- At (x=1650, y=950) – a Potion of Extra Healing.
HINT: If you find some scrolls which you deem useless, you can either save them and sell them later, or let Imoen scribe them into her spellbook. Don't worry; they won't stay in Imoen's spellbook for long, but the party gains the experience for scribing the scrolls.
- The Sewage Room. You will have to battle an Otyugh (650 XP) that drops the Wand of Frost Key which you will need on Dungeon Level 2. The Otyugh's attacks can cause Slowness and a minor poisoning.
The chest at (x=2730, y=1730) is locked and contains an Oil of Speed, 2 Potions of Healing and Splint Mail.
The chest at (x=2740, y=1810) is trapped and contains 2 Potions of Healing, a Scroll of Vocalize, a Light Crossbow and ten Bolts.
The chest at (x=2900, y=1880) is locked and contains a Scroll of Clairvoyance, 3 Potions of Healing and a Helm of Infravision. I normally give the helmet to Minsc or the protagonist. As a half-elf, Jaheira already has infravision.
- Another Goblin war party. Two of them drop a War Axe and minor treasure, the third drops a Composite Long Bow, up to 60 Arrows and 5 Arrows of Biting.
 The Master's Room. Make sure to search the room for traps. You should find one in the floor at (x=3730, y=1000), one in the cabinet at (x=3930, y=971) and one in the cabinet at (x=3560, y=900).
The trapped cabinet at (x=3560, y=900) contains the Helm of Balduran and a Scroll of Chromatic Orb.
The locked chest at (x=3600, y=890) contains the Wand of Lightning Key (keep this for the trap room on Dungeon Level 2!) and a Scroll of Burning Hands.
The small drawer at (x=3760, y=890) contains the Air Elemental Statue needed to open the door at 25 so you can enter the Elemental Plane of Air.
The Cupboard at (x=3930, y=970) contains an Amulet of Metaspell Influence.
- Here is the other portal to Dungeon Level 2. You will need the Portal Key from the Mistress' Room at 22 to use the portal.
You will also find another Goblin war party.
The barrel at (x=3340, y=810) contains 20 bullets and a Scroll of Armor.
The vase at (x=2110, y=820) contains a Scroll of Fireball.
 Here you will meet three Dryads; Ulene, Canya, and Elyme. They will ask you to help free them. First you need to get their Acorns from Ilyich, whom you will find at 24. Return the acorns to the Dryads for 9,500 XP. They will then ask you to bring the acorns to the Fairy Queen in the Windspear Hills. You will solve this quest in Chapter 2.
If you refuse to help the Dryads, they will take Minsc hostage. However, they are easily killed. Each Dryad drops a Potion of Healing, an Antidote, and a Dagger.
You also need to speak to (or kill) the Dryads in connection with the Genie's Quest, which you get on the Elemental Plane of Air. One of them has the Genie's Flask.
Incidentally, the Dryads will also tell you that your captor is a mage named Irenicus.
 The Mistress' Room. Make sure to search for traps! There are three traps in the floor right inside the door and one more at (x=3130, y=2320) in front of the bed. Furthermore, the chest at (x=3110, y=2300), the cupboard at (x=3070, y=2210) and the table at (x=3170, y=2470) are all trapped.
The chest at (x=3110, y=2300) contains the Portal Key needed to activate the portals at 4 and 20 to Dungeon Level 2. Once picked up it can't be removed from your inventory until you leave the dungeon.
The cupboard at (x=3070, y=2210) contains a Potion of Extra Healing, Bracers of Defense AC 8, and the Pommel Jewel of the Equalizer.
The shelf at (x=3020, y=2400) contains a Potion of Master Thievery and a Scroll of Monster Summoning 1.
The table at (x=3170, y=2470) contain a Scroll of Dire Charm.
NOTE: If you didn't kill the Lesser Clay Golems back at 12, they will arrive shortly to defend the Mistress' Room! You may not meet them until you're back in the Master's Bedroom but they will be coming for you, and they will be hostile! ;-)
- Here you will be attacked by a Dust Mephit.
 Here you will meet Ilyich and his Duergar Dwarves. No matter which dialog options you choose, this will end in battle. Ilyich is worth 520 XP, the Duergar Fighters each yield 420 XP, and the mage is worth 620 XP.
Ilyich drops Leather Armor, a Medium Shield, 40 Bullets, Mail of the Dead +2, a Battle Axe, a Sling, some minor treasure, and the Acorns you need to bring to the Dryads at 21.
The Duergar Fighters each drop Leather Armor, a Medium Shield, 20 Bullets, a Battle Axe, a Sling, and some minor treasure.
The table at (x=1830, y=540) holds various weapons and armor plus a Potion of Healing.
The table at (x=1920, y=580) holds various weapons and 2 Potions of Extra Healing.
The box at (x=1240, y=400) holds 5 Throwing Axes and 2 Potions of Extra Healing.
The chest at (x=1530, y=250) holds mundane weapons and armor and a Scroll of Grease.
- Here is the door to the Elemental Plane of Air. You need the Air Elemental Statue from the Master's Room at 19 to open the door.
- There is a trap in the floor at (x=2310, y=490), so be sure to search for traps!

- The Cambion in this room can't hurt you, and you can't hurt him. Unless of course you deactivate the machine in the middle of the room. Watch out; he packs quite a punch! He drops Chain Mail Armor, a Bastard Sword +1, and some minor treasure.
| Sorcerer's
Place is a project run entirely by fans and for fans. Maintaining
Sorcerer's Place and a stable environment for all our hosted sites requires a substantial amount of our time and funds on a regular basis, so please consider supporting us to keep the site up & running smoothly. Thank you! |

 To free Minsc, just approach his cell and he will talk to you. No matter which dialog options you pick, he ends up thinking you are going to leave him, goes berserk, and breaks out of his cage – and then "realizes" that you were just trying to get him mad so he could break out. :-)
 Here you will find a machine that summons a steady stream of Lightning Mephits. Have one of your party members examine the switch in the right side of the room at (x=2820, y=3060) to turn off the machine for 2,000 XP. Look for the place where the cursor turns into two arrows forming a ring. This indicates that you can perform an action.
 Here you will be attacked by a Steam Mephit. The crate at (x=660, y=2700) contains 5 Arrows, a Short Bow and a few GP. I usually give the bow to Imoen.
 If you have the Energy Cells from Rielev's Room at 14, you can speak to the creatures in the tanks at (x=370, y=2530), at (x=750, y=2730), at (x=450, y=2920), and at (x=1210, y=3110). They all yield some vague information about the dungeon.
 This is Rielev's Room. Rielev is the creature kept artificially alive in the tank at (x=1170, y=1500). If you agree to kill him (by taking the Energy Cells), he will be eternally grateful (albeit for a very short time;-), and the party gains 4,000 XP.
 Apart from the various books, which are worthless, the shelves contain a variety of minor loot:
 The Master's Room. Make sure to search the room for traps. You should find one in the floor at (x=3730, y=1000), one in the cabinet at (x=3930, y=971) and one in the cabinet at (x=3560, y=900).
  Here you will meet three Dryads; Ulene, Canya, and Elyme. They will ask you to help free them. First you need to get their Acorns from Ilyich, whom you will find at 24. Return the acorns to the Dryads for 9,500 XP. They will then ask you to bring the acorns to the Fairy Queen in the Windspear Hills. You will solve this quest in Chapter 2.
 The Mistress' Room. Make sure to search for traps! There are three traps in the floor right inside the door and one more at (x=3130, y=2320) in front of the bed. Furthermore, the chest at (x=3110, y=2300), the cupboard at (x=3070, y=2210) and the table at (x=3170, y=2470) are all trapped.
 Here you will meet Ilyich and his Duergar Dwarves. No matter which dialog options you choose, this will end in battle. Ilyich is worth 520 XP, the Duergar Fighters each yield 420 XP, and the mage is worth 620 XP.