-

- Forums
- Chatrooms
- Gallery
- Gameplay Videos
- Upload
- Articles
- Mod Reviews
- Shop SP: Games, Movies, Books

|
|
New City | Orkogre Castle | Nyctalinth | Munkharama | The Hidden Temple | Land of Dreams | Rattkin Ruins | The Funhouse | Giant Cave | Witch Mountain | Ukpyr | Sphynx Cave | Dionysceus | Return to Nyctalinth | Return to New City | Dragon Cave | City of Sky | Hall of the Dead | Hall of Gorrors | Hall of the Past | Tomb of the Astral Dominae |
RETURN TO NYCTALINTH
Jan-Ette
The journey back to Nyctalinth from Dionysceus involves travelling from the A4 map, and then through the A3, A2 and B2 maps.
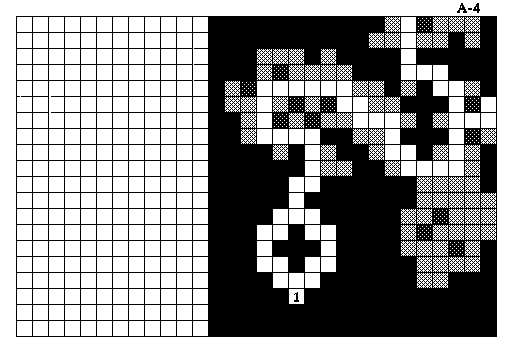
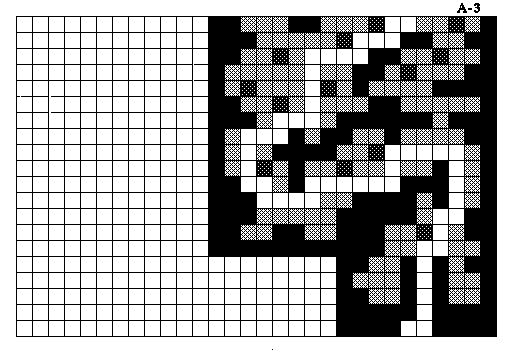
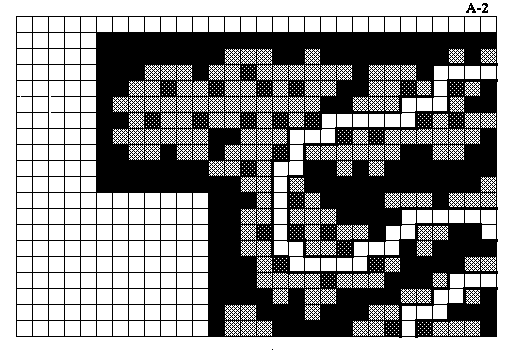
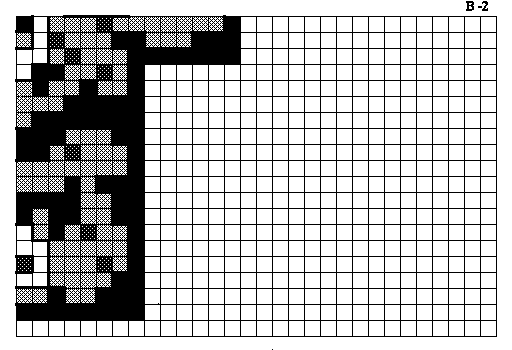
When I hit the little curl of road at the bottom of the B2 map, I encounter several T'Rang trying to capture a Helazoid woman. The game offers me a choice about whether or not I want to help her. I naturally say yes.
My warriors go all out for the more powerful T'Rang Assassins at the front. Errol uses his Silent Lyre on the group of Wilders.
The woman then introduces herself as Jan-Ette, and gives me a Helazoid Banner as a reward. This item will come in handy later on.
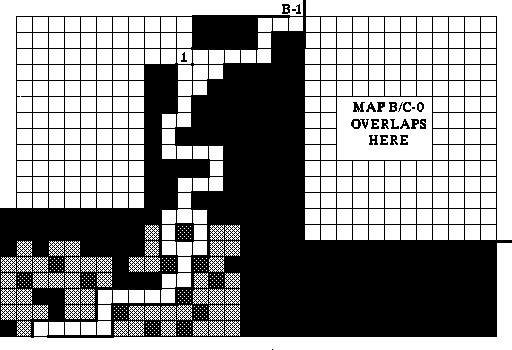
I continue north and through the B1 map until I reach Nyctalinth.
Finger Rods
First off, keep in mind that you'll likely be fighting many T'Rang here depending on what you do. They are in order from weakest to strongest: Youngers, Guarders, Keepers, Watchers, Tecnicks, and Elders. The latter three in particular are capable of harming the party with psionic spells, so be ready for that with spells of your own (e.g., Silence).
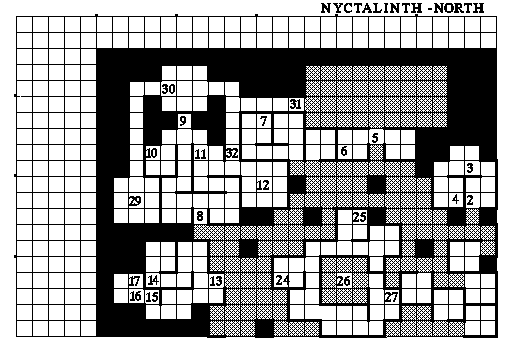
First thing I do is head for the High Chamber through the door at #8. I make for #9 as well, but pull myself just short. I go to the right, and get into a massive fight with many T'Rang, which I end quickly with Nuclear Blast.
Then I go south to #11, and kill another group of T'Rang. I find a Finger Rod. Finger Rods are needed to open certain doors in the city. Each finger rod will only open a specific door, but there's no way to figure out which opens which save by getting all of the rods and then trying them out at the doors.
I then go outside the High Chamber, and make my way towards #7 on the north map, killing more T'Rang along the way.
Errol takes Resurrect on his 17th level-up. It will increase the Divine Mana he gets on each subsequent level-up.
I then find two more Finger Rods at #7.
Tactical Depot
Now the party through the door at #13, and fights their way to #14. I then use one of the Finger Rods to open the door.
After killing the T'Rang on the other side, I have the opportunity to grab a number of T'Rang style polearms. An interesting possibility is the Stun Rod, as it has a 25% chance of paralyzing its target, and a 75% chance of draining stamina from its target. I hold onto it with a view towards exporting it into Wizardry 8 and having Vi Domina use it.
I then go to #15, and use another Finger Rod to open this door. I then kill the T'Rang there, and get the Mystery Ray. The Mystery Ray is a quest item that I will use pretty soon, but I will also import it into Wizardry 8 as a gun.
Livestock Breeding Ground
Now the party uses another Finger Rod at #18. I end up having to kill a LOT of Hog Beetles. Ryu wipes them out with an Asphyxiation spell. A level-up will occur, and I don't want to have to slog things out the hard way in the event that I have to reload after not getting the leve-up rolls I want.
Rothgar reaches his 17th level. I put his Academic Skill Points into Diplomacy. He also takes Remove Curse, which will be handy in case I need a party member to unequip a cursed item or two. That situation will occur fairly soon in fact.
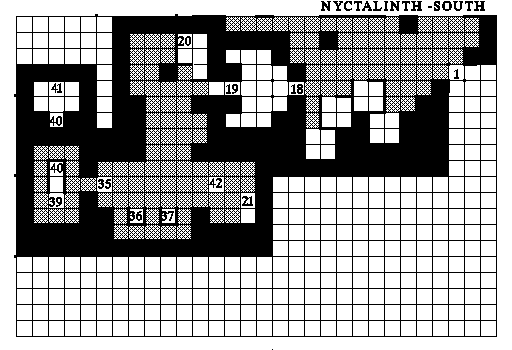
Then I go to #19, where an apparition allows me to pass through the wall.
At #20 is a chest that holds a Bottle of Old Jake's, a pair of Cuir Gauntlets, and a Longstem Spade, which is a quest item that I'll be using very shortly.
Graveyard in Nyctalinth
I go to 3 squares west and 1 square south of #20, and then use the Longstem Spade. This arouses an undead monster called Ymmu, and a few Spirits as well. He leaves behind a Scarab Necklace (+2 bonus to armor class, +20% resistance to hypnosis and psionic spells), and Ymmu's Paw (5-8 damage, stone 15%, paralyze 30%). Both items are cursed, so I don't bother.
I then go to #21, and then cast Levitate. The reason is that I use the Longstem Spade, only for the ground to give way and dump me blow into ...
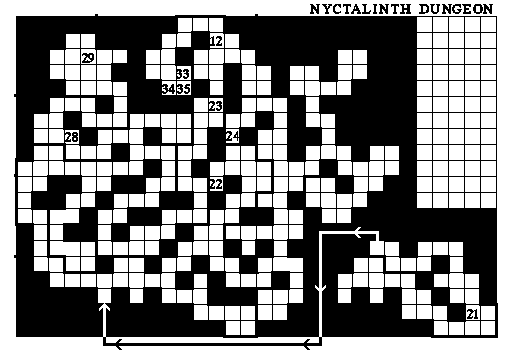
Caverns beneath Nyctalinth
I end up at #21 on the Nyctalinth Dungeon. There will be some standard foes here, plus a new one, Cave Thraxes. They aren't especially dangerous, but take a good beating before going down.
Also note that there are a few places here that can unleash poison gas. As long as the poison gas affects only those of my characters that have regenerating items, that's good enough for me and I'll just sleep it off. Chun-Li takes Locate Person on her 17th level-up.
The chest at #22 has random mundane goods. I reloaded until I got a Solleret, which is an upgrade for the feet for Zarax. Chun-li holds onto the Chain Hosen for importing into Wizardry 8.
I make my way towards the ladder at #24. Terra takes Resurrection on her 17th level-up along the way.
Tydnab Emyt
The party emerges at #24 on the Nyctalinth north map. The chest at #25 will have random mid-tier armors and weapons in it. I reload until I get a second Zizka Star from it, which I will also import into Wizardry 8.
The party heads over to #26, which is a statue of Phoonzang. I then 'search', and then use the Longstem Spade, to uncover an idol called 'Tydnab Emyt'.
I then go to #27, and press the button there. This opens the wall to the east, allowing me to get out to Nyctalinth.
Serpent Map
Now the party returns to the Graveyard by passing again through the wall at #19.
Note locations #36 and #37. There is potentially a jewelled staff at either of these locations. Problem is, if you go to either #36 or #37, a ghost always appears to take the staff away and to the other location. Unless ...
You go to #36 or #37, and use the Tydnab Emyt. Then the ghost appears, drops the staff, and takes away the idol.
The party now gets the Crux of Crossing. Have a party member equip the Crux (in my case Terra the Bishop) so that the energy field at #35 can be crossed. Don't worry, it is cursed, but it won't harm the party member equipping it, unlike other cursed items.
Now the party goes down the stairs at #40. I spin around for a bit until Ryu gets enough xp for his 17th level-up, which I don't want to occur after the next set battle. He raises his Alchemy points to 98, and takes Death Cloud. It will increase the Air Mana he gets with each level-up.
I step ahead, and then have to kill an undead monster called Vilet Kanebe, as well as a few more Minoskells. I reload and redo this battle until I get an Ankh of Might from it. Zarax will import it into Wizardry 8. I also get a Scroll of Remove Curse, which is sugar on top.
The chest at #41 has the Serpent Map.
The party waits until it gets back across the energy field before Terra uses the Scroll of Remove Curse spell to unequip the Crux of Crossing. I keep the Crux, as I will import it into Wizardry 8.
I then take the pit at #21 again. Now the party finds itself back at #21 on the Nyctalinth Dungeon map. Now I have a different goal in mind.
T'Rang Eggs
First I make my way towards #23. As I step into the Cavern, I end up having to fight a Crust Thraxe and a few Cave Thraxes. At #23 are the bodies of adventurers that can yield random items of mid-tier quality.
It was enough for me to get the Midnight Cloak, which Ryu will import into Wizardry 8.
The Broadsword +1 can be imported into Wizardry 8, and it will become part of Errol's starting setup for that game.
Now the party heads over to #28. Notice that there will be a lot of T'Rang eggs up ahead. If you try, everybody will get paralyzed/drowned in the goo and mire and then die. But this is the opportunity for me to use the Thermal Pineapple. It incinerates the eggs into husks, and the party can now step through safely.
I then go up the ladder at #29.
H'Jenn-ra T'Rang
I am now at #29 on the Nyctalinth North map. I initially dropped my Broadsword +1, because my import plans hadn't solidified just yet.
At #30 is the Queen of the T'Rang, H'Jenn-ra T'Rang. This can be a tough battle. H'Jenn'ra T'Rang can cast high level spells, and can also use dangerous physical attacks with his stinger and his Psi-Rod. He is also helped out by several T'Rang Assassins and Elders. A double shot of Nuclear Blast from both Errol and Terra wipes out all his help then and there. The warriors wear down H'Jenn-ra. Errol softens him up with Armormelt in the next round, and Terra chips in with Deep Freeze. It's only a matter of time.
Now the party heads to #32, and presses the button there. This opens the south wall. They then take the ladder at #12.
Mystery Ray
The party then ends up at #12 on the Nyctalinth Dungeon #12 map. At #33 and #34 are Savant Berserkers that must be activated by the Mystery Ray before they can be killed.
At #35 is another Savant Berserker that can be awakened and killed by way of the Mystery Ray, but this time it leaves behind an important clue, "018@67C1". Remember this important clue, or hold onto the Parchment that you get until you need to use that clue in New City. I go back up the ladder at #12.
Observation Control Center
I went back to #29, and picked up the Broadsword +1. Errol holds onto it with a spare inventory slot.
Now the party makes towards #31 on the Nyctalinth north map, and then heads through the doors at #2 and #3, each time killing Savant guards along the way. One thing to keep a look out for are Savant Controllers, who can use Psionic Blast. Cast Silence on them when you can.
I go one square north of #2, and pick up another important clue, "023@41A2" for 'Black Ship Command'. As with the previous clue, this will also be recorded on a parchment that appears in your inventory.
At #4 is another group of Savant Guards. This time, they leave behind a TX-Coder. This will be used very shortly.
T'Rang-Guardia Landing Port
Now the party heads over to #5, the T'Rang-Guardia Landing Port, and then goes through the door to the left.
They then continue on to #6, and 'search'. This leads to the discovery of a T'Rang Portbook. I use the TX-Coder on the book. Note how at one point the Book makes a reference to "Nargisst Shuttle". Then there's co-ordinates below it, "088:53". If you're so inclined, this is what Don Barlone is wanting.
Now the party fights its way through the High Chamber again, and uses the Anthracax at #10 in order to Return to New City.

