-

- Forums
- Chatrooms
- Gallery
- Gameplay Videos
- Upload
- Articles
- Mod Reviews
- Shop SP: Games, Movies, Books
|
Kuldahar | Vale of Shadows | Kresselack's Tomb - Level 1 | Kresselack's Tomb - Level 2 | Kresselack's Tomb - Level 3 | Temple of the Forgotten God |
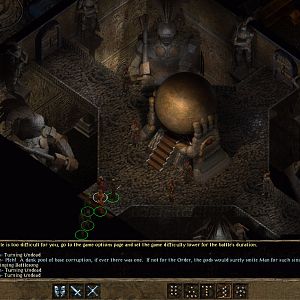
TEMPLE OF THE FORGOTTEN GOD
Upper Level
Note from the previous video that I set apart a savegame called 'Temple of the Forgotten God'. The reason is that there's a chest here, the one a bit north of the southwest corner, that I want to cherry pick. The possibilities for this chest are:
The Black Knight works once, and once only, before disappearing from the inventory permanently. There will be better rings or cloaks of protection available. After that, it is a matter of subjective taste. Personally, I find the prospect of being able to cast at the start of each day a spell that adds +1 to hit, +3 to damage rolls, and 5 temporary hit points for the whole party, and lasts 50 rounds, to far outweigh the benefits provided by the other items. And besides, good amulets can be hard to find in this game. My choice is set.
If I don't get the Badge, I'll reload the 'Temple of the Forgotten God' savegame. Once the Badge of the Brave is set in the chest, I reload my quicksave. I then walk ahead a little, and then shoot down the Acolyte waiting ahead.
Next up are a pair of Verbeeg giants. They can hit for hefty damage, so don't underestimate them. Here I show another theme. Hitting one of them from afar with missile fire, including Magic Missiles from Lanatir, and then switching over to melee weapons once they've closed the gap. Killing Verbeeg giants also affords my warriors an opportunity to upgrade to tower shields.
The next fight shows another theme. The Black Thorn goes into hiding first. The party advances, and then more Verbeeg giants show up. The melee scrum ensues almost immediately. The Black Thorn positions himself behind the first Verbeeg to land a backstab, thus ensuring that the first one dies quickly.
The chest in the southwest corner is also randomized, and offers the following possibilities:
I will get other bows along the way, so I wasn't hung up on what I could get out of this chest and took whatever came my way. It happened to be a Scroll of Protection from Fire, which I stored for my fight against Belhifet.
The next chest is the one that I set to what I want. Genevieve now gets the Badge of the Brave as her amulet for the rest of the game, allowing her to cast Emotion: Courage at the start of each new day.
The next fight, in the northwest corner, will start off against 2 Acolytes and a Verbeeg. Genevieve holds up the Verbeeg by herself, allowing her comrades to go to work. Halagrim gets the Acolytes with a Silence 10' Radius spell. The Black Thorn, Cassandra, and Derrick fire away with missile weapons. Once the Acolytes are dead, they then help Genevieve out against the Verbeeg. Another Acolyte comes up from behind, but he is quickly cut down. Same thing for another Verbeeg that shows up.
One of the shelves in this room has a Skull Trap spell. The Skull Trap spell has its pros and cons in comparison to Fireball. Skull Trap has a smaller blast radius than Fireball. Fireball, however, has a damage cap of 10d6, whereas the Skull Trap is 1d6 per level without a cap. Skull Trap, while requiring precise placement, may sometimes be a better choice for a cluster of foes that are tightly packed together.
Now I venture to the east side of the level. The first Verbeeg I see is easily cut down after the Black Thorn gets him with a backstab.
I then go north. The Black Thorn and Derrick shoot down another Acolyte, while Genevieve, Cassandra, and Halagrim handle another Verbeeg.
The only thing that stands between me and the next level is a trap and another Verbeeg.
Lower Level
Note again that there are two randomized chests here that will get set the first time you enter. They both appear about midway. The one to the north can have:
The one to the south can have:
I take whatever I get from the north chest. I set the south chest so that it has the Snowmaiden's Reaver, not so much with the intention of using it, but because it will sell for the most gold.
I start things off with the Black Thorn hiding, and then backstabbing the first Verbeeg he sees. This doesn't kill the Verbeeg outright, but it leaves him sorely wounded and following the Black Thorn into the waiting arms of the rest of the party. An Acolyte follows after me, and then I shoot him down. Another Verbeeg comes by, only to get cut down. This is the benefit of employing attrition and 'dart forward and retreat' tactics, the monsters can be dealt with in fewer numbers and can't support each other as a unified force.
I soon demonstrate another theme. Derrick casts Invisibility on the Black Thorn. This allows him to safely scope out traps and disarm them without losing his cover. Once he disarms a floor trap, he positions himself behind an Acolyte to backstab him and set him up for quick death. Another Acolyte soon arrives, but he is easily cut down.
Keep in mind that the alcoves with chests often have traps in them.
At the east end of the level will be a fight against 3 Verbeegs and 2 Acolytes all at once. This represents my first use of crowd control. Lanatir casts Web and Cassandra casts Entangle at the same time. This forces my foes to make 2 saving throws to avoid getting stuck in place. And indeed, this combination locks everyone in place, allowing my party to fire away with missile weapons. Halagrim further renders the Acolytes helpless with a Silence 10' Radius spell.
Shrine of the Heartstone Gem
Now I go down the stairs, and then north. I come on quite the scene of carnage, but a dead Priest of Talona leaves behind a Vial of Mysterious Liquid that I take with me. The Heartstone Gem is also missing from its shrine.
I head back to Arundel, and his next destination for me is Dragon's Eye.