-

- Forums
- Chatrooms
- Gallery
- Gameplay Videos
- Upload
- Articles
- Mod Reviews
- Shop SP: Games, Movies, Books
|
Kuldahar | Vale of Shadows | Kresselack's Tomb - Level 1 | Kresselack's Tomb - Level 2 | Kresselack's Tomb - Level 3 | Temple of the Forgotten God |
KRESSELACK'S TOMB – LEVEL 1
Priest's Key
Now the party goes through the entrance. Just to the north is a gate that requires the Gate Key to open.
Now notice that I don't rush forward. I edge someone forward until one or two Skeletons come to view, and then I lead them onwards into the waiting arms of my warriors who are packing blunt weapons. I thus avoid the risk of a massive attack, and instead eliminate the undead in a process of attrition.
The room southwest of the central chamber will have traps, a few more undead, as well as miscellaneous loot.
The door west of the central chamber needs the Sanctum Key to open. There will be Zombies, Skeletons, as well as a Wight that can only be damaged by weapons of +1 enchantment or higher. Don't worry, it can't level drain. It can only inflict a brief spell of bad luck.
A coffin in the west room has the Priest's Key, which I'll use very soon, as well as Gauntlets of Weapon Skill (+1 to THAC0). Halagrim, being a multi-class Fighter/Cleric, wears these gloves to improve his chances of hitting the monsters.
Holy Symbol of Myrkul
The party then moves towards the room southeast of the central chamber. The Black Thorn again both looks around for traps and at the same time utilizes the drawing out technique. A coffin in the room will have a Longsword +1, and a few potions. The Black Thorn now has a magical weapon.
The Priest's Key opens the door east of the central chamber. More undead to be fought here. The first coffin will have a Shortbow +1, which the Black Thorn equips. The next coffin holds a few items, like a scroll of Burning Hands, as well as a Holy Symbol of Myrkul, which I'll use very soon.
Mytos
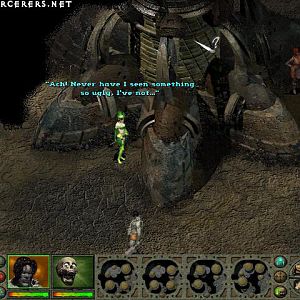
The Holy Symbol of Myrkul opens the huge door north of the central chamber. On the other side are an undead priest of Myrkul named Mytos, as well as 4 Temple Guardians. This fight can be dangerous. Mytos can cast Hold Person, and if he manages to paralyze multiple party members with it, they are in danger of getting hacked apart by the Guardians. He can also cast Static Discharge. So, I basically high tailed it out of there, and went where he couldn't see me. I then sent ahead Genevieve who, as a Paladin that is also wearing her Ring of Lesser Resistance, has better saving throws. She tries to draw the Guardians away from Mytos, and this works in that she resists his Hold Person spell and draws one of the Guardians away to be killed individually. Eventually I get Mytos to shed enough spells to convince him to come after me, at which point the whole party charges forward, surrounds him, and gangs up on him. After he falls, I mop up on the guardians.
Mytos leaves behind a Warhammer +1, which Halagrim equips. One of the Temple Guardians leaves behind a Longsword +1. Now Genevieve has one too.
Myrkul's Sending
First, I head up the tunnel leading northwest away from where I fought Mytos. At some point, I encounter a couple of Skeleton Archers. I retreat and force them to come around a bend in the hallway so I can jump them.
There will be a coffin at the end of the hallway. Now the thing is, if you open it, you'll get hit with a Sleep spell, and a whole bunch of Skeletons will appear. They're smart enough to wake only one character and try to gang up on that character before moving on to somebody else.
So the trick is for one character to trigger the Sleep spell by himself so that it doesn't affect the whole party. The rest of the party then 'brings in the cavalry' so to speak.
The coffin itself has:
Now I go back to where I had fought Mytos. I demonstrate another theme. Derrick casts Invisibility on the Black Thorn, so that he can both look for and then disarm any traps without getting noticed. At this point, a spirit called Myrkul's Sending starts wandering about and notices Cassandra. He then attacks, drawn away from the support of his Skeletons, so that I can kill him individually. I then finish off the Skeletons aftewards.
Myrkul's Sending will leave behind the Ring of Shadows (+15% to Hide in Shadows, Non-Detection on wearer, Rangers and Thieves only). The Black Thorn wears this as one of his rings for the rest of the game.
Mausoleum Key
Now I journey along the corridor northeast of where I first encountered Mytos. At some point, I run into 2 Skeleton Archers. Be careful, in front of them will be a trap. So I simply have the Black Thorn bring them into view, and then retreat so that they're forced to bend the corner, allowing me to jump them.
I then bend south around the corner. At the end is a Mummy, who requires +1 weapons to hit him, and has about 50% damage resistance even to weapons that can hit him. He can also cause disease with his attacks, though my Paladin can make sure that isn't a problem. He leaves behind a couple of containers that hold:
Now there's a couple more turns to the corridor, and again, each time it's two Skeleton Archers standing behind a trap. And each time, the method is the same. Lead them away from the trap and around the corner so I can jump them.
At the end of the corridor are 2 Temple Guardians that are easily taken care of.
Now I see the entrance to Level 2.