-

- Forums
- Chatrooms
- Gallery
- Gameplay Videos
- Upload
- Articles
- Mod Reviews
- Shop SP: Games, Movies, Books

|
Kuldahar | Vale of Shadows | Kresselack's Tomb - Level 1 | Kresselack's Tomb - Level 2 | Kresselack's Tomb - Level 3 | Temple of the Forgotten God |
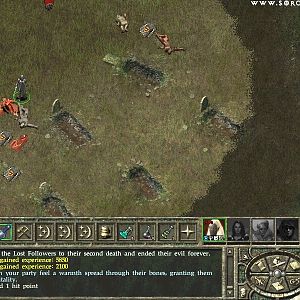
KRESSELACK'S TOMB – LEVEL 3
Spectral Knights
Yet another fight against many undead, including Skeletons, Tattered Skeletons, Temple Guardians, and a new kind, Spectral Knights.
There isn't much to say except a word of advice ... Hang tight together, and let them come to you instead of chasing after them. This way, you can deal with smaller groups one at a time while bringing the minimum number of other undead into view. Remember what should be a motto, deal with your enemies piecemeal whenever you can.
Chosen Zombies
At the south room will be more Zombies, a couple of Imbued Wights, a Mummy, and now Chosen Zombies. Again, don't rush forward. Let them come to you. This time there's the additional incentive that there are a couple of traps at the entrance.
The sarcophagi here hold various items like gems, potions, and spell scrolls, most of which I've already seen by now. There is, however, a scroll of Shield in the south sarcophagus, which Derrick scribes to his spell book. This can be useful for harmlessly absorbing enemy Magic Missile spells.
Shadows
Now I go to the north. This time there will be a Mummy, and a few of both Lesser Shadows and Shadows. The latter require +1 or better weapons to hit.
Again, let them come to you. There are 2 traps at the doorway. I then loot the sarcophagi for any loot.
Skeletal Mage and Spectral Knights
The last room to the west will have a few Skeletal Archers, a few Spectral Knights, and another Skeletal Mage.
The dangers are the same, and the approach is the same. I send a lone character forward to tease forward the foremost Archers and Knights, out of the room and around the corner where I can jump them. Once these are gone, I take out the Mage at a distance with missile weapons. Lanatir chips in with a Magic Missile spell. The Mage leaves behind another Bracers of A.C. 8, which Lanatir now wears.
Once the Mage is dead, I then take care of the remaining Knights and Archers.
Kresselack
Now I speak with the spirit of Kresselack. He has a request for me, to kill a Priestess of Auril named Lysan in exchange for his information.
Lysan
Now remember that Yeti cave in the middle of the Vale of Shadows? I return there, where Lysan is waiting for me. A fight ensues after some dialogue. She summons several Yeti to help her out. I had tried a few ideas. I tried to have the Black Thorn hide so that he could backstab, but he was unable to maintain stealth. I hoped to have Lanatir interrupt Lysan's spell with Magic Missiles, and then go into a sequence of Horror, and then Sleep. But Lysan managed to get Silence 10' Radius off, and this reduced the battle to straight physical combat. I was able to overwhelm them in any event.
There is a theme worth noting though. Note how Derrick, my Gnome Fighter/Illusionist, was taking on a Yeti by himself. As a general rule of thumb, don't spread your party members out so that they're combating monsters individually. Group them together, and have them gang up on the monsters one by one. Each individual monster goes down faster for it, and the number of attacks you face is likewise reduced more quickly. Once all the Yeti are dead, I surround and kill Lysan, who leaves behind a Morningstar +1.
Now I inform Kresselack of Lysan's death. He doesn't give Genevieve the answer she was hoping for, but he does allow the party to take whatever is in his now accessible sarcophagus.
It will have Kresselack's Sword (+1 2-handed sword, +10% cold resistance), which will make for a nice interim sword for Derrick. It will also have one of:
Keep in mind that if you have a preference here, you'd have to be pretty masochistic to get it. The sarcophagus is inaccessible until you kill Lysan for Kresselack, and thus involves not just prolonged combat but multiple lengthy trips just to check for the item. I just accept whatever comes my way here.
Helm of the Trusted Defender and Mantle of the Coming Storm
Now I return to Kuldahar, and there are two items that I am interested in obtaining.
First, I stop off at Conlan's Smithy. Note that I didn't show every sale of every item that I accumulated while in the Vale of Shadows. I do show, however, a simple concept. I accumulated several High Quality weapons when I was exploring the Vale. Once I return, I always have a character sell off all of a single type of a High Quality weapon that I may have found all at the same time. For example, Genevieve the Paladin has all the High Quality Bastard Swords upon my return. She sells all of them to Conlan in one sale, thereby maximizing my gold return. Halagrim will sell all of the High Quality Morningstars all the same time, and so on. Notice also my restraint in a few instances. I don't sell the 2 Shortbows +1 that I have, because the Black Thorn is using a 3rd Shortbow +1 for the time being. Once he does find a better bow, I then sell all of the Shortbows +1 for the same price to maximize my gold return. Same thing with the Slings +1, I wait until Halagrim gets a better sling.
Anyway, the item I want from Conlan is the Helm of the Trusted Defender (+3 armor class, immune to Sleep and fatigue, Gnomes and Halflings only). This is the obvious helmet for Derrick for the rest of the game.
Next, I stop off at the Root Cellar tavern. I speak to Whitcomb about Lysan's true identity. With a little prodding, I can get Lysan's items from him, which includes a couple of clerical scrolls, a Scroll of Protection from Fire (I stow this for my fight against Belhifet), and a cloak, the Mantle of the Coming Storm (+1 armor class, 3 charges of Free action, +1 to saves vs. paralysis, +30% fire resistance, +30% cold resistance).
The Mantle will be Lanatir's cloak for the rest of the game. Sure, there's cloaks or rings of protection that provide better protection against physical attacks. But, I can very often have the monsters ignore Lanatir completely by keeping him at a distance from the main scrum. In the event that monsters do close the distance on him, he'll be able to protect himself with spells like Mirror Image and Stoneskin. By comparison, fire and cold-based attacks will be a more frequent source of danger for a Mage who hangs back.
To the Temple of the Forgotten God