-

- Forums
- Chatrooms
- Gallery
- Gameplay Videos
- Upload
- Articles
- Mod Reviews
- Shop SP: Games, Movies, Books
CHAPTER 1 | CHAPTER 2 | CHAPTER 3 | CHAPTER 4 | CHAPTER 5 | CHAPTER 6 | CHAPTER 7 | CHAPTER 8 | CHAPTER 9 | CHAPTER 10 | |
SIEGE CAMP
Change of Heart
I buff up to the max beforehand, including buffs against magic like Magic Resistance and Death Ward spells. I also have Imoen include a Project Image. Imoen's Image is then able to summon two Planetars.
Now I bring both Hearts to Nyalee. She uses her powers to quench the fires of Yaga-Shura's Heart. Everybody in the party gets an xp bonus, but then she has second thoughts. She summons Shambling Mounds and Nymphs to help her out.
SCS jacks this fight up further with Nyalee having a Mirror of Opposition. She uses the Mirror to create clones of the entire party that have the same equipment and abilities as my party members. Suffice to say I don't hold back in this fight. I have Imoen's Image go on an offensive barrage after Time Stop, and then have Imoen go on another Time Stop barrage herself, to kill everything as quickly as possible. Note that the cloned Avastrian also enjoys the benefits of the Cloak of Mirroring, so that barrage won't affect it. I thus have to hit the cloned Avastrian with a Breach spell.
Now it's time to kill Yaga-Shura himself.
Yaga-Shura
Note that Imoen has two instances of Project Image ready to use before I head over to the Siege Camp itself.
Now it's time for quite the epic battle. As soon as I arrive, Avastrian, Jaheira, and Imoen put up Stoneskins or an Ironskin. Anomen guzzles a Potion of Agility. I head west over the bridge and kill the three soldiers immediately in view. I do a couple more buffs, Spell Trap for Imoen, a Remove Fear from Avastrian, and Protection from Evil from Anomen (saving throws really matter here).
Now I continue west again, and right into the midst of Yaga-Shura's army. I keep pressing west. The only foes that I pause to kill are either Yaga-Shura Mages because they can cast Chaos, and Yaga-Shura Clerics because they can cast Greater Command. Keldorn's Carsomyr is easily able to dispel any of their buffs.
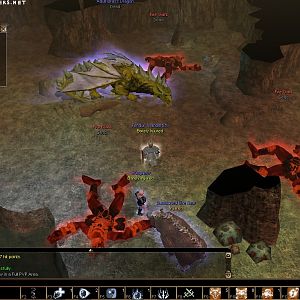
Eventually I find Yaga-Shura himself. He displays one of his powers under SCS, the innate ability to launch a Fireball that not only inflicts fire damage but will also knocks my characters back and stun unless they make their saving throws. Fortunately all the saving throws were made, and I charge Yaga-Shura straight away. Landing a few blows on him is enough to chase him away for the time being.
I continue west until the party is bunched up against a barricade on the west side. Anomen blankets the east side with Fire Storm against the oncoming army, while Jaheira throws in an earthquake. Imoen uses her first Project Image. The first Image goes into an extended sequence of: Time Stop, Skull Trap carefully aimed to both damage as many enemies as possible while avoiding my own party, Time Stop, Incendiary Cloud to blanket the east against oncoming enemies, Summon Planetar, Summon Planetar again.
Yaga-Shura will arrive again after a significant period of time after he first fled. So I spend the time killing everything in sight, healing or drinking potions when necessary, and having Imoen's first Image wreak as much havoc with arcane spells as possible (e.g. Horrid Wilting, Dragon's Breath, etc.).
At some point I have Sarevok kill Imoen's first Image. The reason is so that Imoen can put up a new Image, with a whole new array of spells to use.
The game eventually auto-saves, which heralds Yaga-Shura's arrival. Yaga-Shura's powers, in addition to his Fireball, now include:
Ok, so now what to do? First off, I avoid the temptation to cast spells right away. The reason being that Yaga-Shura will soon let off another one of his potent Fireballs, which will likely interrupt any spellcasting.
I immediately send the Planetars after the Lieutenant Mage to distract her. Avastrian immediately casts Spell Immunity: Abjuration to keep his buffs in place. Sarevok and Keldorn stay near him.
Jaheira, Anomen, and Imoen retreat further away from Yaga-Shura with the intention of avoiding his Fireball. The Lieutenant Yaga-Shura Mage gets in a Time Stop first, but doesn't do much with it.
Jaheira aims a Creeping Doom at one of the Fire Giants. It does its job, but it takes a while to reach its target and spread out. Anomen attempts to cast a Storm of Vengeance, but unfortunately I hadn't gotten him far enough out of the Fireball's reach.
Imoen meanwhile casts her second Project Image. The second Image goes on a sequence of: Time Stop, Horrid Wilting, Time Stop, Dragon's Breath, Summon Planetar, Summon Planetar again. Note how I positioned the Planetars to keep the Lieutenant Mage occupied. The second Image gets dispelled by the Lieutenant Mage's True Seeing after the second Time Stop ends.
The Lieutenant Mage uses another Time Stop, but it's beneficial to me because she expends her Imprisonment spell on one of the Planetars.
Imoen herself now begins to cast spells. She unleashes a Dragon's Breath that almost finishes off everybody. The only ones left alive are the Lieutenant Cleric who's 'near death', the Lieutenant Mage who has now been rendered helpless by Jaheira's Creeping Doom, and Yaga-Shura himself.
I let a Planetar finish off the Cleric. The warriors gun straight for the Mage, and finish her off before she can recover. Now only Yaga-Shura is left.
Jaheira is stunned and out of the action. Everybody else besides Avastrian and Jaheira switch over to missile weapons. Avastrian had been using his Axe of the Unyielding while fighting the sheer mass of enemy forces, but now he switches over to the Flail of Ages for Yaga-Shura. The end strategy becomes clear. Avastrian will keep himself protected with spells like Protection from Magic Weapons, and use the Flail of Ages to slow Yaga-Shura down. The rest of the party will fire away from a safe distance. Note that the SCS AI will often make Yaga-Shura go after other party members to avoid this trap. But Avastrian and the surviving Planetar together give Yaga-Shura too much to think about. It's only a matter of time before he falls.
*Evil* Yaga-Shura
Here's the battle for the evil party. The themes are pretty much the same, although there are a few differences.
One difference is I show how a Mage/Thief can exploit the Mislead spell at the start of the video. Jan casts Spell Immunity: Divination so that True Seeing won't undo things. Jan then casts Mislead, but leaves it behind on the east side of the bridge. This means monsters won't be able to attack and kill the Mislead, leaving Jan with a free hand to backstab at will.
Secondly, I went all the way west and then all the way east. I suspect this reflects an older SCS release where Yaga-Shura appearing a second time depended on back tracking instead of enough time elapsing (at least that was my previous experience).
Once Yaga-Shura does arrive for the second time though, the methods and themes are pretty much the same. Although Jan does use his Spell Trigger of Spell Immunity: Divination + Improved Haste + Mislead to give himself a free hand for backstabbing.
Alianna
Avastrian gets transported back to the Pocket Plane after defeating Yaga-Shura. He learns from the Solar the truth about his mother and of Sarevok's origins. The video shows the selection of dialogue options that amount to good-aligned choices.
*Evil* Alianna
Here is the evil equivalent for Asteroth, along with the dialogue options that amount to evil-aligned choices.
Conference with Melissan
Now I share words with Melissan, who warns me of Abazigal and Sendai, and bids me to seek out somebody named Balthazar in Amkethran.
I now loot Yaga-Shura's body for the following:
*Evil* Conference with Melissan
The equivalent for the evil party, but with different dialogue choices. It also shows Viconia revelling in the force of destruction that Asteroth has become.
Self-Reflection
I go back to the Pocket Plane and continue my romance with Jaheira. I then buff up and summon a Simulacrum and a Planetar. I head to the now open southwest cave in the Pocket Plane.
I am forced to confront an evil version of my self, along with more powerful versions of Sarevok's lieutenants at the end of SCS1, Semaj, Angelo, and Tamoko. Killing my clone, Angelo, and Tamoko is fairly straightforward. With Semaj, he likes to cast Comet. Keep in mind that Comet and Dragon's Breath ignore the Cloak of Mirroring and Magic Resistance. So when I'm getting a sense that he's about to go into Time Stop, I retreat the party members away from him and then try to have at least one summons go up to him to encourage him to target that summons. I eventually manage to wear him down. Keldorn brings down his protections with a Dispel Magic while Avastrian still has his Spell Immunity: Abjuration up. After this, the party is able to cut down Semaj.
The good Bhaalspawn power for Avastrian is the ability to use Mass Cure twice a day.
*Note* Semaj ended up casting Imprisonment on the Planetar. This means that I won't be able to cast Summon Planetar or Summon Deva in the Pocket Plane until I cast Freedom to release it (although its summoning time has long since elapsed). I don't show it in this video, but it is easily dealt with by simply lending Avastrian a Freedom scroll, and then spamming that scroll through a Simulacrum via Vhailor's Helm.
*Evil* Self-Reflection
The equivalent for the evil party. This fight goes a little differently in that Asteroth actually manages to catch his clone with a Creeping Doom that spreads to Semaj, while Jan uses his Spell Trigger to pull off backstabs against Angelo, who was attacking Viconia.
The evil Bhaalspawn power for Asteroth is Regeneration, the equivalent of the 7th level Clerical spell.
The Oasis
One more piece of business. I have to stop off at the Oasis before I make it to Amkethran. Once there, I get assaulted by a large force of Tethyrians led by General Jamis Tobelthen. The only difference in SCS is that some of them hang back, rather than letting themselves all get killed in the same spell wave. All this means is that I have to kill them piecemeal instead of all at once. The General leaves behind the Answerer (Longsword +4, reduces target's magic resistance by 15%, reduces target's armor class by 2). Certainly a potent weapon, but I have other arrangements in place.
Now I'm ready to start Chapter 9 in Amkethran.