-

- Forums
- Chatrooms
- Gallery
- Gameplay Videos
- Upload
- Articles
- Mod Reviews
- Shop SP: Games, Movies, Books
CHAPTER 1 | CHAPTER 2 | CHAPTER 3 | CHAPTER 4 | CHAPTER 5 | CHAPTER 6 | CHAPTER 7 | CHAPTER 8 | CHAPTER 9 | CHAPTER 10 | |
ELEMENTAL LEVEL
Chromatic Demon
I descend through the portal to the next level, and speak with the Chromatic Demon. The end result is a bargain whereby I agree to find the four elemental sceptres in exchange for him allowing me access to the next level below.
Air Library
The room to the northeast is the Air Library. Imoen goes on ahead and disarms the traps while invisible, and without being detected by the numerous Golems. Once she's done, Avastrian leads the Golems out of the Library and into combat in the more wide open central room, and again to avoid one or two characters getting gang up on at the doorway. Jaheira helps matters along with a defensive harmony.
The room itself has plenty of potions and magical ammunition, as well as a note that describes a potential weakness of the minions of the poison wizard.
Fire Library
Now I head for the room towards the northwest, which is the Fire Library. Waiting for me are a pair of Fire Giants. Fire Giants are definitely capable of landing quite damaging attacks, and in SCS will start off by buffing themselves with Hardiness. Avastrian gets their attention and then retreats. The party weakens the first one with missile weapons, and then finishes him off once he closes in. Avastrian slows down the second one with his Flail of Ages.
Imoen then checks the room for traps, and loots the containers for potions and magical ammunition. There's also a note that suggests that the fire wizard's minion is invincible, while the air wizard's minions are definitely mortal.
Also, there's an Imp at the east end this room who is willing to provide additional information.
Air Scepter
Now I send Avastrian, Jaheira, and Sarevok in along to the room to the northeast. I open the gate and then click on the machine. I then retreat so that I'm at the edge of the door, close enough to get the attention of the Air Elementals, but not so deep in the room that I'll get banged around against the walls by the machine.
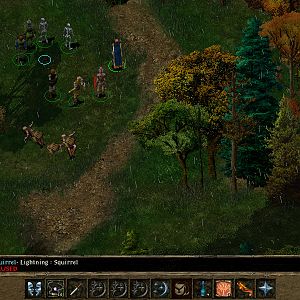
I let the Air Elementals come to me. I can ignore the occasional Chain Lightning emitted by the machine, as Avastrian, Jaheira, and Sarevok, are all protected against electrical damage. One of the Air Elementals, the Guardian of Air, leaves behind the Air Scepter. This will be one of the keys I need to free the Chromatic Demon.
I make a point of making sure that both doors leading to the air machine stay open.
The video concludes with me resetting my Spell Triggers for Avastrian and Imoen.
Poison Library
Now I head for the room to the southeast, the Poison Library. On the other side of the door will be several Mutated Spiders. Be forewarned that a Mutated Spiders' poison inflicts much more damage and acts much faster than the poison from other spiders you may have encountered. And if your priests get poisoned, well ...
Avastrian is protected against poison by his buffs and his Ring of Gaxx, check. Sarevok is protected against poison by his Amulet of Ilmater, check. I send these two ahead on their own to attack the Mutated Spiders up close, while the rest of the party fires away with missile weapons at a safe distance, a reliable strategy that minimizes the risk of massive poisoning.
Imoen then searches for and disarms any traps. The containers have plenty of potions and magical ammunition, as well as a note that provides a clue for defeating the ice wizard's minions.
Slime Scepter
First, I open the door to the northeast. On the other side will be the pets of the poison wizard. One of them, a snake, cannot be killed so long as the poison mist remains in the room.
So I retreat to the central room. I then send Jaheira ahead into the Air Library. She opens the other door leading to the poison mist room. She then uses the Air Scepter in order to power up the air machine.
This blows the mist away and into the poison library. Now I can go in and kill the poison wizard's minions. The snake leaves behind the Slime Scepter. This is another key that I'll need to free the Chromatic Demon.
The vat in the middle of the mist room has a few Antidotes, as well as the Poison Head. I return to the Pocket Plane, and have Cespenar attach the Poison Head to the Flail of Ages. The result is the Flail of Ages +4 (33% chance of slowing target without magic resistance or saving throw, +1 acid damage, +1 cold damage, +1 fire damage, +1 poison damage). From this point onwards I start relying more and more on the Flail of Ages instead of the Celestial Fury. The Celestial Fury's stun power was pretty cool in the early going, but it allows a saving throw without any penalty. The stun power starts to work less and less the further I get into Throne of Bhaal with its higher level enemies who have better saving throws. Whereas the Flail of Ages always has a straight 1 in 3 chance of slowing down its target without either magic resistance or saving throws being able to prevent it.
I close the door at the south end of the mist room for the time being.
Ice Library
The room at the south end has the minions of the ice wizard, an Ice Golem and a few Icemists. Note that they cannot be killed for the time being. First, I open the door leading to this room from the Poison Library.
Next, I have Jaheira use the Air Scepter to turn off the air machine. The reason for this is to avoid the poison mist hitting the party while they're in the Poison Library.
Jaheira then makes sure there is a clear path (i.e. no closed doors) from the air machine to the ice room. Then, she uses the Air Scepter to turn on the air machine. This results in the poison mist blowing away and entering the ice room. This is how to make the Ice Golem and the Icemists vulnerable to getting killed.
Now that they're vulnerable, I have Anomen put a Fire Storm over the ice room. This won't damage the Icemists, but it will damage the Ice Golem. The Ice Golem won't actually leave the room, so Jaheira pecks away at a distance with her Firetooth. The Golem inevitably falls. As for the Icemists, I have Avastrian and Jaheira go in and remain just on the edge of the poison mist, allowing them to get the attention of the Icemists and then kill them close up.
The Ice Golem leaves behind a Horn (which is used for an item upgrade) and the Ice Scepter, which is another of the keys needed to free the Chromatic Demon. I then close one of the doors leading to the poison mist room.
Ice Library
I head back to the central room, and then have Avastrian and Anomen go to the room to the southwest. They kill a pair of Vampiric Wraiths and other spirits on their own.
Imoen searches for traps, and loots the containers for a Wand of Breaking, some magical ammo, and potions, as well as another Horn that's part of an item upgrade. There's also a note that describes how to defeat the minions of the fire wizard.
Fire Scepter
I have everybody besides Avastrian vacate to the central room. Avastrian then opens the door immediately north of the Ice Library. On the other side of the door will be a Fire Giant who cannot be killed for the time being. There is also a lava pit that spawns four Greater Fire Elementals. The trick here is for Avastrian to lure each one back to the ice room. The Greater Fire Elemental will freeze in place. The key here is to wait for the Fire Elemental to shatter apart into ice crystals in order to kill it permanently. If I touch the Fire Elemental before it shatters, it will respawn in the lava pit. I repeat this process until all four Greater Fire Elementals are permanently killed.
The Fire Giant can now be killed. I start off by weakening it with missile fire, and then finishing it off close up when it tries to retreat. The Fire Giant leaves behind the Helm of the Rock (+25% acid resistance, +25% cold resistance, +25% fire resistance, +25% electrical resistance) and the Fire Scepter, which is the last key I need to free the Chromatic Demon.
You could give Cespenar the Helm, both Horns, and 5,000gp, to create the enhanced Helm of the Rock that is just the same but would give its user the ability to use Aura of Command three times a day. But I prefer Citadel Helmets for Sarevok and Anomen, not least since they also provide the static benefit of immunity from charm.
Fighting the Chromatic Demon
Now I return to the central room, and click on the Chromatic Demon's cage with all four of the elemental scepters. Predictably enough, he attacks me.
Now remember, he's immune to physical damage, but each of his four forms is vulnerable to a particular kind of damage. The Ice Golem form is vulnerable to fire damage. The Balor form is vulnerable to cold damage. The Shambling Mound form is vulnerable to electrical damage. The Air Elemental form is vulnerable to acid and poison damage.
In vanilla BG2 I could 'cherry pick' by reloading until I got the Ice Golem form, and then nail him with Melf's Minute Meteors and other fire-based spells. It doesn't work in SCS, because the Chromatic Demon's SCS AI has him change his forms far more frequently.
It becomes a matter of wearing him down over the long haul. The Flail of Ages really comes in handy because it slows him down, and will score chip damage against all of his forms except the Shambling Mound form. Beyond that it's a matter of playing it by ear and taking advantage of opportunities as they arise.
For example, when he's in his Ice Golem form Avastrian will blast away with spells like Fireball and Sunfire. The rest of the party will retreat and Anomen will put up a Fire Storm on top of Avastrian and the Demon.
For the Balor form the party will get out of the way but leave Avastrian to fight him. Imoen can then cast her Cone of Cold spells over both Avastrian and the Demon.
For the Air Elemental form Jaheira will jump right in with her Pitchwife club, which scores extra acid damage.
For the Shambling Mound form Imoen expends her Chain Lightning spells on the demon, and then hits it from afar with her Gesen Bow.
I eventually wear it down. It leaves behind: