-

- Forums
- Chatrooms
- Gallery
- Gameplay Videos
- Upload
- Articles
- Mod Reviews
- Shop SP: Games, Movies, Books
CHAPTER 1 | CHAPTER 2 | CHAPTER 3 | CHAPTER 4 | CHAPTER 5 | CHAPTER 6 | CHAPTER 7 | CHAPTER 8 | CHAPTER 9 | CHAPTER 10 | |
Suldanessellar | Tree of Life | Hell | |
SULDANESSELLAR
Stone Horn
I enter the city, whereupon Elhan urges me to find High Priestess Demin and Queen Ellesime.
I then enter a house to the north. I kill two Stone Golems and a Clay Golem. The loot here includes a Cloak of Elvenkind (+50% hide in shadows) and the Stone Horn, which I'll need later on.
Elven Priest Stone
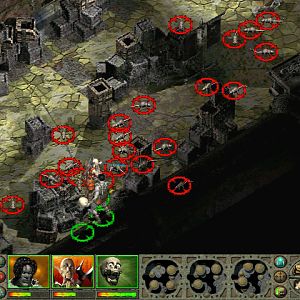
Now I leave the house and come down from the stairs leading to its door. The platform to the west will spawn an Adamantite Golem and a couple of Stone Golems. There's a simple trick here that avoids going to the platform altogether. Jaheira goes north a little bit to trigger the spawning. An Iron Golem comes after Jaheira from the north, but can't reach her because it can't squeeze past the narrow walkway. Jaheira takes it out with her Firetooth. The Stone Golems come after me the long way around, but they're easily cut down by my warriors. The Adamantite Golem is unable to come after me, so Jaheira and Keldorn use their Firetooth and Azuredge to take it out at a distance.
The party continues westward, where they find Elves locked in battle with Trolls. Avastrian and Jaheira rush onwards to take out the Trolls. Another Adamantite Golem and two Stone Golems spawns just north of the Trolls. The Stone Golems follow after Avastrian and Jaheira, but they're easily killed. It's a potentially dangerous situation with the Adamantite Golem, but Minsc manages to kill it with a vorpal hit from his Silver Sword.
The party continues west until it finds another house. They climb the long set of stairs leading to the higher door, and enter within. The party finds another scroll of Time Stop, which Avastrian adds to his collection, as well as an Elven Priest Stone that will drop a hint that will be needed very soon.
Talisman of Rillifane
Now the party heads down the stairs, and goes through the door at the bottom of the house. On the left will be a scroll of Meteor Swarm. On the right is a container that requires that the buttons be pressed in a certain order. The Elven Priest Stone provides the clues. The correct order is: Correllon, Rillifane, Water, Tree, and then Suldanessellar. The party now gets the Talisman of Rillifane, which is a quest item that will be needed soon.
Raamilat
The party continues westwards and run into Elves locked in battle with three Skeleton Warriors. Keldorn nails the furthest one with his Azuredge, while the rest of the party takes care of the nearest two.
The party continues west and north a little. I pause for a little preparation. Anomen summons a Skeleton Warrior, while Keldorn summons an Astral Deva. Anomen also adds in a Remove Fear. Avastrian readies himself with Spell Shield and then Spell Immunity: Abjuration.
Avastrian leads the Deva and Skeleton Warrior westwards onto the platform. A Drow mage named Raamilat soon attacks me, along with a Nabassu. Avastrian and the summoned creatures take out the Nabassu easily enough.
After this it's a matter of letting the Deva and the Skeleton Warrior occupy and go to work on Raamilat, with Avastrian around as a safe observer. The rest of the party keeps a safe distance. I bring in more summoned creatures as necessary, including a Nishruu from Imoen. Raamilat's protections eventually wear off, allowing me to kill him with combined melee and missile attacks. He leaves behind a Quarterstaff +1.
High Priestess Demin
Now I enter the house that Raamilat was guarding. Inside will be High Priestess Demin being attacked by Adsalan and two other Rakshasa. The plan is a pretty simple one. Keldorn uses a carefully placed Dispel Magic to remove the Rakshasas' protections, and Imoen immediately uses Time Stop to unleash a double shot of Abi-Dalzim's Horrid Wilting. This kills the other two Rakshasa outright, and leaves Adsalan badly weakened. Avastrian and Jaheira finish him off.
The containers in here have magical ammunition, and a scroll of Absolute Immunity. Adsalan leaves behind the Belt of Stone Giant Strength (sets Strength to 20), which will be Minsc's belt for the rest of Shadows of Amn.
The video concludes with Demin giving me some information.
Stone Harp
Now I continue towards the northwest corner. I end up killing two Sand Golems and two Iron Golems. There's no in game consequence for whether the nearby Elves survive or not.
I then enter the nearby house, and obtain another quest item, the Stone Harp.
Nizidramanii'yt
Now I take the exit to the left. It is time to fight the Black Dragon, Nizidramanii'yt. In addition to the usual buffs before Dragon fights, like Remove Fear and summoned creatures and so on, I also undertake a specific preparation. Avastrian reconfigures his 5th level spells so that he has multiple instances of Protection from Acid. Imoen also changes one of her 8th level spells so that she can cast Protection from Magical Energy. Avastrian also makes sure that each party member has at least one green Protection from Acid scroll. The idea is that everyone will be protected against the dragon's acid breath, and is ready to put up another protection against acid in case their initial protections get dispelled. Now the party rests up and then buffs up. Avastrian also adds Spell Immunity: Abjuration.
I spread the party out, with everyone besides Avastrian and Jaheira switching over to missile weapons. Imoen uses a Time Stop sequence that includes Breach, Lower Magic Resistance, and Magic Missiles. The dragon does have an Insect Plague-type power, but it didn't show up here. It's a matter of wearing him down after Imoen's Time Stop sequence, with only Avastrian and Jaheira going up close while the rest of the party pecks away with missile fire. Keep in mind, again, that the plan isn't fool-proof as SCS Dragons make far more generous use of wing buffets. And indeed, in one instance, the dragon went straight for Keldorn after knocking Avastrian and Jaheira back. This forced Keldorn to switch over to Carsomyr and then use Hardiness on himself. But it soon becomes only a matter of time.
Nizidramanii'yt leaves behind a lot of treasure, as well as:
Moonblade
The party returns to Suldanessellar and then heads for the house southeast of the one where they found the Stone Harp. Inside will be an Elven Warrior who sacrifices himself to kill a Balor. The party acquires the Moonblade.
I leave the house, have Imoen reconfigure her 8th level spells to include two instances of Horrid Wilting and one Incendiary Cloud, and then rest up. I then walk southeast for a bit until I get a distinctly noticeable pause in the game. This means monsters have spawned. More specifically, a few Rakshasa appear near the house I had just left. They will be attacking some Elves. Imoen's putting together two Horrid Wiltings inside a Time Stop works here as well, and kills the Rakshasas outright. Avastrian racks up several spell scrolls, which provides more xp.
Temple of Rillifane
Now I continue southeast to return to where I had previously fought Golems and Trolls. I then turn a little northeast. Imoen uses her Staff to go invisible, and then scouts out several Rakshasa Rajahs and Maharajas guarding the entrance to the Temple of Rillifane. The tried and true technique works here for the most part. Imoen hits them with an Incendiary Cloud from outside their fog of war. Most of them burn to death. A couple, owing to their SCS AI, make it out to attack me but they're easily killed.
Suneer
Keldorn activates his True Seeing before the party enters the Temple. I get attacked by a Mage named Suneer, as well as a Rakshasa, an Iron Golem, and a Glabrezu. Avastrian summons his Simulacrum via Vhailor's Helm. Jaheira waits until the party gets hit with an offensive spell from both Suneer and the Rakshasa before she aims an Insect Plague at the Glabrezu. It spreads to Suneer. Imoen summons a Nishruu to distract Suneer.
The Simulacrum then uses its spammed Time Stop scrolls to hold everything still, and then use Whirlwind Attacks to get rid of Suneer's help. After that, Avastrian and Keldorn stay on top of Suneer until they kill him.
Avatar of Rillifane
Avastrian places the Moonblade, the Goblet of Life, and the Talisman of Rillifane, in the container in the middle of the Temple. Everybody in the party gets 65,000xp, and an Avatar of Rillifane appears. He commands the spirits of the forest to drive the evil out of Suldanessellar and opens the gates to the Queen's Palace. Avastrian also gets a Staff of the Woodlands +4 (sets base armor class to 3, summon Shambling Mound with limited charges, enhanced Charm Animal at -4 penalty to save vs. spells).
The party steps outside, and then sells their excess loot to an Elven merchant named Reirra. Avastrian also buys a spell scroll for Invisibility and stores it in his scroll case. The reason is that it's needed for an item upgrade that won't be available until Throne of Bhaal.
The party makes its way towards the gates to the Queen's Palace in the northeast corner, killing a Sand Golem along the way. The way to the Tree of Life is now open.