-

- Forums
- Chatrooms
- Gallery
- Gameplay Videos
- Upload
- Articles
- Mod Reviews
- Shop SP: Games, Movies, Books
CHAPTER 1 | CHAPTER 2 | CHAPTER 3 | CHAPTER 4 | CHAPTER 5 | CHAPTER 6 | CHAPTER 7 | CHAPTER 8 | CHAPTER 9 | CHAPTER 10 | |
Irenicus Dungeon - Level 1 | Irenicus Dungeon - Level 2 | Athkatla | |
IRENICUS' DUNGEON - LEVEL 1
The Beginning
The video starts with the opening cinematic for Shadows of Amn. I then show the process for importing Avastrian into BG2. Then we witness Irenicus torturing my protagonist with magical energies. The video concludes with Imoen breaking Avastrian free from his cage.
Jaheira and Minsc
Avastrian and Imoen go to the adjacent room to the north and west. Imoen disarms a trap on the painting. The painting, chest, and table provide quite a bit of assorted mundane equipment to help get a new party started. The table also holds a Jail Cell Key.
Now Avastrian and Imoen go to the north side of the room. Avastrian uses the Jail Cell Key to free Jaheira from her cage and have her join. He then goads Minsc into breaking himself out of his cage, and having him join as well.
Lightning Mephit Room
Now the party continues south, and then west. There will be a machine that will continually summon Lightning Mephits. Simply click on the switch for the machine to turn it off, and then kill any Mephits that happen to be here.
Aataqah
The party continues northwest. A Genie named Aataqah presents me with a riddle, which implicitly demands to know how much Avastrian values Imoen. If I choose the answer that involves not pressing the button, I'll have to kill a bunch of Gibberlings.
It is more rewarding to choose the answer that involves pressing the button. Aataqah summons an Ogre Mage, which is worth 650xp. Keep in mind that the Ogre Magi will have a few buffs in place, including Shield and Mirror Image together, in SCS. He'll also try to cast Horror on the party. I also have a limited amount of time to try and kill it. It's a matter of hoping enough party members make their saving throws against the Horror, and then cutting through its defenses quickly enough, and then bringing it down fast enough. This does admittedly amount to hoping that enough bounces go my way, but it is also decidedly more worthwhile than fighting a bunch of feeble Gibberlings. Aataqah advises me to seek out somebody named Rielev.
*Note* There is an important reality that I need to address when it comes to both levels of Irenicus dungeon. You only get one rest at any point during Irenicus dungeon, as part of SCS. Any time you try to rest after that, you'll always get interrupted by Duergar Dwarves. This warrants three pieces of advice. One, save your one-time rest for when it will make the biggest difference. Second, be very careful about expending any of your memorized spells. You only get one chance to recoup them. Save them for when they'll be needed the most. Thirdly, try to get by on straightforward physical combat whenever you can, relying on any healing potions you may find to keep yourself healthy. I show an example of this at the end where Avastrian drinks a Potion of Healing to recover some hit points following the fight with the Ogre Mage.
Rielev
Now I begin to travel in a northwest direction. A frequent occurrence will against Duergars, some of them using axes and others using crossbows. They replace the puny Goblins in vanilla BG2. They're pretty challenging given the fact that I can only rest once, so I have to squeeze every advantage that I can. Jaheira, having the best armor class in the party, always puts herself in the forefront. Once I do close in I always go one at a time. The faster I bring down an individual Duergar the faster I get myself to less attacks coming my way.
There are two Duergar battles in this video as I travel northwest along the hallways. Imoen starts using a Light Crossbow, and helps herself to any crossbow bolts that she can find.
I eventually make my way to a room with a life preservation tank in it. To make it short, the creature inside, Rielev, wants me to end its suspended state by taking the energy cell that powers its tank. I do so and now have a quest item that will be used very soon.
Jaheira has been taking a beating so she gulps down the Potions of Extra Healing that she found at the north side of the room.
Tortured Ones
Now I back track and then enter a large room on the south edge of this level. I take care of a pair of Mephits and a few traps here. The crates will have a Quarterstaff +1, and some mundane loot like a Longbow and some arrows for Minsc.
The tanks have more creatures similar to Rielev. They drop vague hints that may prove useful. The one on the east side of the room in particular provides a valuable hint regarding a Genie.
Sewage Golem
The party now backtracks to where they first encountered Rielev. A table in the middle of the room holds an Activation Stone.
They then go south, and east a little, and then north, to end up in a room just a little south of Rielev's room. They kill a mineral mephit inside. The containers have various loot, like mundane equipment, three Potions of Extra Healing, as well as scrolls of Flame Arrow and Dispel Magic.
*Note* With Throne of Bhaal installed I do have the option of de-scribing and then re-scribing spells back into my spell book. But I am holding onto all of my scrolls for now. The reason is that I want to put off getting the xp for de-scribing and re-inscribing until Imoen rejoins the party in Spellhold.
I then speak to the Sewage Golem, and order it to perform its duties (this requires the Activation Stone). I follow the Golem back to where I first encountered Aataqh, and then to a hallway that starts a little west but then stretches northwards. I conclude the video with a battle against a few Duergar.
Otyugh Guardian
Now the party goes north along the way. In a room at the other end is a monster called an Otyugh. An Otyugh can simultaneously cause Slowness and Disease with its bite attacks. I have Jaheira go on ahead, both because she doesn't have as much hitting power just yet and because she has the best armor class. Avastrian and Minsc then bring up the cavalry and hit it hard. Once it dies it's simply a matter of letting the disease condition wear off.
The chests in this room hold various loot, including an Oil of Speed, Potions of Healing, and a Helmet of Infravision that Minsc wears for the time being.
Air Elemental Statue
Now I go north from the large central room, and kill a group of Duergar.
There is a room at the end of the hallway that has plenty of traps. Imoen takes care to thoroughly search for and disarm all of them. The containers include various loot such as:
Uylene, Cania and Elyme
Now I head south and then east, where I run into a trio of Dryads. The short of it is that they want me to retrieve their acorns from a Duergar named Ilyich.
The Mistress' Bedroom
Now I head for a room to the south of the Dryads. Once I approach an alarm bell goes off. More on this later.
Imoen thoroughly searches for traps, and disarms them. Among the loot will be:
Ilyich
Now I go west from the central room, where I find a library. One thing to keep in consideration is that there will be two groups of Duergar close by. One will be at the west side of the library. The other, led by Ilyich whom the Dryads mentioned, will be in a room north of the library. If Ilyich's group hear the battle with the closer group of Duergar, SCS AI will have them rush forward to join in. It can be pretty easy to get overwhelmed if I'm not careful.
When I first enter the Library, I notice a Mineral Mephit. I let it use its Glass Dust powers a couple times first, and then let it come to me. This way, I avoid bringing the Duergar into it and I can quick-save.
Now I backtrack all the way to the room where I found the key to Jaheira's cage, killing a Smoke Mephit along the way. I then position everybody to be just to the side of the door. This has two objectives. One objective is to try and lead the closer group of Duergar to follow me and to this room, and thus avoid bringing Ilyich's group into it as well. Divide and conquer. The second objective is that some of the Duergar will include crossbow archers. The idea is that they have to come past the doorway to the room I am now in, and thus become within much closer reach when they start firing away.
Now I have Jaheira return to the Library, bring the first group of Duergar into view, and lead them back to the rest of the party. The party kills them off without Ilyich's group joining in. I have succeeded in my objectives.
Now the whole party returns to the Library. Ilyich is there, but his AI makes him hesitant to confront the party without any support, so he retreats. I then kill another Mephit. Imoen thoroughly checks out the shelves, and finds a few healing potions that wounded party members gladly guzzle down.
I now continue west from the Library. Ilyich's Duergar minions are now spread out, since they followed after Jaheira but only part of the way. This allows me to deal with them piecemeal. Ilyich and his minions gradually fall one by one. Ilyich himself leaves behind a Potion of Stone Giant Strength, and the Acorns that Uylene wants. The containers around this room hold quite a bit of mundane equipment, but also some much welcome healing potions.
The video concludes with me bringing the Acorns to Uylene. She tasks me with bringing them to the Faerie Queen.
Cambion
Now I back track to where I finally killed Ilyich. There will be a hallway leading a little north, and a door that I ignore for the time being. The hallway continues east. Imoen disarms another trap.
The hallway continues south and then a little east. At the other end is a room with a Cambion in it. The Cambion can be a tough opponent, so I saved my Haste spell for this battle specifically. Imoen clicks on the device twice to release the Cambion. I then manage to outlast it, helped along with Haste. The Cambion itself leaves behind a Bastard Sword +1.
Pocket Plane of Air
Now I leave the Cambion's room, and head for the door directly north. It requires the Air Elemental Statue to open, and leads to a pocket plane of elemental air.
I milk the Haste spell for the full duration, and kill the first few Mephits I see. I then follow the walkway leading west, and kill a couple more Mephits. A container at the far end has a scroll of Conjure Air Elemental.
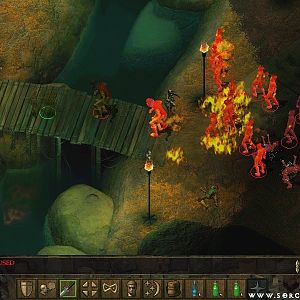
I then back track, and go a little north. There's quite a few Mephits of various sorts at the platform. They're pretty weak and with few hit points, but you still need to be careful since they are pretty numerous and that means they can affect characters with elemental attacks of various sorts (e.g. blindness, cold, fire, stun, etc.). Here it suffices for me to make sure that I gang up on each Mephit one at a time, and that all of my characters can reach any given Mephit that I am targeting.
Malaaq
Now I go north and west. I click on a small table and a Genie named Malaaq appears. The proposal is a simple one. I find his flask, and he gives me a weapon that is somehow tied to me.
It turns out that the Dryads have the flask. Now I bring it back to Malaaq, and he rewards me with 9,000xp and the Sword of Chaos (+2 two-handed sword, +1 vampiric regeneration damage), which Minsc will use in the interim.
Dungeon Portal
I return to the room where I found the Air Elemental Statue and the Helm of Balduran. To the west is another room. Some barrels have scrolls for Fireball and Armor. Now that I've cleared out the first level, and the process using what spells I had memorized where they were needed the most, I have Avastrian and Imoen put up Stoneskins and then rest up.
There is within view a portal that leads to the next level.