-

- Forums
- Chatrooms
- Gallery
- Gameplay Videos
- Upload
- Articles
- Mod Reviews
- Shop SP: Games, Movies, Books
Prologue | Chapter 1 | Chapter 2 | Chapter 3 | Chapter 4 | Chapter 5 | Tales of the Sword Coast | Chapter 6 | Chapter 7 | |
Lion's Way | Friendly Arm Inn | Coast Way | Beregost | South Beregost Road | North Nashkel Road | Lonely Peaks | |
LONELY PEAKS
First, I may as well explain where things stand. I used to include Branwen in my old BG1 parties, but now I have a preference for Yeslick. So, I'm going with a 5 man party until I can get to Yeslick. This also means more xp for my 5 members until I get to Yeslick. In the meantime my immediate priority is to get everyone in the party a +1 weapon. The reason is that mundane weapons have a minor chance of breaking upon striking a target. I get that it is tied to the overall story, but it is annoying to deal with. The sooner I get this out of the way the better. Here is where I make a start, as this area has a Two-Handed Sword +1 that Kivan will use. Coming here with most of the party members still 1st level is risky, but the battles can be won with a little ingenuity (and luck).
Sprat
I start off by exploring the southwest corner of the area. Kobolds are rather weak, just like Xvarts. But the first group is in large enough numbers that a 1st-level party still finds the use of Sleep to be prudent. The next is just three of them, so I have little trouble just walking up to them and cutting them down.
I then run into a rather flummoxed messenger named Sprat, who doesn't offer much by way of useful information.
Hurlik's Cow
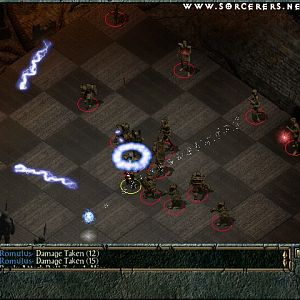
I continue east. Here's one reason why coming here with a first level party is risk, a pair of Ogre Berserkers who are significantly tougher and more dangerous than usual Ogres. Initially I try to have Jaheira use Entangle on them after Kivan marks their location. It doesn't work though, as Ogre Berserkers also have better saving throws. So now I have to employ hit and run tactics. And indeed Avastrian has brought a card that has made this battle winnable for a first level party, the Wand of Lightning from the nobleman's house in Beregost. He tags the Berserkers with a Lightning Bolt whenever he can, while Kivan and Imoen fire away with arrows. I keep doing the hit and run until one is killed off and the other is close to dying. That is when I stand my ground looking for the final blow. With a little luck, I am able to win and advance Kivan to the second level.
I continue on east and find several Xvarts attacking a cow. The cow's owner, Hurlik, pleads with me to save it. The Xvarts must be killed off before they can finish off the cow if you want to get any quest rewards for this. So I knock them out with Sleep and pick them off one by one just to be sure. I then talk to Hurlik again and get a +1 to reputation and 350xp.
Ioin Gallchobhair
I travel north and a bit to the west and then casually wipe out another group of Xvarts.
To the northeast will be Ioin Gallchobhair, and a couple of archers named Billy and Dribben. Ioin can be fairly challenging himself, especially after he quaffs his Potion of Defense. It can be a dangerous fight for a 1st to 2nd level party with the two archers added in. Kivan and Imoen start off by opening fire on Ioin before he closes in. Here again is an instance where my Wand of Lightning makes a difference, as Billy and Dribben are standing in a straight line. Avastrian hits them repeatedly with Bolts of Lightning, and Imoen helps out with her arrows, while the rest of the party goes to work on Ioin. Eventually Avastrian closes in on Dribben after Billy has been killed, with Imoen helping out, and then Dribben falls as well. After that it's a matter of toughing it out and finishing off Ioin. Note that I don't hesitate to use my Potions of Healing when they're needed.
Arghain
Now I continue on towards the northwest. I find a cave entrance and go through. I get attacked by a spider-like monster called an Ettercap. Notice how I do not use a group command to attack the Ettercap. I let it come to me, and once it closes in I manually assign Khalid, Kivan, and Imoen to attack it and kill it. Imoen reveals the reason why, there is a web trap at the entrance. It will not be tripped if everybody stands still. If you do trip it it can render your whole party vulnerable to the Ettercap's attacks. But now Imoen simply searches for it and disarms it. The crate has a Potion of Fire Resistance (which I'll keep), a gem, and a Bloodstone Necklace.
I continue west and run into Arghain. A fight is inevitable. Jaheira casts Entangle. It does not capture 2 of the other Half-Ogres, but it does hold back Arghain, which is a good thing since he's a little tougher than the others. Kivan and Imoen open fire on the two that are coming forward. The party then cuts them down in melee combat once they close in. Arghain is still caught in the Entangle, so Kivan and Imoen simply shoot him down. One more Half-Ogre then comes forward, but he's easily shot down as well. Arghain leaves behind a Two-Handed Sword +1 which Kivan will use an interim sword. Kivan, check.
Sarhendra
Now I continue towards the east conducting various battles along the way. I kill off one group of Ogrillons after putting them to Sleep. I then shoot down another trio of Ogres after trapping them with Entangle. I then touch the east edge of the map to expose another area on the world map.
I continue south, and run into a Dwarf named Sarhedra who suggests that I 'pick on the Ogres to the south.' I continue south and round out the woods a bit. Kivan marks their location, and then Jaheira casts Entangle. I don't rely solely on that though. Avastrian throws in Sleep once enough of them come into view, which puts most of them to sleep. Once this is in place, whom to shoot first is in itself a strategical decision. I hit at the Ogre Berserker first, since he's the most powerful and is likely to come out of the Entangle. I soften him enough to quickly drop him once he does manage to close in. Next, the Ogre at the edge of the Entangle, who will be the closest to coming out once he wakes up. Khalid helps out with his Sword. Next, the Hobgoblin Elites, since they can attack with their own bows once awake. After that it's a mop up.
I then get 300xp for giving the good news to Sarhedra.
My next destination is Nashkel.