-

- Forums
- Chatrooms
- Gallery
- Gameplay Videos
- Upload
- Articles
- Mod Reviews
- Shop SP: Games, Movies, Books
Prologue | Chapter 1 | Chapter 2 | Chapter 3 | Chapter 4 | Chapter 5 | Tales of the Sword Coast | Chapter 6 | Chapter 7 | |
Lion's Way | Friendly Arm Inn | Coast Way | Beregost | South Beregost Road | North Nashkel Road | Lonely Peaks | |
BEREGOST
To Beregost
Now the party makes its way to Beregost. I go towards the north exit and get some friendly advice. The video concludes with me showing where to find Kagain, an evil Dwarf Fighter who can join a party.
Garrick and Silke Rosena
The video starts with me speaking with the local town crier and learning about a bounty on a murderous madman named Bassilus.
I then go east a little and speak with a naive young Bard named Garrick. I accept his job to bodyguard Silke. Only, Silke is an evil witch with murder in her plans. I choose not to help her and she attacks me. This fight is considerably more dangerous in SCS1. She starts off with Stoneskin in place, although this is worn down relatively quickly. She can then use spells like Charm Person, Armor, Mirror Images, and Magic Missiles, which are perfectly capable of killing a 1st-level character outright.
This battle is winnable by a 1st-level party, but it may take some luck and a few reloads. Note how I had everybody besides Avastrian and Khalid change over to missile weapons. The other part of what makes this battle difficult is I don't get the chance to surround Silke. This whole quest plays out like an extended cinema whereby the party actually starts off at some distance from her when the fight begins. Being able to hit her as soon as possible is imperative.
Now I cross my fingers that:
The video shows my pulling off this desired outcome. Silke leaves behind a Quarterstaff +1, which Imoen equips, as well as a Potion of Invulnerability. The so-called Thugs she was going to kill give me a Potion of Defense as a token of appreciation. Garrick at this point becomes a joinable NPC.
The Burning Wizard
Now I head two buildings to the left, and enter the Burning Wizard. I run my cursor over a Halfling named Zhurlong. He offers a quest to get his Boots of Stealth back. The problem is I want to keep the Boots for myself. Also, he'll pickpocket me for some gold if I talk to him. So ... I don't bother.
Upstairs is a guy named Spen Gil'meh who can offer some background information in response to questions.
I then head back downstairs and have Jaheira change her spell configuration to Doom, Bless, and Armor of Faith before resting. This is in anticipation of my next battle.
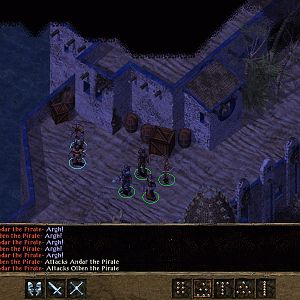
The Red Sheaf Inn
Next stop is the Red Sheaf Inn, just a little to the east. Jaheira casts Bless just before the party steps through the door. Once on the other side a Dwarf named Karlat will attempt to collect the bounty on me. He has a fair amount of hit points, and a low armor class, so this fight can be quite challenging. This is the reason for Jaheira temporarily adjusting her spells. She now hits him with Doom, the point being to maximize the party's chances of outlasting him, which they eventually do. Note that I made Kivan specialized in two-handed sword, but not spears, so he'll take a penalty with the Halberd he's currently using. I did, however, also specialize him in Longbows, so for this fight I have Kivan switch over.
I then speak with a Halfing named Perdue, who offers a quest to his sword back. Choose responses 1-2-1-1 to avoid losing the quest.
I then explore upstairs, unlocking all the chests and getting gold and gems along the way.
I then realign Jaheira's spells before resting again.
Marl
Now I head west and enter Feldepost's Inn. Once there I get accosted by Marl, who's bitter about losing a son who got killed early in his fledgling career as an adventurer. I choose responses 1-1-3-3-1 to get 900xp.
The Bartender offers drinks, rooms, and some goods for sale, with the notable ones being some spell scrolls, a Bracers of A.C.8, a Helmet of Charm Protection, and +1 versions of some armors and weapons. For the evil party the Battleaxe +1 is a priority acquisition for Kagain.
The History of the Fateful Coin
Now I head east across the street and enter the house. Inside will be Firebead Elvenhair, who would like me to purchase a copy of a book called History of the Fateful Coin. The book in fact can be purchased at Feldepost's Inn. Once I bring the book to Firebead, he rewards me with a +1 increase to reputation, an xp reward, and a book called History of the Dead, which explains the ascension of Bane, Bhaal, and Myrkul to godhood.
The Jovial Juggler
Now I go to the Inn towards the southeast corner of Beregost, the Jovial Juggler. For now, there are two persons of interest and another of curiosity.
Bjorn wants vengeance on the Half-Ogres from nearby who roughed him up.
Gurke complains bitterly about Tasloi in the Cloakwood stealing his cloak.
Oogie Wisham feels uneasy on account of Bjorn's presence, but nothing really comes of this.
Landrin's House
Now I go one house to the left, Landrin's House. Inside are the four spiders she mentioned. This can be a dangerous battle for a 1st level party, as their poison may mean certain death for a character with few hit points. As it turns out, Sleep works pretty well here as well. Only one is still standing, and after I manage to take it down without getting hit, the battle is pretty much won.
Imoen loots the chest for an Andar Gem, a little gold, some Worn Out Boots, and a Bottle of Wine. Avastrian picks up the Spider Body.
I don't show it in this video, but I rest up at the Jovial Juggler. I then head over to the Friendly Arm Inn, and get attacked by a pair of Worgs. Sleep works here as well.
Once at the Inn I give all three items to Landrin for xp bonuses and gold.
Burglary in Beregost
Now return to Beregost, and am forced to deal with a group of Gibberlings along the way.
I then show in this video a few places where loot can be scored. One is the nobleman's house towards the northeast corner. The chests at the top floor will have gems, gold, potions, and a Wand of Lightning.
Then there's a house that's almost due south from the Nobleman's house. I get caught picking a chest, but show that sometimes the guards can be avoided altogether by getting out of there right away. The chest on the second floor has a gem and a Potion of Heroism.
I then visit Taerom Fiurium's smithy during the day. He sells a lot of armor and weapons, with the notable ones including:
But for now I rest up in the Red Sheaf again and come back at night. I then come back, and have Imoen loot the chests. One of the chests has several weapons, but also a Bastard Sword +1 that Khalid will use temporarily.
I will soon be heading south of Beregost.