In this room you'll find Ability Notes and a book that describes Avernus' rather horrific experiments in using Blood Magic to augment and control the Darkspawn taint that comes with being a Grey Warden.
On a table in this room you'll also find an Alchemical Concoction. Its your choice whether you drink it or not. If you do choose to drink it, it's implicitly an evil choice. You gain access to two new talents. The talents you get depend on your base class, and are as follows:
Mage: Dark Sustenance - Lets you expend a small amount of health in order to significantly replenish your Mana; Bloody Grasp - Another lets you expend a small amount of health in order to inflict spirit damage on the target, with Darkspawn suffering greater damage than usual.
Rogue: Nimble Passage - A passive talent that allows your Rogue to move more quickly while using Stealth, and an increased chance to dodge physical attacks; The Tainted Blade - Allows the Rogue to score extra damage based on his or her Cunning score, but will also continuously decrease health.
Warrior: Blood Thirst - replicates the effects of a Haste spell for the Warrior, but increases the damage sustained by the warrior when he is struck, and drains health repeatedly; Blood Fury - Expends health in order to knock back nearby enemies, subject to their failing a physical resistance check.
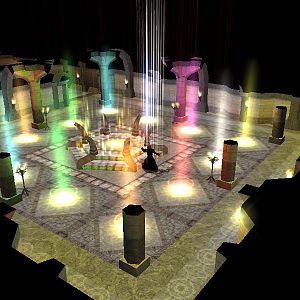
Here is Avernus' Sanctum. Once he explains the past, you are faced with a basic choice between siding with him or siding with the entity that possesses the body of Sophia Dryden. If you decide to side with Sophia, you can either kill Avernus here or convince him to head back to the summoning circle on the second floor and help Sophia kill him there. If you do decide to side with 'Sophia' and kill Avernus, wherever you decide to kill him, he'll leave behind the Robes of Avernus.
On the other hand, if you rejected Sophia's offer of a deal and killed her, the dialogue progresses towards Avernus being the one to help you seal the breach in the Veil on the second floor. Once there, you'll have the same choice as with Sophia, let him go free or kill him then.
As an aside, there is also a few containers in this sanctum with random items.
Sorcerer's
Place is a project run entirely by fans and for fans. Maintaining
Sorcerer's Place and a stable environment for all our hosted sites requires a substantial amount of our time and funds on a regular basis, so please consider supporting us to keep the site up & running smoothly. Thank you!
Supporting Sorcerer's Place
Has Sorcerer's Place been useful? If you'd like to show your appreciation
for our hard work on the site, and help us pay the bills the site generates
every month, please consider helping support SP.
Thank you!