Dragon Age logo

BioWare


Dragon Age: Origins Online Walkthrough by David Milward


INTRODUCTION  |  GETTING STARTED  |  NPCs  |  ORIGINS  |  RECIPES |  ITEMS   
Areas in the original game:  
Brecilian Forest  |  The Camp  |  Circle Tower  |  Denerim  |  The Final Battle  |  Haven  |  Landsmeet  |  Lothering  |  Orzammar  |  Ostagar  |  Redcliffe  |  Ruined Temple  
Areas available as Downloadable Content:  
Honnleath  |  Return to Ostagar  |  Warden's Keep 
About the Walkthrough  |  About the Maps  |  About the Author  |  About Playing the Game  |  Where to Begin
Disable all ads!

Ruined Temple: 
Ruined Temple  |  Mountain Lair  |  The Gauntlet  |  Wyrmling's Lair  

Mountain Lair

Wyrmlings Lair

  1. Here is the way back to the Wyrmlings Lair. When you first enter here, you will be treated to a cutscene of the High Dragon taking a few reconaissance swoops around the party before perching on a high rock nearby.

  2. Kolgrim Pleads with the DragonIf you've reached an agreement with the Cult leader, Kolgrim, however, he and several Cultists as well as a Drake will be here. The Dragon will bar your approach threateningly. Kolgrim however will intercede and somehow convince the Dragon to let you pass.

    If you successfully fulfill Kolgrim's quest to corrupt the Urn of Sacred Ashes with the Vial of Dragon's Blood, come back to him here. He then offers you 'power'. This means drinking a goblet with dragon blood in it. This unlocks the Reaver specialization.

    Reaver's CupIf you aspire to battle the High Dragon, you will need Kolgrim's Horn after killing him. Even if you fulfilled his quest to corrupt the Urn of Sacred Ashes and unlocked the Reaver specialization, it is still open to you to kill Kolgrim for his horn. Simply speak to him and pick the dialogue option that involves the belief that he's too dangerous to let live.

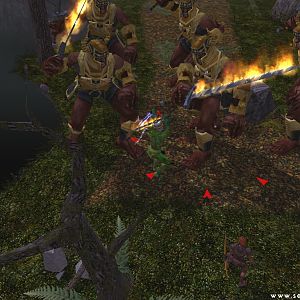
    Now it's a question of how to defeat the High Dragon, who can provide a very difficult fight. The Dragon can nail your whole party with its fiery breath. It also has a special attack that involves flipping a character and biting repeatedly in the air. Flanking also will not work since it can attack with its hind legs. Nonetheless, there are a few guidelines.High Dragon Fight

    To state the obvious, make sure you're stocked up plenty with Lyrium Potions and Health Poultices. Even allowing for healing spells, the Dragon can often dish out damage with such frequency that waiting for a cooldown may be too late.

    Have your mages and rogues use staves and bows to attack from a distance. Keep in mind that the Dragon can fly up and come back down at another spot, so give yourself room to run to a new spot.

    Now it's a question of how to set up your tank. One option is to pick a character that is immune to her special attack just for this fight. One candidate is Shale. Equip her with an armor crystal that imbues fire resistance, and this should work. Another possibility is the Mabari War Hound. He's also immune to the special attacks. Equipping him with the Black Metal Torque and the Kaddis of the Siege-Breaker will provide a good combination. I put off this fight until my party was about 16th level, so what worked for me was an Arcane Trickster that's revved up with Combat Magic and Shimmering Shield. Keep in mind that unlike Shale, the Arcane Warrior can be knocked down. Also, keep an eye on your mana bar in case you need to drink a Lyrium Potion to keep your defenses up.

    As for the spellcasters, spells that minimize the Dragon's ability or make it more vulnerable to damage are key. Examples include Misdirection Hex, Death Hex, Telekinetic Weapons, and so on. The Dragon can also be frozen temporarily, although it breaks out sooner than most other monsters. You may want to save Cone of Cold or Winter's Grasp for when the Dragon happens to catch a party member in its special attack.

    Once the Dragon falls, its leaves behind:

    Maetashear War Axe
    Antivan Longbow
    Deadhead Charge
    Crow Dagger
    Grandmaster Flame Rune
    Heavy Infantry Helmet
    Heavy Plate Armor x2
    Heavy Plate Boots
    Heavy Plate Gloves
    Metal Kite Shield
    Pure Bitch Braid
    Qunari Siege Gloves (Hardened)
    Storm Hands (Inscribed)
    The Long Sight (Drakeskin)

  3. Here is the way to the The Gauntlet.


Amazon.com
Amazon.ca
Amazon.co.uk
Sorcerer's Place is a project run entirely by fans and for fans. Maintaining Sorcerer's Place and a stable environment for all our hosted sites requires a substantial amount of our time and funds on a regular basis, so please consider supporting us to keep the site up & running smoothly. Thank you!

Disable all ads!