-

- Forums
- Chatrooms
- Gallery
- Gameplay Videos
- Upload
- Articles
- Mod Reviews
- Shop SP: Games, Movies, Books
|
|
SEVERED HAND – LEVEL 1
Note that I have a certain method for organizing this Chapter. There will be a lot of going back and forth between different levels for quests in this part of the game, and yet I don't want to have one sprawling page for all of Chapter 6. So I use a compromise. If a quest originates on a certain level (e.g. on Level 1) I'll show the complete method for resolving that quest on the page for Level 1, even if it involves the party travelling to different levels of the Hand.
Guard Commander
The chapter begins with the party leaving the Fields of Slaughter and going to the Severed Hand. I immediately get accosted by the Guard Commander so a fight is inevitable. Note that there's an xp bonus for pretending to be a delegate, and tricking the Guard Commander into revealing that Xavier Torsend can issue Delegate Passes.
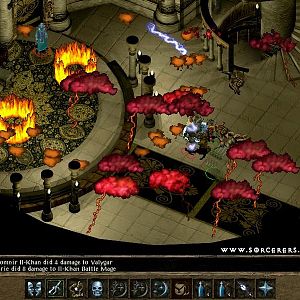
This fight starts right away with many of the enemies already in view and without a chance for me to buff up beforehand. So it is imperative for me to take steps to give myself an immediate edge. Lord Markus goes straight for the Commander. Akutagawa attempts to use Quivering Palm on one of the Chimera (it sometimes works). Stygar hits the oncoming forces with Power Word: Blind in a flash. Tithian and Lady Elanna defend themselves with Mirror Image.
Alliria provides the decisive advantage with a Tremor spell, giving the warriors free reign to attack the enemy while they're knocked down and unconscious. Lady Elanna accentuates this advantage by immediately following up with Executioner's Eyes, which allows the warriors to inflict the maximum damage possible on the monsters before they can get back up.
Meanwhile Stygar switches over to his Club of Disruption and quickly takes out the Apocalyptic Boneguards,before switching back to his Balance axe.
Lady Elanna then casts Mordenkainen's Sword. Tithian and Alliria switch over to their missile weapons. The trio then take out the Archers that are hanging back.
It soon becomes a mop up. The entrance to the Fortress of the Severed Hand lies just ahead.
Zigma
First I buff up to the max, including Holy Aura and Mass Haste. There's a specific reason for this. Now I step in through the front door.
I am immediately attacked by several Guards led by a Monk named Zigma. Now I feel the need to digress for a bit. Another item you should be on the lookout for is Tymora's Loop, a ring that provides a permanent +3 bonus to luck while worn. The potential benefits of this ring are immense, since it basically improves any dice roll by +3 but not above the maximum.
One of the frequently touted benefits is the chance to improve a warrior's chances of landing a critical hit, and this was something that I used to do as well. But in retrospect, and from experience after recent playthroughs, this ring is much more effective in the hands of a dedicated damage caster.
Let me put it this way ... For all characters it will provide certain salient benefits like improved saving throws or improved skill checks.
For a warrior the luck bonus will affect 3 dice rolls: the attack roll, the weapons' base damage, and the chance to land a critical hit (which is admittedly sweet). And furthermore the attack will affect only one target.
For a damage caster it will improve rolls for every damage dice of an offensive spell. Consider that Elanna now combines Tymora's Loop with the Rabbit's Foot for a combined luck bonus of +4. It will significantly increase damage output for offensive spells. It will also improve the number of Mirror Images she gets when she casts that as a defensive spell. Now consider also that the dice rolls of the luck bonus will affect multiple targets instead of one. For me, giving the Sorceress the Tymora's Loop is an easy choice.
For quite a few players, a Holy Grail kind of question is how to get a Tymora's Loop. I used to do it through the fight against Tyrannar Brutai, checking his corpse and his chests afterwards, but that's such a long and tough fight that it became masochistic. The key is to understanding how random drop tables work. I can do no better than to refer to the discussion on this forum page.
If you take a look at monster files (*.cre) with either Dalekeeper 2 or NearInfinity, you'll notice that some creatures' inventory files actually contain references like RT12_R and the like. These are references to different random item drop lists. As lendial explains at the bottom of the page, the RT14_V and RT15_R lists provide the best relative chance of a Tymora's Loop drop.
Another thing to keep in mind is that both lists actually involve a significant chance to not drop any item at all. Taking that into consideration the best opportunity to score a Tymora's Loop is:
The earliest opportunity is actually Kratuuk but he has only a single instance of RT14_V in his inventory, which would have been frustrating. Saablic Tan and Wanmok both have 2 or 3 references to the drop lists in their inventory, but that battle is too tough and too long for me to want to force it.
The fight that meets all 3 criteria is the one against Zigma, who has 3 references to RT14_V in her inventory. The fight is easily won, all the more so with Holy Aura and Mass Haste casted before hand, and helped along by spells like Executioner's Eyes and Power Word: Blind. I actually managed to luck out and get this after a few tries. Lady Elanna now wears a Tymora's Loop for the rest of the game.
Xavier Torsend
Much of Chapter 6 involves racking up xp bonuses for various quests. I head north and speak to Xavier Torsend, who's the diplomat for the Legion of the Chimera. I get xp bonuses for learning what led to the war between the Legion and the Ten Towns, and for convincing him to give me a Delegate Pass.
I then head south, and speak with Jerro Stoh. I get xp bonuses for learning that he and the other workers are slaves held in the Severed Hand against their will, and that the nearby Glabrezu is an immortal demon who cannot be killed.
I then speak with the Glabrezu and get another xp bonus for confirming that it is immortal.
I conclude the video by informing Xavier Torsend that the workers are actually slaves being held against their will, and convincing him to resign and leave the Severed Hand.
The containers here contain Death's Hand (Longsword, -4 to attack, heals wielder 1d4 hit points with each strike), and a spell scroll for Fiery Cloud. Tithian already scored one of these scrolls, and it is a useful spell, yet another lingering damage spell that he can use in addition to Stinking Cloud, Cloudkill, and Acid Fog.
Ysha's Plans
I begin the video by going to the room just west of where I met Xazier. A vase holds Rage of Chaos (+3 Bastard Sword, cursed and cannot be removed except by a Remove Curse spell, +2d6 damage vs. lawful creatures, random chance of wielder going berserk) but I have no use for it.
I go the room immediately south and speak with a woman named Ysha. Her predicament is that she did not construct the Severed Hand levels according to the original plans, and she fears for her life in the event that her error is discovered. She also cannot destroy or hide the original plans. I get the plans from her so I can see what I can do.
I then go up the stairs to the south to reach the second level. I then go to the north end of the level, and speak with a mage named Kav Lathram. He is able to alter the plans so that they resemble the work that Ysha has actually done.
I conclude the video by bringing the plans back to Ysha for an xp bonus.
The Food Thief
Now I go towards the northeast corner of the level, and speak with a woman named Vashti. She wants me to plead with the Kitchen for more food for the slaves.
I then check out the room at the east side of the level. A container holds the Spiritcaller (+2 Battleaxe, Inflict Critical Wounds 3/day, Summon Shadows 1/day) but I'm not interested.
So I go up 3 flights of stairs (avoiding the outer edges of the levels) and then go towards the northwest corner of the 4th level. I speak with the cook, Miram, who is dead set against any more food for the slaves. By the way a container in the kitchen has Demon's Blood, which can be used in another quest later on if you're so inclined.
On the way down, at the second level, I check out the container near Kav Lathram. It has a Virulent Agent (related to the same quest as Demon's Blood) and a Ring of Nourishment which I'll use shortly.
I then break the news to Vashti. She has me watch the room discretely while she feeds the rest of the slaves. I then notice a Lizardman-type creature sneak some food away.
I then go the room where I found Spiritcaller. I manage to resolve matters, with a few xp bonuses to boot, by giving the creature the Ring of Nourishment.
Now it is time to go up to the second level.