-

- Forums
- Chatrooms
- Gallery
- Gameplay Videos
- Upload
- Articles
- Mod Reviews
- Shop SP: Games, Movies, Books
|
|
Shaengarne Ford | Horde Fortress Exterior | Goblin Warrens | Horde Fortress Interior |
SHAENGARNE FORD
Dereth Springsong
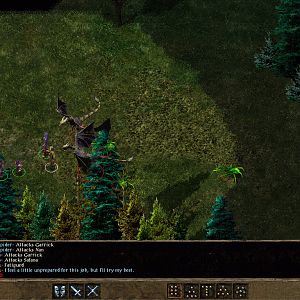
Now I leave the Palisades through the gate in the northwest corner, and travel to the Shaengarne Ford, to start Chapter 1.
An Orc Chieftain named Torak Skullsplitter warns me to stay away. I now begin a series of confrontations with his Broken Tusk Clan. The first fight involves several Orc Warriors and Archers, as well as an Orc Shaman, behind a continuous series of Kegs. Lady Elanna puts several to Sleep, while Lord Markus and Stygar open up a breach through the line of Kegs. Alliria and Tithian fire away at any Archers that are still awake. As Lord Markus, Stygar, and Akutagawa make their way through the breach, reinforcements arrive about 2 times. Note also that Orc Shamans only cast lower-level spells, and usually aren't anything to fret over. And each time, Lady Elanna is ready with another Sleep spell. I don't show it in this video, but the party is religious about accumulating any and all treasure it can get its hands on after these battles. Lots of gold and gems and healing potions to go around. Alliria also begins to accumulate arrows as well.
At around 5:45, Torak tries to scare me away again. This starts another fight with another large force of Orcs. This now includes an Orc Firestarter. There will be a nearby Keg of Blasting, and the Firestarter will hit it with a flaming arrow, causing the keg to burst with a Fireball-type effect within three seconds. And yes, the Firestarter will still be dumb enough to do it no matter how many other Orcs happen to be close by. Here I show one way of dealing with this, which is to simply retreat a little. This forces the Orcs, the Firestarter included, to simply follow after me and away from the Keg of Blasting. Once they follow after me, Lady Elanna makes repeated use of Sleep to put most of them to rest. At this point, I am rather judicious about using my missile ammunition. There won't be a lot of crossbow bolts or sling bullets to be found at this point in the game, but Alliria has been accumulating lots of arrows from the Archers that I killed previously. So she simply fires away at any that are still standing, while Lord Markus takes down any that come close enough. Once the still awake Orcs are dead, she then takes out the sleeping Orcs one by one.
This also has an additional benefit in that I avoid bringing into view another Orc force that was a little to the northeast. At around 9:55, I take out this force as well, using familiar tactics.
I then journey a little north and west, and cut my way through the smaller line of Kegs, the Keg of Blasting included. On the other side is a Druid named Dereth Springsong. I get an xp bonus for liberating his home from the Orcs. He also has a request for me, to find his wife, Sabrina. He opens a path leading west, near where I first entered Shaengarne Ford.
Sabrina Fairwynd
Now the party travels along that path, fighting small groups of Orcs along the way. One group (at around 0:44) includes an Orc Runner, whose job is to set a Keg of Blasting in my midst, and an Orc Firestarter, who will hit the Keg with an Arrow of Fire hoping to cause an explosion. In Tactics, both the Runner and the Firestarter will have more hit points, so don't bother with them. Smash the Keg apart instead before it explodes.
Note that around 2:20 is another theme. My characters don't have extended range weapons (e.g. spears) yet, so I retreat to avoid fighting along a narrow pathway. The problem with narrow pathways is that often only 1 or 2 characters can attack the monsters, and may themselves be in danger of getting overwhelmed. Instead, I retreat a little so that I can use the more open field to surround and kill off the Orcs one by one.
I eventually make my way towards the northwest corner of this area, where I find Dereth's wife, Sabrina Fairwynd. This is a plum opportunity to get numerous xp bonuses just from the dialogue. Here, I got ones for simply rescuing her, for learning about a fire trap (based on Kegs of Blasting) that the Orcs have set up, and for offering to escort her back to Dereth. She then teleports away.
The party then makes its way back to Dereth's house. Dereth rewards me with another xp bonus, as well as a Scimitar +2 that Alliria equips.
Orc Blast Trap
Now I head a little north, and then up a path leading east. I run into 2 more bands of Orcs, and the tactical themes are pretty much the same. Lady Elanna drops as many as she can with Sleep, while the others take out the ones that are still awake. Whenever a Runner leaves behind a Keg of Blasting, take out the Keg before it explodes.
The path will curve north, and then west. The end of the path affords a view of the trap that Sabrina was referring to. There are several Kegs of Blasting across the river. The Orcs' intentions was that they would set the Kegs to explode if you had approached from the south. But now I've taken out the Firestarters that were on the east bank of the river. Alliria uses her bow and arrows to destroy the Kegs one by one and render them harmless.
The party now goes back the long way around to other side of the river. Going north, I get another visit from Torak. I then take out more Orcs using the same strategies. I then see Torak yet again, and he leaves, this time setting down a slab of stone that can be used as a gangway. I then waste another group of Orcs.
I cross the stone gangway to reach the next part of the Ford.
Emma Moonblade
Once the party crosses, there will be a very large force of Orcs due east, and a few more Archers to my left. A Priestess of Selune appears, but then a Troll steals a sword from her and runs away. Alliria and Tithian switch to missile weapons and begin taking out the Archers to the left. Elanna puts as many of the Orcs to the east to Sleep as she can, allowing the warriors to go to work.
Once the battle ends, Emma has a new quest for me, to recover the Moonblade from the Troll that stole it.
Captive Villagers
Now I move straight ahead east. A villager named Kaitlin Silvertongue informs me that the Broken Tusk clan is holding nearby villagers captive, and will kill them if I try to confront Torak directly. She suggests I might be able to sneak in behind Torak to open the gate leading to the villagers and then rescue them. She also suggests that something from a nearby abandoned apothecary might help. The apothecary is in fact the dishevelled house in view just a little to the north, and it has a Potion of Invisibility.
The method is pretty simple. I have Akutagawa go into hiding, sneak into the main Orc fort, turn the lever which is at the northwest corner of the fort, drink the Potion of Invisibility, and get back out.
North of where I first entered this area is the now opened gate. I go across, and slaughter a massive force of Orcs, aided as always by Lady Elanna's use of the Sleep spell.
I then go west, and kill off the one remaining Firestarter in order to ensure the villagers' safety. A crate just west of the villagers has the Clenched Fist (+1 Club, gold piece 1/day), which Stygar will use as an interim blunt weapon.
I then inform Kaitlin that the villagers are safe for an xp reward.
Torak Skullsplitter
First, in the southeast corner of the area will be another merchant named Arte. Most of his wares are mundane, but some of his more unique ones include:
Now that the villagers are safe, it's time to confront Torak. Torak himself is rather tougher with the Tactics mod installed, as he packs quite a wallop and takes a fair amount before going down. He also has a LOT of Orcs, both Warriors and Archers, to help him out. This battle is where Alliria makes her first use of the spell Entangle. The Orcs' saving throws aren't great, so a lot of them get caught in the spell's area of effect. The few that do come forward are chopped down. Lady Elanna meanwhile is helping out with repeated castings of Sleep, particularly with the Archers in mind.
The key success of this strategy is that Torak separates himself from the rest of his band. Alliria then shows how the Alicorn's Lance spell can be used effectively, to render a particularly dangerous foe easier for my warriors to hit with their weapons. The best part is that there's no saving throw against it. Once he falls, Alliria takes shots with her bow until the Entangle wears off. Once it does wear off, the party then closes in to kill any Orcs still awake, saving the sleeping ones for last.
Torak leaves behind a Key, a Leather Armor +1, as well as a Battle Axe +1, which Stygar equips.
I then inform Kaitlin Silvertongue of Torak's death for another xp reward.
Now I begin to make my way through a trail that leads west and then north of the camp, and kill a few more Orcs along the trail. A crate at the east end of the camp has 10 Final Words (+1 throwing daggers, 10% chance of Silence on target). At the end of the trail is a cave entrance.
Cave of Slimes
The cave itself has a number of monsters, including Slimes, Slime Zombies, and Ochre Jellies. These creatures respond best to slashing damage. Also, be mindful that Ochre Jellies can inflict additional acid damage. Remember not the rush them, but to let them come to you instead. This way, you only have to deal with at most 1 or 2 at a time, as opposed to dealing with a mass attack by bringing many of them into your fog of war all at once.
Another type of foe are Carrion Crawlers, which can paralyze party members. I look to get in a few shots with missile weapons as one of them is trying to close the distance. By the time it gets close enough, I can kill it much more quickly.
There are two unique items to be found along the northern edge of the cave. Haft over Head (+1 throwing axe, blunt damage instead of slashing damage) can be found in the northeast corner of the cave.
Somewhat west of the northeast corner is Interloper (+1 Studded Leather, wearer under the effect of Non-Detection, +2 to Hide, +2 to Move Silently), which makes for a decent interim armor for Alliria.
Vrek Vileclaw
Now I begin with a couple of spell protections. Lady Elanna begins to make use of Mirror Image as a defensive measure. Alliria casts Barkskin on Lord Markus. I'm counting on the Paladin to score the heavy damage against the upcoming boss monster, so I want to increase his durability.
Now I step ahead, and initiate dialogue with a Troll named Vrek Vileclaw. I get an xp bonus for learning that Vrek is trying to run his own human-cattle farm. Combat begins.
First, I let the Orc Warriors close in around me. Once they're bunched together, Lady Elanna puts a few of them to Sleep. Alliria begins to open fire on the Shaman.
The rest of the party takes out the one Orc Warrior who was left standing after Elanna's Sleep spell. Once the Warrior falls, they go all out for the Shaman. The Shaman can be pretty dangerous in combination with Vrek, especially if he catches party members with a Hold Person spell.
A couple more Orcs Warriors will arrive as reinforcements from the north, so Elanna uses Sleep again.
Once the Shaman falls, the rest of the party goes all out for Vrek Vileclaw himself, who's almost entirely without support now. I begin to use a number of measures to improve my odds in combat. Alliria hits the Troll with an Alicorn's Lance spell, while Tithian uses Faerie Fire (as an innate Drow ability) on him. Stygar now uses his Tempus' Strength power to up his combat prowess.
Alliria and Elanna are busily taking out the two remaining Orcs that are still awake. Once the last Archer falls, Alliria and Elanna begin pumping the Troll with Arrows of Fire and Magic Missiles respectively to help out the other party members.
Now remember, Trolls can only be killed permanently if they're hit with fire or acid damage while they're down. Alliria delivers the final blow with an Arrow of Fire.
After this, it's a matter of taking out the sleeping Orcs one by one.
The chest at the west end of the cave has the Moonblade that Emma wants back.
Moonblade of Selune
I don't show it in these videos, but I often rest up for random monsters and experience. Just before the start of this video, I did this until I got just enough experience points for Lady Elanna to be a little short of the 5th level.
Now I come back to Emma, and get an xp reward for bringing the Moonblade back to her. She lets me keep it though. The xp reward is enough for everybody besides Lord Markus to advance another level. Lady Elanna acquires the Web spell, which will be very helpful in a soon to come battle.
The Moonblade of Selune itself (Longsword, +2 to hit, +4 enchantment, bypasses armor bonuses from shields or body armor, scores magical damage on target but with no Strength bonuses or sneak attack damage, double damage against undead, scrambles attempts by the target creature to cast spells after being struck with it) is a fairly impressive weapon.
In my previous walkthrough I had Alliria use it. Now I have Tithian use it. The reason being that my usual set up is for Tithian to use the Brilliant Short Sword +5 with the Giant's Cap, and the Expertise feat at the same time for more armor class. As it turns out, Tithian, being a Drow Elf, also has the Martial Weapon: Longsword feat. I also installed the component from the Light of Selune mod that allows the wielder of the Moonblade to apply Dexterity bonuses to attack rating instead of Strength if he has the Weapon Finesse feat. This makes sense considering how the Moonblade is described. Tithian can switch over to the Moonblade as a secondary weapon, especially when faced with undead or spellcasters.
Gaernat Sharptooth
Note that I start showing the idea of daily preparations. The beginnings are small, Stygar casting Magic Circle against Evil, Tithian casting Mage Armor on himself, and Alliria casting both Barkskin and Bull's Strength on herself.
I head north, and kill a Highland Snake right away. I then head north and kill a Verbeeg Giant.
I now set up at a bend near where I first entered this area. I then send Akutagawa ahead, and he manages to lead a few Harpies away from the rest of the monsters. Harpies can cause a fear effect on party members, so Stygar casts Remove Fear on the party. I then rest up and prepare again.
Again, everybody stays put at the bend except for Akutagawa, who moves on ahead to start a dialogue and ensuing combat with Gaernat Sharptooth. Akutagawa doubles back and leads on the pack of Wererats led by Gaernat Sharptooth, along with a couple of Harpies, several Orc Archers, and a couple of Orc Shamans.
They're capable of overwhelming my party if all manage to reach me all at once, so this is one of my earlier examples of crowd-control. Once Akutagawa regroups with the party, I then have Alliria plant Entangle, and Elanna plant Web, over that bottleneck. This set up acts as a crowd-control filter. Many of the monsters will get caught, while the odd one or two or three will make it through. The odd one that does get through becomes easier pickings for the warriors, waiting for the next batch to break through, and so on. When Gaernat does manage to make it through, I tag him with both Alicorn's Lance and Faerie Fire to make him easier to hit.
The Entangle and Web eventually wear off, leaving a few other Were-creatures and some Orcs that didn't follow me into the crowd-control zone. But the strategy has served its purpose, by effectively cutting the monster horde in half, allowing me to deal with each in separate turns.
Note how Lady Elanna responds to various situations. She makes repeated use of Sleep to keep as many Orc Archers low as she can. Sometimes monsters still love to single her out, but she has more than one response. One is to simply defend herself with Mirror Image. The other is to cast a Chromatic Orb at the monster coming after her, which often stuns the monster in its tracks.
Gaernat himself will leave behind a couple Lamp Oils, and scrolls of Globe of Minor Invisibility and Halt Undead.
The video concludes with me killing a pack of small Spiders, along with the Queen Spiders. This fight shouldn't be difficult, but do keep an eye out for poisoning. The way is now open to the Shaengarne Dam.
Malarite High Priest
As soon as I step into the new area, I get attacked by a few each of Malarite Priests and Arctic Boars. The Priests cast lower-level spells, so they aren't especially dangerous. They like to use Entangle, but in this instance, I don't mind. They're not really a threat at long range, and I can let the Boars come to me so I can kill them first. Once the Boars are gone, I simply persist and struggle my way towards the Priests so that I can kill them as well.
Note that there's also a quest here to undermine the damn by taking out its support beams. The first support beam is just to the north of where I first entered. Lord Markus and Stygar simply hack it down.
The next fight is the same thing, not minding the Entangles and letting the Mad Cat come forward so that I can kill it by itself. However, once the Malarite High Priest shows up, I have Alliria, Tithian, and Elanna concentrate missile fire on him, since his spells (e.g. Call Lightning, Unholy Blight) are somewhat more dangerous.
Once the Mad Cat dies, I have Lord Markus press on ahead so that he can stay on top of the High Priest. Alliria helps him out with missile fire, while Lady Elanna adds in Magic Missiles. Another Malarite Priest comes towards the rest of the party inside the Entangles, and this allows me to cut him down. Once the High Priest dies, the remaining Priest is an easy mop up.
In one of the chests Tithian finds a few Flaming Oils, and a Oil of Fiery Burning, which may come in handy later. He also finds the Thy-Dunag Blade (+1 Shortsword, +2 bonus to attack).
Shaengarne Dam
First, I go a little west and then a little north. There's a bridge that is apparently in need of repair.
Then I go east a little for another fight. The strategy is about the same. Don't worry overly much about the Malarite Priests and their spells. Take care of the animals that come forward first, then take out the Priests.
At this point, and I don't show it this in the video, I rest around for a bit for random monsters and xp points until I'm just a little short of advancing Stygar, Akutagawa, Alliria, and Elanna to the 6th level. The key point of this is so that Elanna can learn the Fireball spell, which will help during a major battle at Shaengarne Bridge. Alliria will also be able to cast Spike Growth.
Now I advance forward and north, where there's more Malarite Priests, Arctic Boars, and Orc Archers. I deal with this by a process of attrition, taking out as few enemies at a time as I can while avoiding bringing the rest into view. Once I feel that I've thinned out the enemy ranks enough, that's when I charge in to finish off the rest.
Clicking on the Support Beam at the northwest corner yields some Lumber that I'll use very soon.
Alliria then uses her arrows to bring down the central Support Beam, and completes the destruction of the dam. The party gets an xp reward for this.
I then use the Lumber to repair the small bridge leading westwards.
Shaengarne Bridge
The video starts off with the cutscene whereby Guthma orders the destruction of the Support Beams of Shaengarne Bridge.
There's three possible outcomes, take your time and let the support beams get destroyed, let one support beam get destroyed, or race to the Ogres and kill them in order to keep the support beams and the Bridge intact. The latter will net me the biggest xp reward, but in Tactics this can be quite a challenge.
So, I made a point of not coming in until Elanna can use Fireball and Alliria can use Spike Growth.
Now initially, I'll get assaulted by a group of Orcs and a Bugbear. Try to take them quickly without bringing in any other foes into view. Use missile weapons to take out their archers to avoid this if you can. Alliria casts Call Lightning, which not only takes out an Orc Shaman instantly, but will activate periodically over what will be a very long fight. I quick-save here so I don't have to do the cutscene over and over again.
Now I head due north, and hug the right side as tightly as I can in order to bring a minimum number of foes into view. Once I reach the west end of the bridge, at least a Bugbear, a couple of Snakes, and a Malarite will come into view. I take out the Bugbear and at least one of the Snakes as quickly as I can in order to open a path to the right side of the Bridge. If the Malarite casts Entangle, I may as well reload and try again.
Now I head for the right side of the bridge. Make sure that a) none of your characters are too far behind, when you run into the boss here, so that all will be in a good position to head east and b) have a character with high Wisdom in the lead.
The reasons are as follows ... The leader of the force holding the bridge is a Sorceress named Xuki. A character with a decent Wisdom score will get an xp bonus if he or she can call Xuki on her decoying tactic. But once the gloves are off, several Malarites will appear instantly nearby, including three Malarite High Priests. This is why its important to have everyone in good position before bringing Xuki into view. You don't want anyone surrounded and unable to head for the east side of the bridge.
Once I do get everyone to the east side, I have my warriors take out the Ogres as quickly as they can to make sure the Support Beams stay intact. Alliria casts Entangle, and then Spike Growth. Elanna chips in with Web. Now Elanna blasts away with Fireball after Fireball.
At some point, Elanna manages to finish off almost everybody caught in the crowd-control zone, with only a Malarite High Priest. Alliria, Tithian, and Elanna make a point of finishing him off from afar. Markus, Akutagawa, and Stygar have also killed off the Ogres at roughly the same time.
This means it's high time for everyone to go after Xuki. Lord Markus, Akutagawa, and Stygar stay on top of Xuki with their melee weapons. Alliria and Tithian train their missile weapons on her.
Throughout this phase of the battle, I make generous use of any healing potions I have to try and keep my hit points maxed. The reasons for this is that Xuki has a few dangerous tricks up her sleeve. She can unleash a Fireball herself at one point. Another tactic of hers is to use Animate Dead once or twice, and then casting Stinking Cloud over the area, with the idea that the Cloud-immune undead can take free shots at characters that have been rendered unconscious. She can also cast Improved Invisibility either on herself or on one of her undead summons. She can also cast Chromatic Orb, Web, and Charm Person, and she will keep herself protected with defensive spells as well.
The point behind using healing potions to keep my hit points as close to the max as possible is that it provides insurance against when characters may find themselves scorched, knocked out, paralyzed, stunned, etc. on account of Xuki's tactics. It buys them time to survive the damage they may incur while incapacitated, and then they can use another healing potion once they've recovered.
Bottom line, you gotta take everyone else out first, but with persistence (and a little luck) you should succeed this way.
There is one last annoyance I had to deal with in this fight. I had to kill off a Chosen Zombie that Xuki had cast Improved Invisibility on.
Xuki leaves behind:
The barrel near Xuki will have Footman's Folly – A +1 small shield that either Markus or Stygar can use as part of alternate weapon set.
One more thing to keep in mind, it is not enough to take out the Ogres. If you leave this area, or rest, before you've cleared the entire area of any monsters, the remaining monsters in this area will destroy the support beams. So ... I make a sweep of the area, and kill of any remaining monsters. Once they're all dead, that's when I get the xp reward for saving the Shaengarne Bridge from destruction.
Next up is the Horde Fortress.