-

- Forums
- Chatrooms
- Gallery
- Gameplay Videos
- Upload
- Articles
- Mod Reviews
- Shop SP: Games, Movies, Books
|
|
Shaengarne Ford | Horde Fortress Exterior | Goblin Warrens | Horde Fortress Interior |
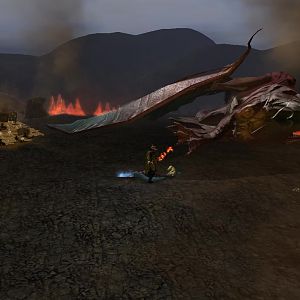
GOBLIN WARRENS
Morkul
As soon as I get inside the Warrens, there will be a large force of Goblins led by Morkul to the south. Akutagawa goes into stealth, and then walks up to and kills one of the Goblins. He then doubles back, in order to lead the Goblins into a trap of my making. Here I can set up crowd-control, because the narrow passageways act as a bottleneck. Alliria casts Spike Growth, and Elanna cats Web in advance of the enemies' approach. When they're stuck, Elanna cranks out Fireball after Fireball. The warriors mop anybody who happens to make it through. Once just a Shaman and Mokrul are left standing, Elanna cranks out repeated Magic Missiles to finish them off.
I then loot the camp for various items, including some Arrows +2, Bolts +1, and Sparkling Bolts +1. One of the tents also holds scrolls of Fireball, Skull Trap, and Vampiric Touch.
Gothrog Zogar
Now I go west a little bit. Akutagawa scouts out a group of Orcs. The theme is a familiar one. Akutagawa marks the location, and Lady Elanna gets the jump with a Fireball. They then regroup with the rest of the party. Lady Elanna times another Fireball just as the Orcs are about to bend around the corner. Most of the Orcs are then softened up for my warriors. The Orc Witch Doctor is soon left by himself and helpless.
The camp has some more loot, including a Returning Frost Dart and a random Sanctuary Buckle +1.
Ogrok
Now I head westwards again. In the southwest corner of this area is another large force of Goblins led by Ogrok. It also includes a Goblin Sorcerer, a Goblin Shaman, and a Goblin Worg Rider Captain, among others.
These guys are more numerous so crowd-control becomes expedient. This time Lord Markus sticks his neck out just a little, and then leads them on to my party. Alliria and Lady Elanna throw down their crowd-control spells. Elanna then cranks out Fireball after Fireball. The warriors have an easier time against the odd enemy that makes it out. Once Elanna has ran out of Fireballs, she helps matters along by pelting nearby foes with Magic Missiles. Eventually it's only a lone Goblin Sorcerer who's left by himself inside the crowd-control zone, and he's easily shot down by Alliria and Tithian.
The camp that's left behind has a fair amount of loot, including spell scrolls for Melf's Minute Meteors and Dispel Magic.
Pondmuk
In an isolated cave a little northeast of where I fought Ogrok I find a lone Goblin named Pondmuk, who actually provides a quest of his own. He wants a spider corpse to feed on in return for him providing me with a password.
The Wooly Spiders are through a door to the west. They are few in number and not very dangerous. The Queen Wooly Spider can be dangerous. If she gives you trouble use something with a stun or hold power on her, like a Chromatic Orb. All of the spiders leave behind their corpses as items. It is the Queen Wooly Spider's body that will earn the biggest xp reward from Pondmuk. He also gives me the password, "Chimera."
I also find a few items in the Spider cave. These include Gauntlets of Weapon Skill (+1 to attack bonus) and a Buckler of Dexterity (+1 to Dexterity) as random items. Lord Markus equips the Gauntlets for the time being. Another item that is set here by the Ease of Use mod is Torment (+1 Full Plate, Death Armor 1/day, evil characters only).
Hobgoblin Door Guard
I go back to the Spider cave, and then open a door at its northeast corner. I blast a few Goblins away with a Fireball. A Troll, and now a Hardened Fire Troll, come through the door next. The Hardened Fire Troll is the opposite of the Hardened Ice Troll. It is resistant to blunt damage, but will go down to slashing damage.
Now I go east and a Hobgoblin Door Guard soon appears. He makes for a nearby War Drum to the west. I make it a priority to beat him to it, and destroy the drum. This is risky in the sense that I allow a number of foes to surround me and force me to do things the hard way, but it is a lesser risk than letting the Door Guard summon Worg Riders non-stop. The Door Guard leaves behind the Door Guard key.
I then send Lord Markus ahead in order to draw on an Orog Chief and his minions. They walk straight into bombardment, from both a previously cast Skull Trap and a Fireball courtesy of Lady Elanna.
I then use the Door Guard Key to open the large door towards the northwest corner. Tithian disarms a couple of traps.
Pusmug
Now I step through the door to the next level of the Warrens. I face a lot of my foes right away, but I still use Web and Spike Growth over the area that I know will have a few Archers, some incoming Warriors, as well as a Shaman and a Witch Doctor. Sure, some of them will still come at me from the sides, but it isn't anything my warriors can't handle. And Lady Elanna gets to pepper the others with her Fireballs.
Here I also show another tactical theme. When every remaining enemy is still caught in the crowd-control zone, I can simply open fire with missile weapons. I have to switch over to melee temporarily when their leader, Pusmug, does manage to make it out. But by this time it's a mop up.
I again search the camp tents for loot. This includes Bullets +1, and scrolls of Dire Charm, Summon Monster I, Silence, and Glyph of Warding.
Orog Taskmaster
More goblinoid foes and I use the same crowd-control theme, except it gets only some of the enemy. So I took a gamble and had Akutagawa run across the crowd-control zone and lead the rest of the enemy (led by an Orog Taskmaster) back across the zone before it expires. The Taskmaster is pretty tough so I have to help matters along with an Alicorn's Lance from Alliria and Magic Missiles from Lady Elanna.
*Note* The Orog Taskmaster drops a Black Wardstone that is needed to make progress, but I didn't get around to picking it up until the next video.
There's plenty of loot here, some of it added by mods:
There will also be some priestly scrolls, as well as spell scrolls for Lance of Disruption and Flame Arrow. Tithian will inscribe both of them.
Yquog and Kruntur
This video shows the sequence for a series of quests. I go back to the first level. On my way there I picked up the Black Wardstone that the Orog Taskmaster left behind.
I then make my way towards the center of the first level where I find a Goblin named Vurnag. I can talk him into taking his tribe and leaving, but it requires precise selection of dialogue choices (as shown in the video) plus a decent Diplomacy check, otherwise he'll fight you. When I succeed, I get an xp bonus for convincing him to depart.
I then send Lady Elanna ahead east, because Lord Markus as a Paladin will pick a fight with the next individual if I let him handle the dialogue. Yquog wants a message for him from his masters retrieved from a Dekanter Goblin named Kruntur.
Kruntur can be found by following the hallway where I initially found the Orog Taskmaster. Note that the chest at the north corner of his cave can be looted, which includes Corrosive Bullets. The chest right next to Kruntur can't be looted without him going hostile. Kruntur is willing to return the message, but only if he gets a pair of bracers that Yquog took from Kruntur's brother.
So I go back to Yquog and explain things. Yquog is naturally furious, but is nonetheless willing to part with Tamjan's Bracers (+1 deflection bonus to armor class).
I then return to Kruntur, and get the Message for Yquog and a Leather Armor +2 in return.
I then bring the Message to Yquog, and get the Flail of the Defender +1 (+1 deflection bonus to armor class) as a reward. Alliria equips this as an interim blunt damage weapon.
Sleeping Orcs
But, since they're packed close together, I hit them first with a Fireball. I then kill them quickly enough so that they never have the chance to either fight back or hit the Drum.
Now I continue westwards and then kill the Troll, and then destroy the Drum. More monsters are in view, but since they're behind a closed gate I can just retreat east a bit and then quick-save.
Tithian memorizes a couple instances of Snilloc's Snowball in anticipation of some upcoming fights.
Fire Beetles and Otyughs
Next fight, past the cage door, is against several Fire Beetles, a Fire Beetle Queen, and a pair of Otyughs. The Otyughs can cause disease with their bites. The Fire Beetles are immune to fire damage, but they do take cold damage, so Tithian unleashes a couple of instances of Snilloc's Snowball. Lady Elanna spends her time tagging single enemies with Chromatic Orc (if they're close to full health) or Magic Missiles if they're pretty close to dying.
A sack in the cave has a bow, Sophia's Flight (+3 attack bonus, +2 damage, x1.5 shooting range), which Alliria equips.
Past the other cage door are a pair of Ogres and an Ogre Chieftain that I kill rather routinely.
Gumph
Now I go east a bit and destroy the next Drum I see. I continue around the bend, and notice an animal farm for the Horde. Just west will be a large force of Orcs, as well as a Hobgoblin named Gumph. I use the same crowd control + bombardment strategy, except I aim my spells carefully southward to avoid hitting the farm animals. There's no game consequence for killing the animals, but it does make saving my game easier.
Gumph leaves behind an Iron Wardstone which I'll need fairly soon.
I've accumulated quite a bit of loot by now, and it's starting to weigh me down. So I head back to Targos, sell what I don't need, and buy a few things from Lady Elytharra. These include Boots of the North (+5 cold resistance) for Stygar, and spell scrolls of Cat's Grace, Mirror Image, and Blindness for Tithian.
The video concludes with me making my way from the animal farm and to a magical door that requires both the Black Wardstone and the Iron Wardstone to pass.
The way to the Horde Fortress is now clear.