-

- Forums
- Chatrooms
- Gallery
- Gameplay Videos
- Upload
- Articles
- Mod Reviews
- Shop SP: Games, Movies, Books
|
|
CLERIC'S TOWER
Oromis Dohor
Now I open the gate to the middle cell. I speak with Oromis Dohor, the head of the Black Raven Monastery who has been turned into a Lemure by Isair and Madae. My quest is to get a potion that will allow him to return to humanoid form.
So then I make my way back to the first level of the Cleric's Tower, where I performed the Ritual.
Second Level
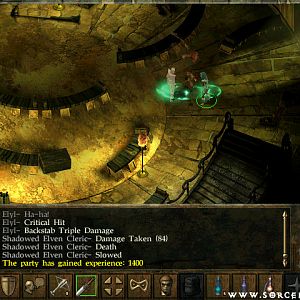
I then go up to the second level. I have to kill several Priests, as well as a few Slayer Knights and the odd Orog Priest. Getting the jump with offensive spells works nicely here. Markus, Stygar, and Akutagawa clean up on any that come close, aided by Elanna's Executioner's Eyes. Alliria, Tithian, and Elanna shoot down any that hang back.
Note that the skull mosaic in the center is the portal to Tyrannar Brutai's demesne. Every party member needs an Iyachtu Xvim Holy Symbol to be able to get through the portal. Otherwise the party will just take lightning damage. A couple of Ruinlords leave their Holy Symbols behind, which Alliria and Tithian collect. Now only Elanna needs one.
Third Level
Similar to the previous one, except that given the sheer number of enemies, I instead proceed with a succession of crowd-control and cloud-damage spells, followed by offensive spells. Lord Markus, Stygar, and Akutagawa take down any that make it through. Alliria, Tithian, and Lady Elanna, once they finish casting spells, shoot down any stragglers that are left at a distance.
Incidentally one of the Ruinlords will leave behind the Aramite Cult Leader's Ring (+3 deflection bonus to armor class, +2 magic resistance).
Lady Elanna collects an Iyachtu Xvim Holy Symbol. Every member of the party has one, so they can now enter through the portal.
Tyrranar Brutai
This can be a pretty intense fight. Suffice to say prepare to the max beforehand, including Mass Haste and Holy Aura.
What makes this fight particularly dangerous is that Tyrannar can pick himself back up several times with Heal. Going after him first is counter-productive, because the spirits of your past enemies will in the mean time be after their pound of flesh. So you do have to go after his help first, which can be painful because it leaves him free to go to work with spells like Blasphemy, Symbol of Death, Tremor, Unholy Blight, Hold Person, and his melee attacks with his duel-wielded weapons.
Now my spellcasters, as well my enemies, will all be packed together into a fairly tight space, so I place a premium on party friendly spells. My sequence was as follows: First round, Elanna casts Executioner's Eyes, Alliria casts Static Lightning (it will be a long battle), Tithian casts Improved Invisibility on himself (getting attacked by somebody is inevitable). Second round, Tithian casts Fire Shield:Blue on himself, and Alliria casts Tremor. Tremor will knock down many of your enemies, and buy you valuable time. Stygar chips in with Power Word: Blind as well.
My fighters go after Sherincal first, since she has the largest damage range, especially on a critical hit. Then Guthma, then Gaernat Sharptooth, then Beastlord Harshom, and then the other Ruinlords. Tyrannar won't nearly be as dangerous without his aid. Once he falls, he leaves behind:
I now explore the Officer's Tower.