Baldur's Gate 2 Online Walkthrough by Montresor
HELL
Having successfully killed Irenicus, the entire party dies and awakens to find itself in Hell. The party members will express their opinions about this, and not all of them are very happy. But fortunately they all accept that it is their fate to help you out once again.
And fortunately the party appears to have rested on the way down. All spellbooks have been refreshed, even if your spell protections from the first Irenicus battle are still in place. If any of your party members died on the Tree of Life, they will be resurrected here at full health, and their possessions will be at their feet.
You find yourself in front of a huge door with five eyes around it. To open the door, you must close the eyes. To close the eyes, you must find five Tears of Bhaal. And to find the Tears, you must pass five tests.
For each test you can choose a Good Path or an Evil Path. You will gain a reward depending on which path you choose. If in any of the five tests you choose the Evil Path, your alignment shifts to Neutral Evil. If you are a Paladin or a Ranger, this also means that you become Fallen.
Each time you have passed a test, go back to the door and click it to use the Tear you have won. When you use the final Tear, the door opens...

- This is where you find yourself after defeating Irenicus and following him down into Hell.
Each time you have completed one of the tests, you can come back here and click the large door to use the Tear you have gained and receive your reward.
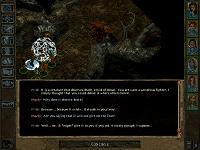 Here is the entrance to the Test of Pride. Enter, and a Demon will greet you. The Demon will try to goad you into fighting the "terrible creature" behind it. Resisting your pride and refusing to fight the creature just because it stands in your way is the Good Path. Giving in to your pride and attacking the creature is the Evil Path.
The creature is a Gold Dragon. If you refuse to fight it, it gives you the Tear voluntarily.
If you kill the dragon, it drops a Scroll of Sphere of Chaos, a Scroll of Wail of the Banshee, a Scroll of Time Stop, 20 Bolts of Lightning, the Robe of the Evil Archmagi, 20 Arrows of Dispelling, and a Ring of Protection +2.
There is a container at the top of the room at (x=410, y=360) with 2 Potions of Invulnerability and 2 Potions of Extra Healing.
For following the Good Path, the protagonist earns +20% resistance to Fire, Cold, and Electricity.
For following the Evil Path, you gain 200,000 XP.
- Here is the entrance to the Test of Fear. A Demon called Fear greets you and tells you that to pass this test, you must face your fear. You can pass either of two rooms. The upper room has a number of Beholders, Elder Orbs, and Gauths, while the lower is empty - but also casts Fear on you.
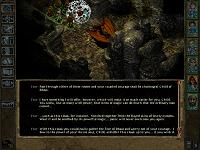 The Demon offers you a cloak made from the skins of Nymphs which will make the wearer immune to fear. Accepting the Cloak of Bravery is the Evil Path. Refusing the Cloak is the Good Path.
You can simply refuse the Cloak and have your Cleric cast Resist Fear on the party, and then move through the lower room. But why not also take the XP for killing the creatures in the upper room? ;-)
The Tear of Bhaal is at the back of the area at (x=1000, y=800).
There is a chest at (x=580, y=660) which is trapped and locked. It contains 4 Potions of Extra Healing, 5 Potions of Fire Giant Strength, and 5 Potions of Invulnerability.
For following the Good Path, the protagonist gains immunity to +1 weapons and less.
For following the Evil Path, you gain +2 to your Constitution.
- Here is the entrance to the Test of Selfishness. The Demon here takes one of your companions hostage (or a commoner, if you are soloing) and demands that you make a choice: Will you take the Good Path and sacrifice some of your own abilities, or the Evil Path and sacrifice your companion?
The Good Path is to go left on the screen. When you open the first door, you lose 2 of your Max. hit points. The second door costs you a Dexterity point, and the third door costs you 75,000 XP.
If you take the Evil Path and go right on your screen, your companion loses 1/3 of their hit points for each door you open, of course ending in their death. Sure you can Raise your companion afterwards, unless you are playing on Core Difficulty, but still...
Don't forget to loot the container at the bottom of the room at (x=560, y=1220) for some gold and 3 Potions of Extra Healing.
For choosing the Good Path you gain +10% Magic Resistance.
For choosing the Evil Path you get a +2 to your Armor Class.
CHEAT: For those who don't want to sacrifice another or something of their own (and who aren't above exploiting a bug in the game;-)), the following cheat is described in several earlier walkthroughs:
- Before entering the test, create a savegame.
- Now enter the test and speak to the Demon of Selfishness. One of your companions is abducted. Note which one.
- Reload the savegame and make sure the companion who is to be abducted is hasted (Boots of Speed, Oil of Speed, or the like).
- Enter the test and speak to the Demon.
- As soon as conversation breaks off, Pause the game! (Hit the Space key.) Your companion will have been abducted but is not yet paralyzed.
- Select the abducted companion who is now behind the two hindmost doors and order them to run to the door on the left (the "good" path") and open it FROM THE INSIDE.
- You will be deemed as having taken the Good path but won't have to make any sacrifice.
Note: If you try to take the Evil path in this way by opening the door to the right, your companion will still be killed.
- Here is the Test of Greed. The Tear is in the possession of a creature that is extremely hard to kill - a Genie, as it turns out. However, the Demon gives you the long sword Blackrazor, which will allow you to kill the Genie.
 You have to choose whether to free the Genie by giving it the sword (the Good Path, which earns you 20,000 XP), or by killing it for 11,000 XP (the Evil Path).
The Good Path earns the protagonist +2 to all Saving Throws.
The Evil Path earns you +15 to your Hit Points. And of course you get to keep the sword.
- Here is finally the Test of Wrath. You will not meet a Demon here, but rather your old enemy from Baldur's Gate, Sarevok. Or at least, Wraith Sarevok. He attempts to goad you into giving in to your wrath and attacking him. Refusing to give in is the Good Path. Giving in to your wrath and attacking him is the Evil Path.
 In the end battle is inevitable but so long as you refuse to initiate the fight, you have chosen the Good Path. You get the Tear when Sarevok goes down.
The reward for the Good Path is a +1 to your Wisdom and Charisma.
The reward for the Evil Path is a +2 to your Strength.
- When you have used all five Tears of Bhaal on the door, it opens and Irenicus steps out. He, too, has been through the tests, and he has now gained the ability to become the Slayer. He summons two Balors and two Glabrezu to his aid.
Before using the final Tear, prepare your party for the ultimate battle. Irenicus uses the time while you are fighting his demons to put up his defenses and you will have to tear them down several times. When you get him down to near death, he teleports to another place in the area, heals, and sets up his magical defenses again. And he may do this once more before you finally prevail. Once more, a Deva and/or an Elemental can be a great help.
If any of your party members die here, they will be resurrected along with the rest of the party after Irenicus falls; however their inventory is lost, unless one of the other party members takes the time to pick everything up.
Once Irenicus falls for the last time, you and your party are resurrected in Suldanessellar and take part in a great feast in your honor. If you have installed Throne of Bhaal, you are then transferred automatically to the extension. In the meantime, you can enjoy the cinematic of Irenicus waking up one final time in Hell. And this time, it looks like he is here permanently. ;-)
| Sorcerer's
Place is a project run entirely by fans and for fans. Maintaining
Sorcerer's Place and a stable environment for all our hosted sites requires a substantial amount of our time and funds on a regular basis, so please consider supporting us to keep the site up & running smoothly. Thank you! |


 Here is the entrance to the Test of Pride. Enter, and a Demon will greet you. The Demon will try to goad you into fighting the "terrible creature" behind it. Resisting your pride and refusing to fight the creature just because it stands in your way is the Good Path. Giving in to your pride and attacking the creature is the Evil Path.
 The Demon offers you a cloak made from the skins of Nymphs which will make the wearer immune to fear. Accepting the Cloak of Bravery is the Evil Path. Refusing the Cloak is the Good Path.
 You have to choose whether to free the Genie by giving it the sword (the Good Path, which earns you 20,000 XP), or by killing it for 11,000 XP (the Evil Path).
 In the end battle is inevitable but so long as you refuse to initiate the fight, you have chosen the Good Path. You get the Tear when Sarevok goes down.
