-

- Forums
- Chatrooms
- Gallery
- Gameplay Videos
- Upload
- Articles
- Mod Reviews
- Shop SP: Games, Movies, Books
Prologue | Chapter 1 | Chapter 2 | Chapter 3 | Chapter 4 | Chapter 5 | Tales of the Sword Coast | Chapter 6 | Chapter 7 | |
Cloakwood Lodge | Cloakwood Spider Nest | Shadow Druid Enclave | Cloakwood Wyvern Nest | Cloakwood Mines | |
CLOAKWOOD WYVERN NEST
Wyvern Attack
Now I travel along to the next part of the Cloakwood. I get attacked by a pair of Wyverns on the way. Wyverns can be dangerous for a lower-level party. Their attacks can cause poisoning, and even then can cause significant damage even if the target makes its saving throw. The motto to follow here, as in many other battles, is to concentrate on one target first instead of spreading out your attacks amongst multiple targets. The sooner you bring down the first, the less attacks you yourself have to worry about. Avastrian opens with a shot from his Wand of Frost, while Imoen whips out her Magic Missiles on the first one. The party goes all out to finish off the first one before going to work on the second. I don't hesitate to gulp a Potion of Extra Healing when it's needed.
The video concludes with a cinema of a Wyvern flying away with a cow in its talons, and me having Jaheira memorize Dispel Magic in anticipation of battles to come.
Hamadryad
Next I travel southeast for the fight against the Hamadryad. The Hamadryad is also enhanced during SCS, and will start the fight with both Stoneskin and Physical Mirror in place. The ol' shoot her down strategy won't work, at least not yet. I bring her into view, and then have Avastrian and Khalid charge her, while Jaheira casts Dispel Magic. The Hamadryad casts Dire Charm on Khalid, but Jaheira's Dispel Magic is perfectly placed as it gets rid of both Khalid's charm effect as well as the Hamadryad's protections. After that I can proceed with staying on top of her with missile fire until she falls.
Beador
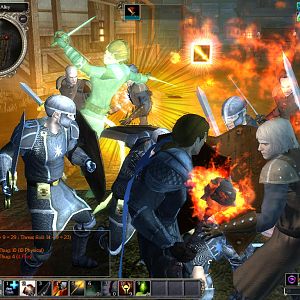
Now I go southwest to begin completion of a quest specific to Jaheira that's added by the BG1 NPC Projects mod. A bunch of Shadow Druids surround a barely conscious Beador. This fight can be pretty dangerous, since they can all summon animals, and cast spells like Doom and Call Lightning. Fireball won't work either, since it will hurt Beador as well. Firstly, I try to position myself as close to them as I can so that I can begin swinging as soon as possible. I keep Imoen well back, both because she is vulnerable to getting killed by Call Lightning, and to use my Wand of Frost. Once combat begins Jaheira casts Dispel Magic right away in order to rip down the Shadow Druids' protections. I then operate on the principle of one at a time. The sooner I can kill an individual Shadow Druid, the less spells like Call Lightning and such I'll have to worry about. Imoen provides a helping hand from a distance. Whenever the warriors target a particular Shadow Druid, she hits him with the Wand of Frost to hasten that Shadow Druid's demise.
One by one they fall. Beador regains consciousness and implores me to rescue Maretha.
Maretha
Now I return to the large tree house in the previous part of the Cloakwood. Waiting for me will be Ardanthe and another Druid. They will both have a lot of animals come to their aid, and have spell protections in place. I use crowd-control here, Entangle, Web, Stinking Cloud, both to hold back the animals and to interfere with the Shadow Druids' spellcasting. Kivan fires away with his bow, while Imoen uses one Fireball after the other. Ardanthe initially shifts a ways back, and I really don't mind as it gives me the time to blow away his help first. Once the crowd-control wears off Ardanthe is by himself. I don't bother with missile weapons. For one thing, he'll have Physical Mirror in place. Also he'll teleport right beside me. Once he does, Jaheira casts Dispel Magic. He will hit the party with a Chain Lightning spell, but then it becomes a matter of wearing him down.
Inside the tree house will be Maretha. I get 2,000xp and a +1 to reputation. I go back to Beador and give him the good news for another 100xp.
I then give the good news to Seniyad for 5,000xp, and with a little pressing, the Eye of the Storm (+2 Club, +25% electrical resistance, Call Lightning 1/day). But I like Jaheira better with the Dagger of Venom.
Wyvern Cave
I sold off my booty and came back to this part of the Cloakwood. Now I head for the large cave east of the bridge. Inside will be a pair of Wyverns, and a pair of Baby Wyverns. This fight can be dangerous, but I soften them up with a perfectly placed Fireball from Avastrian (via a Wand of Fire), a Fireball spell from Imoen, and an Oil of Fiery Burning from Khalid. Killing them quickly then becomes much easier. I loot the back of the cave for the treasure and head east.
My next destination is the Cloakwood Mines.