-

- Forums
- Chatrooms
- Gallery
- Gameplay Videos
- Upload
- Articles
- Mod Reviews
- Shop SP: Games, Movies, Books
|
|
SHADOW MULSANTIR
To Shadow Mulsantir
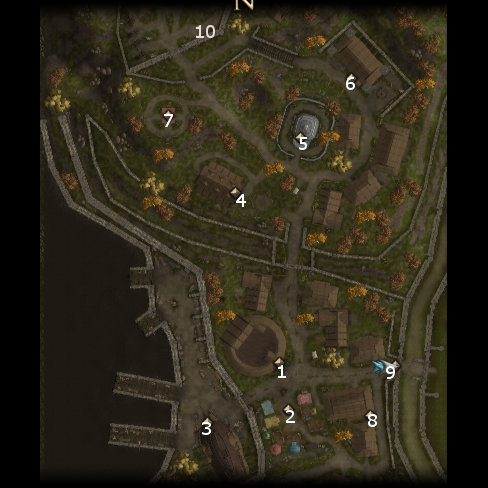
I make my way towards the spot at #8 on the second Mulsantir map. There will be a shadow portal there that allows access to Shadow Mulsantir, but it's active only at night.
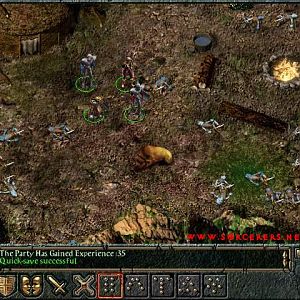
Once on the other side, I am immediately beset by a Greater Shadow. Straight physical combat suffices. I gradually make my way towards the north and center, and kill another Dread Wraith along the way.
I continue north. Once I reach the palisade wall to the north, I have Valeria issue a 'stand your ground' command. I then make a point of luring another Dread Wraith southwards so that I could kill it by itself. The reason is that there will be a boss battle due north, and the less help those bosses have the better.
Valeria's 22nd Level
Valeria now reaches her 22nd level. There isn't much in the way of highlights other than using an Arcane Trickster level to increase her thieving and conversational skills, and being able to reconfigure her spells to take greater advantage of her Empower Spell feat.
Two Nightwalkers
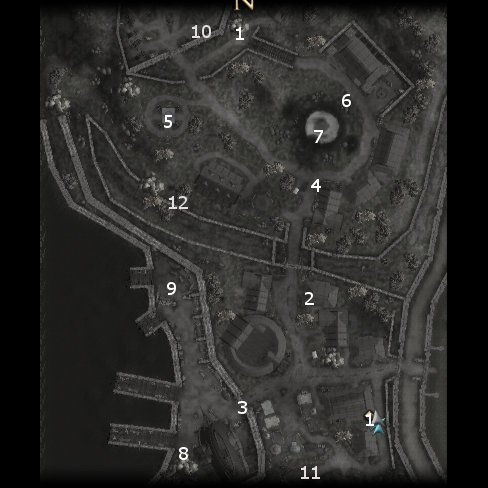
At #4 will be two Nightwalkers that I have to fight at the same time. This battle is definitely an example of working on one foe exclusively before going to work on the other. The battle is won that much easier when that principle is observed.
Valeria and Gann each carefully place a Sun Burst spell so as to catch both of them. It works as both are blinded and end up helpless. Safiya hits one of them with a Meteor Swarm that targets it specifically as a creature. She then wastes the other outright with an Empowered Disintegrate. The other falls very easily aftwards.
At #7 is the entrance to the Death God's Vault. I'll be entering briefly, but only for the purpose of getting Kaelyn the Dove into my party. The door has a pretty tough trap on it, so Valeria improves her odds with a Cat's Grace spell beforehand.
Kaelyn the Dove
Now I step into the Death God's Vault, only to get Kaelyn to join my party. I of course pick a dialogue option that depends on a Diplomacy check that will increase influence with her.
Valeria hands over her Bone Ring (she already has a Cloak of Blackflame) and Hidden Breastplate of Imaskar over to Kaelyn. The Bone Ring, especially once further enchanted, will become one of Kaelyn's rings for the entire expansion. The breastplate provides a good interim armor.
The last third of the video consists of me reconfiguring her spells more to my liking, meaning more Battletides, Stone Body, Mass Heal, Restorations, Words of Faith, Greater Restorations, Magic Vestments, etc., and phasing out spells that I won't use.
*Evil* Kaelyn the Dove
I don't even enter the Death God's Vault until significantly later than the good party does, not until Act II. Once I've devoured Okku's spirit to start Act II, then obtained the Mold Spirit ability, and then obtained the Devour Soul ability, that's when I enter the Death God's Vault for the first time.
Zarathos goes ahead and speaks with Kaelyn. He initially welcomes Kaelyn into the party, but then a dialogue option becomes available that provokes combat with her. Zarathos brings her to 'near death' and then uses Devour Soul on her. He gets Kaelyn's Essence in his inventory.
He places both the Essence and an Amulet of Natural Armor +5 into the Enchanter's Satchel. He next uses his Mold Spirit ability on the Satchel. The result is an amulet that provides both a +5 natural bonus to armor class, and a +10 bonus to Wisdom.
The reason I do things this way is that I'm skeptical that I could ever obtain the bonus feats that come with having high influence with Kaelyn, so I settle for the +10 Wisdom bonus that comes with using her Essence on an amulet.
Malarites
I leave the Vault and move west a bit. At #5 will be a pair of Malarite spellcasters and several Shadow Ghasts.
Valeria targets the Malarites themselves with Empowered Chain Lightning spells. Safiya targets them individually with spells like Empowered Disintegrate and Empowered Polar Ray.
Gann and Kaelyn start off by trying to blind as many enemies as possibe with spells like Sun Burst and Word of Faith. Kaelyn then uses a Firestorm spell while Gann uses a Call Lightning Storm spell to damage as many enemies as possible. Victory soon follows.
Unmarked Graves and Dirt Mounds
Now I do a bit of grave robbing. There will be some monsters spread throughout the rest of Shadow Mulsantir, but it isn't anything that I can't handle through physical combat.
At #10 is a Dirt Mound that has Dragon Slippers (+2 Dexterity, immunity to fear, immunity knockdown, 10 spell resistance). At #6 will be a pair of unmarked graves. They have:
Periapt of the Lost Witch
Now I travel towards #12, which is behind Shadow Mulsantir's equivalent of the Ice Troll Berserker Lodge. I have to fight a lot of Shadow Umber Hulks, which of course can cause confusion in single targets in addition to their powerful physical attacks. Safiya cranks out the offensive spells as always, and the length of the battle is such that Kaelyn is also having to chip in with Fire Storm spells. I eventually manage to outlast them.
The spot at #12 marks the location of another Shadow Portal. On the other side is a pile of debris. I attack it enough times so that it fades away and reveals a skeleton. I loot the skeleton for the Periapt of the Lost Witch (30 spell resistance, immunity to critical hits and sneak attacks, Avasculate 1 / day, Bestow Curse (11) without limit), which will be Safiya's amulet for the rest of the game. Forget the spell-like abilities, the spell resistance and the immunity to critical hits and sneak attacks are the real reasons for having Safiya wear it. And indeed the immunity to critical hits and sneak attacks will augment her use of damage reduction spells, since the two will work together to ensure that any hit she receives inflicts only minimal damage.
Heilari
Now I enter the house at #2. Inside will be the writings of one Heilari which describe his rather disastrous attempts at becoming a Lich. There will be two Death Knights standing guard over a corpse. A trapped and locked chest will have one or two scrolls, plus the Rakshasa Staff (+1d8 fire damage, Dominate Person (7) / 2 charges, Charm Person (10) / 4 charges, Charm Monster (10) / 4 charges, +1 4th level Sorcerer or Wizard spell, +1 5th level Sorcerer or Wizard spell, Sorcerers or Wizards only).
If you've read all the books and scrolls in the house, you'll have some options available to you: