-

- Forums
- Chatrooms
- Gallery
- Gameplay Videos
- Upload
- Articles
- Mod Reviews
- Shop SP: Games, Movies, Books
|
|
Kuldahar Valley | Kuldahar | Chult | Dragon's Eye - Level 1 | Dragon's Eye - Level 2 | Dragon's Eye - Level 3 | Dragon's Eye - Level 4 | Fields of Slaughter |
FIELDS OF SLAUGHTER
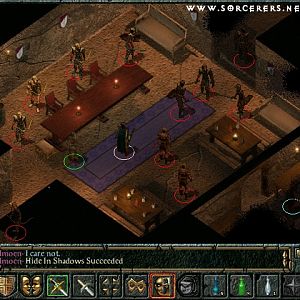
Saablic Taan Returned
Now I buff up to the max, including Holy Aura and Mass Haste, and then move north a bit. A cutscene involving Saablic Taan ensues.
What follows is a very massive fight against many creatures, and one that is easily lost if I'm not careful. The enemy starts off close and within range, so crowd-control is not workable. I literally pull out every stop I can think of for this fight. Alliria casts Elemental Swarm to help absorb some of the onslaught. She then follows up with spells like Sun Beam, Static Lightning, and then Tremor more than once. Stygar uses Power Word: Blind, and then Holy Word repeatedly. Tithian casts Slow. Lady Elanna tries to use Mass Dominate (didn't work), but also Executioner's Eyes and Chaos, and then offensive spells like Chain Lightning.
There are 2 opponents here that merit special attention. One is the Slayer Knight, which can land hideous damage with its Greatsword. Lord Markus and Akutagawa make a point of killing him first and foremost.
The other threat is the Red Wizard, who can cast instant death spells like Flesh to Stone and Wail of the Banshee. Once the Slayer Knight is killed, I have Lord Markus live up to his expected role of mage killer. He has spell resistance from his Holy Avenger, as well as high Fortitude saving throws as a Paladin. The rest of the party hangs back until Markus has finished off the Wizard.
Once the Wizard is gone, the party begins to regroup and start taking out their foes while staying in a tight formation. This is crucial so that Alliria or Stygar can easily reach a wounded comrade with a Heal spell.
Even so, several Fallen Bladesingers arrive as reinforcements, which makes this a particularly prolonged and intense battle. This reality is proven when multiple party members are wounded, obliging Stygar to use Mass Heal.
Eventually only a few Fallen Bladesingers are left, so the party travels south (and taking the Bladesingers with them) and then resumes the battle. The point here is so that I can quick-save after the battle without having to initiate the next cutscene.
Dread Orcs
Now I have Tithian move ahead of the rest of the party towards the north. The reason is that I want him to make a Bluff check on a Dread Orc guard so that I can get some more quest-related xp.
The party is then brought into the presence of the Dread Orc Shaman, Kratuuk. Tithian makes another Bluff check to convince Kratuuk that Saablic Tan has sent the party for aid against an Elven Lich named M'Darfein. Kratuuk gives me a key to open a gate to the east. Note that if the party can't make a Bluff check, they'll have to fight the Dread Orcs right away, and get the key after Kratuuk dies.
Now the party opens the gate, where there's plenty of hostile undead on the other side. Stygar blows many of them away casually with his Club of Disruption.
I continue on and help out several Dread Orcs led by Grog against several Elven Dread Warriors. I then perform another Bluff check on Grog to convince him that Kratuuk sent me.
M'Darfein
To the south is the Elven Lich, M'Darfein, and his Elven Dread Warriors. M'Darfein can engage in repeated casting of spells like Disintegrate and Wail of the Banshee. This is the first reason that I advise making sure everybody is protected by Death Ward. I then summon a few monsters. Once this is done, I then finish my buffing with Holy Aura, Mass Haste, and Emotion: Hope. These buffs will affect my summoned creatures as well.
Now I head south, and begin the combat. M'Darfein himself is untouchable so I take out all of his warriors first. After that I keep concentrating on M'Darfein, who's a really tough nut to crack in Tactics. He keeps himself layered with a lot of defensive spells, including Improved Invisibility, Mirror Image, and Stoneskin. The Stoneskin, coupled with M'Darfein being undead, and combined with Improved Invisibility, means that physical blows won't land as often, and when they do they score chip damage if at all. What makes matters worse is he'll have a Fire Shield: Blue in place that lasts quite a while.
This is the reaon why I bring in summoned creatures and include them in the buffs. Every little bit of chip damage that I can throw in, every meat shield that I can include to soak up damage from M'Darfein, is going to help in what can be a really tough battle.
A bit of a side note, Lady Elanna will take damage from the Fire Shield: Blue if she uses her Mordenkainen's Sword on the lich, but this is avoided when she casts Magic Mirror on herself.
If any of my summoned monsters get killed, I summon in more fodder as well.
M'Darfein will recognize that everybody is protected by Death Ward, so he won't bother with Wail of the Banshee. He'll instead cut straight to the chase with spells like Malavon's Rage, Horrid Wilting, Sunfire, Chain Lightning, and Skull Trap. He'll cast these spells repeatedly, all the while being unkillable himself. It is thus imperative that I be careful about using healing spells. I reserve a Heal spell for when a party member if very close to death. I reserve Mass Heal for when multiple party members are close to dying. At some point even these spells run out and he'll still be cranking out the offensive spells. So then I'm forced to gulp down healing potions repeatedly, sometimes to the point of rotating party members so that healthier ones are staying on top of him, while more wounded ones take a time out at a distance to gulp down enough potions to recuperate. It's all about outlasting the Lich.
Eventually M'Darfein runs out of spells, and some of his protections wear out. Once this happens, I am well on my way to winning and eventually take him out.
At various places around this camp, you may find:
Kratuuk
I get my standard buffs (e.g. Stoneskin, Barkskin, Mage Armor, Cat's Grace, Champion's Strength, etc.) into place before the video actually starts.
By the way, Gorg and his party ended up becoming fodder who got annihilated during the fight against M'Darfein. Gorg himself left behind:
Backblighter (+2 Greataxe, 50 % chance of fear on target unless Will save is made, 50% chance of slow on target unless Will save is made). This will be Stygar's two-handed weapon for the rest of the game.
A fight with the Dread Orc Shaman, Kratuuk, is inevitable as Saablic Tan will have informed him of who I really am while I was away fighting M'Darfein. So, before I even speak to Kratuuk, I set up my ideal position. This fight can be dangerous. Kratuuk himself can cast spells like Blasphemy repeatedly. So I position Lord Markus and Akutagawa so that they'll be on top of Kratuuk from the word 'go'. The Dread Orc Warriors can be really dangerous, since they have high Strength scores and can score triple damage critical hits with their axes. And there are many of them. So I bunch everybody else together at the rear of the dais. I then have Stygar summon two monsters to seal off the flanks. A Frost Giant and a Remorhaz do just nicely. I then add Mass Haste and Holy Aura as my last buffs, which will also benefit my summoned monsters.
I then speak with Kratuuk both to get the xp bonus, and to start the fight. Lord Markus and Akutagawa are able to quickly bring down the Shaman. The buffed Frost Giant and Remorhaz are able to kill off any Dread Orc Warriors that approach from the side. Lord Markus and Stygar are able to lend a hand with their Thunder Hammer and Cloudkiss. I am prepared to cast Heal on either the Frost Giant or Remorhaz to keep the flanks protected, but it proved unnecessary.
Kratuuk himself will leave behind:
The stone behind just behind where Krutuuk used to stand holds:
I conclude the video by looking around the south of the camp to find some Elven prisoners. I get another xp bonus for freeing them.
Purifying the Falls
Now I continue back to where I fought M'Darfein. I continue east and run into a couple of Festering Drowned Dead. Keep in mind that while they can be killed quite quickly, they always have an instant death aura in a certain radius around them, so they can be dangerous in large numbers if you're wanting to sleep around for monsters and xp.
I continue north and find the pool that the Elven Cleric was trying to purify. But there are more members of the Legion of the Chimera just to the north. Here I use another tactic. Akutagawa scouts out their location. Once their location is marked, I hit them with a triple shot of Suffocate, Fire Storm, and Horrid Wilting. This triple shot either kills some of them outright, or panics the survivors, who are easily mopped up.
I then have Lord Markus place the Vial of Elven Holy Water in the pool to purify it, and get an xp reward.
Saablic Tan
Before I actually leave the Fields of Slaughter, I take the time to stop at the northeast corner and buff up to the max. My buffs should also include a Death Ward for everyone in the party, Holy Aura, and Mass Haste. The reason is that Saablic Tan will be waiting in the next area, along with a LOT of help, Red Wizards, archers, a Neo-Orog Priest, Half-Dragons, Slayer Knights of Xvim, Greater Feyrs, Half-Orcs, and Wanmok.
Suffice to say, I crank out as many spells as I can to blanket the area in front of me. My sequence was as follows:
1st round / Alliria – Entangle; Tithian – Stinking Cloud; Lady Elanna – Web; Akutagawa – Quivering Palm on a Slayer Knight of Xvim (it works sometimes)
2nd round / Alliria – Spike Stones; Tithian – Acid Fog; Lady Elanna – Executioner's Eyes to help the warriors bring down the Slayer Knights of Xvim as quickly as possible.
3rd round / Alliria – Spike Growth; Tithian – Cloudkill; Lady Elanna – Horrid Wilting; The warriors are still going to work on the Slayer Knights as the first priority.
4th round / Alliria – Static Discharge; Tithian – Suffocate; Lady Elanna – Horrid Wilting again; The warriors have finished off the Slayer Knights and the Half-Goblin, so they retreat a little to avoid being caught by the Horrid Wilting.
5th round / Alliria – Sunray; Lady Elanna – another Horrid Wilting; The warriors take a few shots at the Half-Dragon, but realizing that she's stuck, retreat again to avoid getting caught by the Horrid Wilting.
The field eventually settles as Saablic Tan comes forward. He would like to kill me off with Wail of the Banshee, but everyone is protected against it by Death Ward. The warriors go to work on Saablic Tan and the Half-Dragon. And indeed, Saablic Tan proves easier to kill than M'Darfein for a specific reason. M'Darfein was immune to critical hits as an undead creature, so I had to wear him away gradually with chip damage. The warriors, bolstered by Executioner's Eyes, manage to bring down Saablic Tan and the Half-Dragon fairly quickly. Once they're gone the warriors simply hold their position.
Lady Elanna meanwhile continues to blast away with Horrid Wilting. Alliria chips in with a Fire Storm.
Eventually, only a couple of Red Wizards and a few Archers remain. Alliria and Tithian switch over to missile weapons, and take out the Archers first. They, along with Elanna and her Mordenkainen's Sword, then go to work on the Red Wizard who is 'near death'.
The mop up leaves only one remaining Red Wizard who's at full health. Lady Elanna casts Dispel Magic, and Lord Markus uses the Dispel Magic power from his Holy Avenger. At least one of them works to bring down the Red Wizard's protections, and he is soon shot down.
Note that the enemy spellcasters will also frequently summon monsters to their aid, and this can lead to practically an extra army being summoned against you. It helps to be able to cast multiple instances of Banishment a la the Sorceress, although I didn't need to call upon that in this playthrough.
Saablic Tan himself will leave behind:
On the bodies of one of the nearby dead barbarians, you'll find: