-

- Forums
- Chatrooms
- Gallery
- Gameplay Videos
- Upload
- Articles
- Mod Reviews
- Shop SP: Games, Movies, Books
|
|
Kuldahar Valley | Kuldahar | Chult | Dragon's Eye - Level 1 | Dragon's Eye - Level 2 | Dragon's Eye - Level 3 | Dragon's Eye - Level 4 | Fields of Slaughter |
DRAGON'S EYE, LEVEL 3
Sword of Myrloch Vale
Now I descend to the third level and begin exploring its southeast portions. I run into various monsters like Armored Skeletons, Yaun-ti Archers, Yuan-ti Champions, and Yuan-ti Priests. For now they're scattered and few enough that I can deal with them with relative ease.
There will be a small room surrounded on all sides by spikes that open and close at regular intervals. Within that room is an Iron Golem, whom the party dispatches with +3 weapons or better. Also within the room is the Sword of Myrloch Vale (+3 Longsword, +20 Knowledge Arcana).
I bring the sword back to the dead body of Mandal Graye on the second level. His spirit then reveals the location of the Modified Mandrake Root, where I first killed the Ancient Wyvern.
So I travel there and retrieve the Root. I then inform Nheero Fhutma, who now wants me to finish concocting the Sabotaged Histachii Brew for him.
Sabotaged Histachii Brew
Now I return just north of the Alchemy Lab. Tithian has been saving up on Potions of Invisibility, and this is where he uses them.
He uses his first one, and sneaks into the Alchemy Lab to avoid being detected. If that Alchemist whom Nheero referred to (I can never get his name) ever spots a PC, he'll definitely call for hostile Yuan-ti, at least after a Tactics4IWD2 installation.
When Tithian arrives machinery in the lab is in motion, so he waits until he hears the sound of a 'chain being loosened'.
Tithian now places 4 Wyvern Stingers (which he's also been collecting) in the table that is indicated as being used for extracting venom from poisonous creatures. He uses another Potion of Invisibility to maintain his cover.
He then switches the Modified Mandrake Root for the Mandrake Root in the east table. He again gulps a Potion of Invisibility.
He then waits for the Alchemist to hit the switch to start the brewing process, which you can tell is in progress when green lights flash over the tables.
Once the process is done Tithian grabs 4 Wyvern Poisons from the west table, and then goes back under cover.
He then grabs the Sabotaged Histachii Brew and the Modified Mandrake Root from the east table, and puts back the Mandrake Root. He then ingests another Potion of Invisibility in order to leave the Alchemy Lab altogether without being discovered.
The party now returns to the first level and brings the Sabotaged Histachii Brew to Nheero. He then leaves for the Histachii Chamber on the second level in order to undergo a temporary transformation into a Histachii. The party visits him there once the transformation has worn off, and they get what's left of the Sabotaged Histachii Brew in their inventory.
Yuan-ti Dining Table
Now I start to explore the north east area. There's a certain room where a stone slab will close behind whoever walks in, and then a few Armored Skeletons will appear and attack within the sealed room. I send Stygar in alone. He switches to his Club of Disruption and quickly blows away the Skeletons. The other party members take down the Yuan-ti Champion outside.
The party then makes its way towards the very northeast corner of the level, taking down various enemies in routine fashion. There are two points to note here.
One, the dining table has some skulls and dead bodies on them. Tithian has so far collected a dead cat, a dead female body, and a dead male body. He completes the collection by taking the dead child's body from the table. The point of this is to complete a certain quest that occurs a good deal later on.
The second point is to click on the water fountain and corrupt it with a Wyvern Poison. This was the point behind collecting the Wyvern Stingers and extracting Wyvern Poison from them in the Alchemy Laboratory. There are 3 other such fountains that I'll need to do this for.
Snake Pit
Now I continue southwards. The central hub of the level will have a lot of Monstrous Snakes, and a few other Yuan-ti. This can be won with straightforward physical force, helped along by party friendly spells like Chaos and Chain Lightning if you're so inclined.
Mustard Jellies
I continue west along a hallway and get ambushed from both sides against Mustard Jellies. They're vulnerable only to fire damage so you need to come prepared. Lady Elanna makes generous use of Fireball. First she blows away the group to the west, while also damaging a nearby Yuan-ti Priest and Archer. Once the Mustard Jellies on the west side are gone, Lord Markus marches in to finish off the Priest and Archer.
Elanna then turns her attention to the Jellies on the east side. Tithian has Evasion, so Elanna simply blows these Jellies as well with Fireball after Fireball.
Alliria meantime uses Flame Blade for those Jellies that are in the midst of the party and thus cannot be targeted with area-of-effect offensive spells.
Yuan-ti Sleep Chamber
Now I make my way towards the southwest corner of the level, engaging in a few routine fights along the way. There will be another impossible to find Dispel Magic trap leading to the chamber, so I may as well just trip it and get it over with.
One container has quite a few magical potions.
I also contaminate another water fountain with a Wyvern Poison.
Yuan-ti Library
Now I continue on to the northwest corner,dealing with yet more routine fights, including the odd Iron Golem. Here is the Yuan-ti Library, which has a lot of spell scrolls.
I also contaminate a 3rd water fountain with Wyvern Poison. There's a 4th and last one, but that's not until later.
I continue to explore a little more to the east, killing more Yuan-ti and another Iron Golem along the way.
Eye of Sseth
Now I have Lord Markus step east a little into a rather large room just a bit east of the Library, and he draws out an Iron Golem back towards the party so I can kill it.
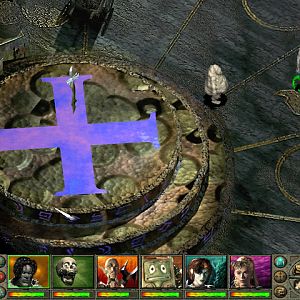
At the north end of the room is the Eye of Sseth, which will force any character within its view to be overcome with fear (no saving throw) unless the Eye recognizes that character as Yuan-ti. The feat that indicates Yuan-ti ancestry doesn't count.
So now I return to Nheero on the second level, and ask him if he has any Sabotaged Histachii Brew left. He does, and gives it to me.
Now I return to the Eye of Sseth, have Stygar drink it, and pass through the Eye of Sseth without any problem. There will be 2 other Histachii here. Stygar can still activate his Tempus' Strength power (hence why I chose him) and kill the 2 Histachii. He then hits a switch on the nearby bookshelf to lower a nearby drawbridge.
All I then need to do is rest up so that Stygar's Histachii transformation wears off.
Efreeti on the Drawbridge
There will be several Efreeti on the drawbridge south of the central room. This can be quite a dangerous fight. The Efreeti can whip out spells like Fireball, Burning Hands, and Flame Arrow non-stop. They also always keep Fire Shield: Red active on themselves, which makes trying to kill them with physical attacks very risky.
I use a method that minimizes the risks. I have Akutagawa and Tithian venture forward by themselves onto the drawbridge. The Efreeti thus direct all of their attention onto them. Lady Elanna then comes up behind ready with her spells. Akutagawa and Tithian both have Evasion, and this allows them to avoid damage from both the Efreetis' spells as well as Lady Elanna's spells. Cone of Cold would be ideal except for the fact that the Fire Shields will reduce the damage from cold-based spells. Lady Elanna instead goes with Acid Storm, and thus kills them in quite short order.
High Priest Thorasskus
I've rested, but I don't put up any buffs just yet. I cross the bridge first, so that I trip a trap that dispels magic on its target. A little boy speaks to me briefly.
It is not until I trip the trap that I begin to buff up. And this time I go to the max, including Mass Haste and Holy Aura.
Now I have Lord Markus speak to the little boy again, who is revealed as the High Priest of the Yuan-ti, Thorasskus. A fight inevitably begins. It's no longer the Monstrous Snakes that we saw in vanilla IWD2. This time Thorasskus is helped out by many Yuan-ti, including several each of Champions and Priests. This is the reason my preparations included both Mass Haste (quicker killing) and Holy Aura (spell resistance).
First, I have Lord Markus go directly for Thorasskus and stay on top of him to prevent as much as possible the High Priest getting his spells off. Alliria immediately casts Elemental Swarm to bring in 4 Elementals. This is more efficient in that it allows other party members to cast spells other than creature summons. Alliria then immediately follows up with Static Discharge.
The other party members wait until the Yuan-ti close around them before casting any spells. But once the enemy closes in the party goes the full mile, Stygar with Power Word: Blind, Tithian with Slow, and Lady Elanna with Chaos.
Alliria then casts Tremor, which is party-friendly and augmented by her Greater Spell Focus: Transmutation feat, twice. Once for the group in the northwest portion of the room, and then the other group towards the southeast portion of the room. This serves to knock many of them down for about 2 rounds.
Once the sequence is completed, the rest of the party members besides Lord Markus make a point of eliminating all of Thorasskus' help first. Once that is done they then gang up on and kill the High Priest.
Thorasskus will leave behind a Ring of Freedom of Movement, a Ring of Protection +3, and Bracers of Defense +4.
Medallion of the Lost Followers
The southeast corner of the room has stairs that lead to the treasure trove of the Yuan-ti. There's plenty of loot to be found here, including:
There is also another water fountain that I contaminate with Wyvern Poison. I now open the nearby door from the inside out.
I start to make may way back towards the east side of the level, killing another Yuan-ti Champion and an Iron Golem along the way.
The door to the next level is open, which was the point behind contaminating the 4 water fountains with Wyvern Poison. But first, I have a Holy Avenger to earn.
The Six Lost Followers of Bane
* The Lowdown *
Now it's time for the big fight against the Six Lost Followers. Here's the breakdown in terms of what Tactics does for this fight.
They all have more hit points, enhanced stats, higher attack bonuses, etc. They are also immune to disruption and plenty of other things. Atalaclys is now under an enduring 'Improved Invisibility' effect from the word go. It is pretty much impossible to disrupt the spellcasting of either Atalaclys or Inhein by conventional means. Veddion and Kaervas can crank out hideous damage, especially on a critical hit.
Jaeger's arrows can now cause instant death unless a saving throw is made.
What you do have going for you is that the Followers still have the same damage immunities, but also the same damage vulnerabilities, as described in the Medallion. You can formulate a strategy accordingly.
* Preparation *
First things first, you need to prepare to the max for this battle before you click on Khosa's grave, which is second to the right from the gateway. Cast all of your long lasting buffs first, like Stoneskin, Barkskin, Spell Resistance, etc. Alliria casts Barkskin not only on herself, but also on Markus and Akutagawa (this one from her Oakshield).
Now I summon some help. My recommendation is to summon some very specific monsters, and there's reasons why.
My strategy includes summoning two Zombie lords. The idea is to try to hold up Veddion for a little while. If your Animate Dead spell turns up a Greater Boneguard, just reload and try again. Veddion's hammer will blow through skeletal undead in no time at all. With the Zombie Lords, their partial resistance to blunt damage will at least give them more staying power.
Stygar, being a Cleric, summons three Remorhazes. If I happen to get either a Greater Werewolf or a Greater Feyr upon casting Summon Monster IX, I just reload. The point here is that the Remorhazes can score blunt damage, and this will help against Kaervas.
Once all the conjured monsters are summoned it's time for the last three buffs. Stygar casts Holy Aura, Elanna casts Mass Haste, and Tithian casts Emotion: Hope. Now it's time to begin the battle.
* Phase One *
First and foremost, I have Markus quickly grab the Holy Avenger. Just wait until the pickup option shows up at the bottom, hit pause, go to your inventory screen, and place the weapon in the right slot. It will be useful in this battle.
* Phase Two *
Now that the Holy Avenger has been claimed it's time for my first battle commands.
The two Zombie Lords go after Veddion.
Tithian uses a Scroll of Protection from Magic on Atalaclys to remove his magic as a factor in the battle.
Markus switches over to his hammer, and Stygar switches over to his Club of Disruption.
Alliria starts to head over to Jaeger.
Elanna casts Executioner's Eyes, ideally catching not just everyone in the party, but also the summoned monsters as well.
*Phase Three*
Markus, Stygar, and Akutawaga head straight for Kaervas. I also command the three Remorhazes to go after Kaervas as well. Between my three main warriors and the three Remorhazes, all of them packing blunt damage, and all of them ideally under the effect of Executioner's Eyes, they should be able to take out Kaervas quickly, and thus remove his x3 damage on a critical hit axe from the battle.
Alliria and Tithian stay on top of Jaeger. If only one character, or no character, is attacking Jaeger up close he'll continue to fire away with his bow. This is something you want to avoid as much as possible. If, however, two melee characters are within range he'll draw a halberd instead of his bow.
Elanna has a Mordenkainen's Sword in place, and is also ready to summon more undead if needed against Veddion.
*Phase Four*
If any of the Remorhazes survived the initial attack on Kaervas, I'll send them after Veddion. And actually, one of them managed to kill the now very vulnerable Atalaclys very quickly.
Everybody else goes all out for Jaeger, in order to permanently remove his instant death bow as a factor from the battle.
*Phase Five*
Now everybody goes all out for Inhein to stop her from summoning anymore monsters. This means switching over to piercing or slashing weapons, like Silentkiller for Akutagawa, the Ice Spear for Allira, and the Brilliant Short Sword for Tithian.
Note that Inhein did manage to get off a Tremor spell that knocked Lord Markus off his feet, and rendering him vulnerable to attacks from Veddion. Stygar thus stays close to Markus, casting Heal whenever needed, until Markus can regain his footing and join the fight again.
*Phase Six*
Now everybody goes for Veddion, who will be vulnerable to slashing weapons. He's the heaviest hitter remaining.
Note that if Executioner's Eyes ever runs out, Elanna won't bat an eyelash at casting it again.
*Phase Seven*
By now it's a mop-up operation. Next is Broken Khree.
If Atalaclys had survived, which he didn't, I would have saved him for last as Tithian's Protection from Magic scroll rendered him helpless.
'Cera Sumat,' Holy Avenger, is now Markus' main weapon. The stats of the improved version are:
+10 to attack bonus, +10 to damage, +5 enchantment, +2d6 magic damage against evil, +2d6 magic damage against chaotic, Dispel Magic on target (Will save), can cast the spell Dispel Magic without limit, +30 spell resistance. Yes it's overpowered, but I don't mind since it seems more consistent with the story in the Medallion of the Lost Followers.
Winning this battle gives Markus a +1 to Strength and a +1 to Wisdom. This was the point behind adding +1 strength at 12th level. It combines with the bonus added after the battle, and the Little Giant Belt, to give Markus a total Strength of 24. The +1 Wisdom here, combined with the Ring of the Wise (when he starts wearing it), and the +1 Wisdom bonus from the Ritual of Purification ritual will raise his Wisdom to 16.
*Incidentally ...*
If you feel that using the Scroll of Protection from Magic on Atalaclys feels a little too cheesy for you, it is still very possible to win this battle without using it. It will make things harder, and longer, but it's still quite winnable.
If you prefer it this way then Atalaclys should be taken out earlier rather than later, probably just after Kaervas. The reason is that while many of his Lost Followers are still around, he'll avoid casting spells that will hurt his comrades and therefore settle for things like Flame of Arrow. If he's by himself, or has a large enough area, then he'll start going crazy with things like Horrid Wilting. His spell protections will enable repeated castings of Horrid Wilting, which can doom the party. It will take time to work up enough damage through his Improved Invisibility effect and other protections to take him out, but it is necessary to take him out early in the battle.
In any event, there are 3 Scrolls of Protection from Magic to be found in the game, even unmodded. Why not use them? This is the first of 3 fights where I use them.
Now it's time to head to the next level.