-

- Forums
- Chatrooms
- Gallery
- Gameplay Videos
- Upload
- Articles
- Mod Reviews
- Shop SP: Games, Movies, Books
|
|
Kuldahar Valley | Kuldahar | Chult | Dragon's Eye - Level 1 | Dragon's Eye - Level 2 | Dragon's Eye - Level 3 | Dragon's Eye - Level 4 | Fields of Slaughter |
DRAGON'S EYE, LEVEL 1
*Note for the Future*
Something I need to keep mind is that soon I'll have to fight the Six Lost Followers of Bane in order to earn the Holy Avenger. In Tactics this fight is way more hellish than before. A key part of my plan is the Executioner's Eyes spell. Problem is, Elanna will need to reach 18th level to be able to cast it. So, off and on, I occasionally rest around for random monsters to kill for xp during my exploration of the various levels of Dragon's Eye, until Elanna eventually reaches 18th level.
To Dragon's Eye
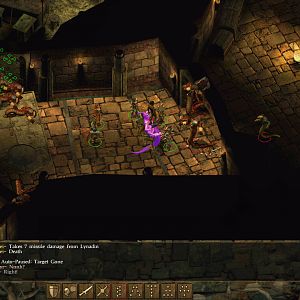
The way to Dragon's Eye is at the east end of Kuldahar. Once I reach Dragon's Eye I'm immediately surrounded by several Frost Salamanders that project an aura that can passively inflict cold damage within a small radius. This fight should still be pretty easy to win for a reasonably developed party.
The ramp way is loaded with lots of traps. Tithian carefully searches for all of them, slowly inching forward. The additional benefit of this approach is that he leads the Frost Salamanders away from the enemy at the end of the ramp way, and back towards the party for easy killing.
High Sorceress Izbelah is at the end of the ramp way. Tithian disarms all of the traps leading to her first. And indeed, since he has considerable spell resistance, he can indulge in this.
Once the way is clear I had Akutagawa and Tithian try to attack her up close as they both have spell resistance. I had Lady Elanna try more than once, albeit unsuccessfully, to bring down her protections with Dispel Magic.
I had Akutagawa and Tithian quit attacking once I notice that Izbelah had Fire Shield in place, so I brought up Lord Markus to use his Throwing Hammer of Thunder +2 on her. Unfortunately she casted Chaos and Markus failed his saving throw. But then, just as fortunately, Lady Elanna's Dispel Magic both removed Markus' confusion effect and then finally brought down Izbelah's spell protections. She was easy pickings after that.
Wyvern Caverns
Now I explore the southwest portion of the first level of Dragon's Eye. The first fights are against Lizard Men and Pureblood Thieves. The latter like to use Potions of Invisibility, both to set up for sneak attacks and to gulp healing potions if they're wounded. They initially show up in small enough numbers so that they can be killed off with routine physical attacks.
More to the southwest, at the other end of two narrow passageways, will be many Wyverns. Note how Lady Elanna plants a couple of Skull Traps by one of the passageways, with the result that the Wyverns are sure to take damage from both of them. Spells like Chaos and Chain Lightning can help too. Tithian makes a point of collecting a few of their Stingers since they'll be used in a quest later on.
There are a few chests in the southwest corner. Some of the more noteworthy items include:
The video concludes with me descending into a cavern and killing the Ancient Wyvern, which can be ganged up and killed rather routinely.
Lizard Men Bridge
Now I return to the northwest portion of the level, and begin taking out small groups of Lizard Men rather routinely.
At some point I come to a bridge. The Bridge itself is heavily trapped so I don't cross it for now. My warriors take out the Lizard Men on the near side of the bridge. There are Pureblood Thieves across the bridge firing crossbows at me. Note that they can evade many offensive spells if they make a Reflex saving throw. Lady Elanna instead kills them off with Horrid Wilting, which does hefty damage and can't be evaded because the spell requires a Fortitude saving throw.
I then kill a few more Lizard Men and Pureblood Fighters and Thieves on the other side.
The video concludes with Akutagawa grabbing another Hemp Rope from the bridge itself.
Lizard Men Prison
The gate to the prison itself is locked. The key to opening it is to try unsuccessfully the first time around. Somebody named Nheero drops a hint about how the gate opens when he hears somebody scream from torture. I send Tithian alone into the room with several torture racks and iron maidens. He clicks on a crank for one of the torture racks, and gets hit with Dispel Magic. This is the reason that I send Tithian alone. Only he gets hit with Dispel Magic, and he has extra buffs memorized that he can quickly put back up on himself.
Turning the crank also opens the gate to the prison. I then get ambushed by more Lizard Men and Purebloods, but I can kill them off rather easily. I don't show it in this video but once this fight is over, I take the time to cast Death Ward on every member of the party.There's a reason for this.
I then charge in and start killing off the Lizard Men and Purebloods on the other side rather routinely. As matters progress
A key fight at the south end of the prison is against a Mage Prisoner and a Troll. The Mage will cast a lot of spell protections on himself and the Troll, including Improved Invisibility. This fight can be a good deal tougher because the Mage can cast spells like Chaos, Disintegrate, Horrid Wilting, Wail of the Banshee, Skulltrap, and Sunfire repeatedly. This is the point behind Death Ward on everybody. The rest of the spells I can weather as long as I can kill the Mage and the Troll fast enough, which I do in this video. Note how multiple party members having the Blind Fight feat can make bringing down a Mage with Improved Invisibility so much easier. It's the Wail of the Banshee that can be a real downer, and hence I make a point of immunizing everybody to it. If you're struggling with this fight you may want to consider adding Holy Aura and Mass Haste as well.
The video concludes with me speaking with Nheero Fhutma, a sage who's engaging in hands-on research on the Yuan-ti. His quest for me is to find his travelling companion, Mandal.
High Commander Grishum
Now I have to get across the pendulum blades. I have everybody cross over one at a time. My tendency is to keep a character just a little back and time his/her start for when the blades are actually lined up with each other at the middle. This method either means the character gets across without a scratch, or a minimum of damage.
Now I rest up and do my daily buffs. My next major battle is against the leader on this level, High Commander Grishum. Note that I arrived by a narrow hallway to get here, so I use this to my advantage. I position everybody back some distance in the hallway. Now I have Lord Markus (wearing his Boots of Speed) run ahead and get the brief dialogue with Grishum over with. Note that I have him run quite deep into Grishum's room with the intention of drawing on as many enemy forces as possible. Lord Markus then regroups with the party. My spellcasters then set up their crowd-control spells just as the enemies approach. Tithian can now add Suffocate to the mix. Once they're tied down, Alliria and Lady Elanna fire away with offensive spells like Fire Storm and Horrid Wilting.
I continue on to the large chamber itself. Note that there will be several Pureblood thieves grouped together and firing away with their crossbows, and also a few Lizard Men Shamans scattered elsewhere around the room. While the warriors go around taking out the Shamans, Lady Elanna takes out the Thieves with a double shot of Horrid Wilting. Horrid Wilting has a number of advantages to it, higher damage range, bypassing Evasion for forcing its targets to make fortitude saving throws, and a large area of effect. But this also means having to stand well back and be extra careful about your own targeting.
After the smoke has cleared, Grishum will leave behind:
Cloudkiss – +3 returning throwing axe, inflicts electrical damage on all enemies in its path. This will be Stygar's missile weapon for the rest of the game.
At around 10:15 of the video is where I hit the switch to turn off the pendulum blades.
Tithian now places the Fire Agate gems he's been collecting in all of the braziers in the room, forcing the Serpent Statue to open the way to the next level.