-

- Forums
- Chatrooms
- Gallery
- Gameplay Videos
- Upload
- Articles
- Mod Reviews
- Shop SP: Games, Movies, Books
|
Wyrm's Tooth | Frost Giant Caves |
FROST GIANT CAVES
To the Frost Giant Caves
Now I head southwards, towards a narrow bridge. You will not be able to cross the bridge unless you come close enough with the Engineering Manual in your inventory. Once you do this, you get an xp reward and the bridge becomes traversable.
On the other side is the entrance to the Frost Giants Cave. I set up a savegame called 'Frost Giants Cave'. The reason is that there's an enemy wizard here who I want to cherry pick. The wizard's name is Kontik, and she will be set to drop one of the following upon first entering the cave:
This is again a process of elimination. I have in mind different weapons for any of my characters, whereas the Patriot Helm with its +2 bonus to armor class will have lasting value. It will be upgrade on the Dead Man's Face for Halagrim. And on a thematic level, the back story of the Patriot Helm fits with having a Dwarven Fighter/Cleric wear it as well.
So first, I step in through the cave entrance. About 2 or 3 Winter Wolves show up and start attacking me. I have Genevieve, Halagrim, and 1 or 2 other characters handle them, while taking care to avoid bringing more Wolves into view. Once that's done, I quick-save. Derrick then casts Haste on the party, and then everyone runs through the tunnel to the north. Everyone then runs northwest and straight for Kontik. Remember, my only present purpose is to check if Kontik is set to drop the Patriot Helm. I then click quickly through the dialogue, and then kill her right away. If she doesn't have the Patriot Helm, I reload the 'Frost Giant Caves' savegame, and start over. If she is set to drop the Patriot Helm, I reload the quicksave and go from there.
The rest of the video consists of me going through the tunnel to the north, and then killing a whole bunch of Greater Ice and Snow Trolls. Remember, take out the Ice ones first. When the Greater Snow Trolls show up in large enough numbers, Lanatir casts Chaos at them. Some of them will be confused and thus can be killed without the necessity of an acid or fire finish.
There will then be a large pack of Yeti just a little west. I rest up after I kill them.
Kontik
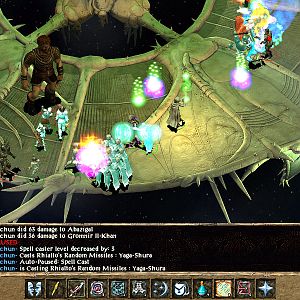
Now everybody prepares to the max, Protection from Evil 10' Radius, Emotion: Courage, Stoneskin, Mirror Image, Haste, etc. Cassandra casts Star Metal Cudgel, as it scores extra damage against construct-like creatures, like Golems.
I then move ahead, and finish my dialogue with Kontik, who is determined to avenge the death of Lysan on behalf of Auril. With Haste in effect, I am quickly able to get on top of Kontink and then kill her. I then systematically gang up on and kill her Black Ice Knights one by one.
Kontik will leave behind:
In the two containers behind where Kontik was, I also find a Barrel of Pure Water (which I'll bring later on to the Elven Arboretum), and spell scrolls for Chain Lightning, Globe of Invulnerability, and Otiluke's Freezing Sphere. Lanatir will inscribe these.
Frostbite
Now I leave, go back south through the tunnel to the east. I then go west, and then turn north. I run into Frostbite and his pack of White Wyrms. In this instance, I can outmatch them physically.
There will be 2 containers to the east. One of them will have various gems. The other will have a Mithral Field Plate +2, a Cittern of War (Emotion: Courge, Bards only), a Longbow of Marksmanship, and a couple of rings.
An altar just a little west will have a couple potions, a Clerical spell scroll, Gauntlets of Infernal Damnation (Shroud of Flame on wearer, cursed and can't be removed), and a Ring of Holiness (+1 each of 1st to 4th level priestly spells). Cassandra now wears the Ring of Holiness, and hands over the Ring of the Warrior to the Black Thorn.
Joril Frostbeard
Now I head over west until I find the chief of the Frost Giants, Joril Frostbeard. I earn a couple of xp rewards, first by convincing him to hand over his badger to me, and then trying to get him to release the slaves. This starts a fight, which I wanted anyway.
In anticipation of the fight, the Black Thorn goes into hiding, cause I want to take Joril out as quickly as possible. Halagrim and Derrick position themselves behind Lanatir and Cassandra to protect the rear. I complete the dialogue and battle begins. Cassandra casts Static Discharge. I want to kill Joril as quickly as possible, so I have Genevieve go toe to toe with him. The Black Thorn sneaks behind him for a backstab. Lanatir helps things along with a Flame Arrow.
Joril will leave behind a Chainmail +2, Joril's Axe (+3 Two-handed Axe, +1 Constitution, -1 Dexterity), plus one of the following:
It doesn't matter to me which one I got.
After this, there will be a lot more Frost Giants and Winter Wolves who will go hostile. So I adopt the strategy of moving slowly forward, and taking down Giants and Wolves alike with missile fire. My party members will split missile fire between 2 targets if more than one monster shows up. They will also draw melee weapons only when any of them happen to close the distance. This way, the damage to my party members is minimized.
There's a lot of loot to be had on the west side of the caves, much of it consisting of gems, potions, and scrolls. But there's a few unique ones as well. The 3 containers in the northwest corner of the caves will have between them:
The east containers will have a Blur Deck, and a Scimitar +3: Frostbrand (+50% fire resistance). The Frostbrand provides a good upgrade for Cassandra.
Devin
Just a little ahead east is a Frost Giant guard named Gorg, who is easily shot down. I speak with Devin, and since I've cleared literally everything in the caves, I can convince him to take the other slaves and escape. I get an xp reward for this of course.
I then leave the caves and then head towards the northeast corner of Wyrm's Tooth. There is an exit from the northeast corner that leads to a small area. This small area in turn has 3 exits. The northwest exit leads back to the small room with 3 doors in the Wyrm's Tooth building structure. The northeast exit leads to the world map. I grab this opportunity to head back to Kuldahar.
One of my stops in Kuldahar is Oswald's potion shop. I stock up on Potions of Frost Giant Strength, for use in key battles. I also buy 3 Potions of Fire Resistance in anticipation of my final battle against Belhifet.
I then stop off at Orrick's Tower. Note that the special items available for sale from Orrick did not change during Chapter 4. But they change for Chapters 5 and 6. What is available is:
I don't have much use for a cloak that offers no benefits besides those with limited charges. I have a different robe in mind for Lanatir, and indeed I don't see much use in trying to have Lanatir pretend to be a melee fighter.
I also buy some newly available spell scrolls. I bought a scroll of Ice Storm for Derrick, and again since Ice Storm's damage isn't dependent on character level, I don't mind having a multi-class Fighter/Illusionist using it. I also bought a scroll of Shroud of Flame for Derrick. This can be a two-edged spell, since it spread to your whole party if even one of them catches fire. It's best used when the enemy monsters are firmly held in a crowd-control zone. I also bought Chromatic Orb and Hold Monsters for Lanatir. Chromatic Orb is a nice single-target 'status effect' spell that remains surprisingly useful for a 1st-level spell. Hold Monsters is party-friendly, and provides Lanatir with another option.
Now I come back to the small area of Wyrm's Tooth. The southeast exit leads to the next Chapter.