-

- Forums
- Chatrooms
- Gallery
- Gameplay Videos
- Upload
- Articles
- Mod Reviews
- Shop SP: Games, Movies, Books

|
Severed Hand | Towers of the Severed Hand |
TOWERS OF THE SEVERED HAND
Solonar Tower
This tower is like a quest unto itself, so it's appropriate to include everything together in one video.
Level One
First, I explore the tower to the south. On the first level is the shade of an Elven Acolyte named Denaini. She is able to give me a fair amount of background information, but she also has 2 requests for me. One is to put to rest the spirits of the Elven priests in the upper levels of the tower. The other is to bring her some Holy Water so that she can purify the sanctuary.
Level Two
During this and the next fight, Lanatir is able to get the jump on the Shadowed Elven Priests and Acolytes with the Fireball spell, which makes physically overwhelming them easier. Halagrim also chips in with a Silence 10' Radius spell.
The chest just to the right of the stage will have set one of the following:
Warhammer +1 (+1 electrical damage)
Warhammer of Sparks +2 (50% chance of 1d3 electrical damage)
Sanctified Warhammer +2 (+2 1st level spells, +1 2nd level spell)
It doesn't matter to me which item I get out of the chest. The other chest will have some gold and a Potion of Hill Giant Strength.
I set up my 'Severed Hand' savegame before going to the next level.
Level Three
For this level, there are 2 items I want. The Shadowed Elven Cleric on the stage will have set one of the following when you first enter this level:
By any yardstick, the Symbol of Corellon Larethain is the best choice. Certainly better that simple Infravision. It provides a +2 bonus to THAC0 for both melee and missile attacks, and not just missile attacks as is the case with the Symbol of Solonar Thelandira. In the D&D 2nd ed. rule set, the benefits of increased intelligence for a properly rolled Mage are marginal. So the Symbol of Corellon Larethain is my clear choice, and will be the Black Thorn's amulet for the rest of the game. As the Black Thorn is an Elf, this also fits on a thematic level.
The chest just a little south and right of the Shadowed Elven Cleric will have set one of the following:
The Elven Chainmail of the Hand +3 is the easy choice for me, as it is high time that Derrick got himself into some body armor that still allows him to cast spells. And besides, the other 2 items demand either a Strength or Dexterity penalty.
Ok, so I am trying to pick both for items I want, making this 1/12 odds. It may require a little patience, but it is worth it. And well, during this playthrough, I managed to get both on the first try. Lucky me.
Level 4
The next level has a few small scale fights. It also has a lot of chests with various loot like gems, potions, and scrolls. Some of the more notable items include a Symbol of Sehanine Moonbow (5 charges each of Know Alignment and Find Traps) and a Ring of Sanctuary (5 charges of Sanctuary).
A chest in the south room will have the Holy Water that Denaini is looking for.
I head all the way back down, and inform Denaini that I have put the spirits of the Elven Priests to rest. I get an exp reward, as well as Edley's Sling (+2 damage, +3 THAC0), which Halagrim equips.
I then give Denaini the Holy Water. I get another xp reward, as well as Sune's Laurel of Favor (+1 armor class, +1 Charisma). Cassandra now has her headgear for the rest of the game.
Kaylessa's Tower
Again, this tower is like a quest unto itself, so I include everything in one video.
Level 1
First, I set up my 'Severed Hand' savegame. I then go up. Now, Kaylessa has a quest for me, and she'll give me a few rewards. One of these rewards is a randomized item that sets when you first enter here. The possibilities are:
As for which I want, it is again a process of elimination. The Ring is completely redundant with, even inferior to, the Ring of Shadows that I obtained earlier. There will be better bows later on as well. Kaylessa's Chainmail is only marginally better than the one I obtained earlier, and that one I obtained when it was clearly a better item than the other available choices. That leaves Kaylessa's Gloves, which will improve armor class on top of body armor. So, I kill Kaylessa first just to see if she's set to drop the Gloves. It didn't work the first time around, so I reloaded the 'Severed Hand' savegame and started over. I got the Gloves to set the second time, so I reloaded the quicksave and went from there.
Now I unlock the doors and kill off the Shadowed Ogre and Orcs waiting behind. I then speak to Kaylessa, and she provides some background information. She wants me to put the spirits of her warriors to rest in exchange for a Piece of Larrel's Astrolabe.
Now I begin with my spell preparations before going up. Note that I have Lanatir and Derrick cast Mirror Image on themselves.
Level 2
The reason is when I first ascend, there will be many Shadowed Elven Archers waiting for me, and they'll aim for my spellcasters. Mirror Image buys time for Lanatir to blow many of them away with repeated castings of Fireball.
Level 3
This is pretty much the same theme. A table at the south end of the room holds a scroll of Beltyn's Boiling Blood, which Lanatir scribes into his spell book.
The exit to the west actually leads to a different tower, but I'm saving that for later. I go up the stairs instead.
Level 4
Nothing much here besides some Wraith Spiders to kill for xp.
I then go back downstairs and speak with Kaylessa. She has one final request, for me to kill her so that she can die in battle. She's actually not that hard. Simply stay on top of her and hack her down. She'll leave behind:
War Tower
Level One
First, I set up my 'Severed Hand' savegame before entering here. Then I go up the stairs and quicksave. Derrick opens the chest towards the northeast, which will set one of the following when you first enter here:
I set it to the Longbow of Marksmanship as the best relative upgrade for the Black Thorn.
When you first look in the room through the north archway, it won't look like there's many enemies at first. But once you go far enough, many more Shadowed Elven Swordsmen and Archers will suddenly appear, as well a Cleric and a Mage. It is easy enough to get surrounded. It is possible to survive such circumstances, especially with spells like Haste and Defensive Harmony on yourselves, and Slow on them.
It is nonetheless possible to use crowd-control here as well. As Genevieve now wears the Boots of Speed, she can go up far enough to trigger the mass encounter, and still run back to regroup with her comrades. Cassandra and Lanatir now blanket the entrance with crowd-control spells. Indeed, Cassandra is now high-level enough to add Spike Stones on top of Spike Growth and Entangle. Keep in mind that the Shadowed Elves are themselves fast enough, so some of them will make it towards me before my crowd-control is set. Once most of them are dead, the Black Thorn goes into hiding and then kills the surviving Elven Mage outright with a backstab. He then upgrades to the Longbow of Marksmanship.
Level Two
This is pretty much a repeat of the same theme. The tables here hold a few spell scrolls. Derrick scribes the Stoneskin spell. As a Fighter/Illusionist, this is one of his bread n' butter spells, as it negates the first several attacks that manage to get past his armor class. He also scribes the scroll of Cloudkill. Cloudkill does the same damage each round no matter what the character level. Consistent with what I said earlier, it makes sense for multi-class mage types to use these types of spells. Derrick scribes the scroll. There is also another scroll of Icelance, which I'll just sell.
Level Three
This is pretty much a series of rooms with small-scale encounters. There is a chest in the east room that will have Arrows of the Hand +2, a Potion of Storm Giant Strength (which Genevieve will save for the final battle), and one of the following:
It didn't matter to me which one of these I got.
Level Four
This is the Arboretum, which is watched over by an Elven spirit named Valestis. He wants some items to help him return the Arboretum to its former beauty. I won't be able to find these items for quite some time yet.
Diary of Evayne
Now the party goes back to the east tower, and up to its third level. This time, instead of going up the stairs, I take the exit leading west. I find myself on a rampart leading westward. Two Shadowed Elven Swordsman arrive, and Genevieve and Halagrim handle them. Two Shadowed Elven Archers arrive, so Derrick and the Black Thorn open fire. Once Genevieve and Halagrim best their foes, I have them stay put. I let Derrick and the Black Thorn finish off the Archers instead. Now the party inches slowly forward. A Shadowed Elven Cleric arrives, but is easily shot down by missile fire. Next is a Shadowed Elven Wizard, and the result is the same. By staying patient and not rushing forward, I was able to win by a process of attrition.
The next room is somewhat trickier. There's quite a few Shadowed Elven Swordsmen, Acolytes, Clerics, and Wizards. It's hard to open fire on them with either ammunition or spells, because you have only a narrow doorway to work with. But I had a couple of characters work on it, while Genevieve went forward. Having the most hit points and the best saving throws, she's able to hold their attention relatively unscathed.
There's plenty of chests around here with loot like gems and potions and scrolls. The table to the east has a couple of potions, and a scroll of Protection from Missiles.
The table in the northwest room will have some gold, a Potion of Clarity, the Diary of Evayne (which is a quest item, the significance of which will not be realized until later), as well as one of the following which sets when you first enter here:
The table in the west room has a Potion of Genius, and scrolls of Improved Invisibility and Malison. Derrick scribes both of them. The Improved Invisibility spell provides Derrick with another defensive resource for his Fighter/Illusionist build. The Malison spell is basically a primer, to penalize the saving throws of monsters in order to set them up for offensive spells from either Cassandra or Lanatir.
Mythal Lore
Now I go up the next level, which is a library. I speak to the librarian, Custhanatos, who offers to allow me to read any of several books. The only one I'm interested in is the book on Mythal theory, as this is the one that Orrick is looking for.
Once I have the book, I make my way back to Kuldahar. Orrick gives me an xp reward for bringing him the book, as well as one of the following items:
As for my choice, I may as well speak about the limitation that you cannot equip magical armor with a cloak or ring of protection. Sure, there's good magical armors out there. But a possibility you need to take into consideration is whether a non-magical armor plus a ring or cloak of protection provides greater aggregate benefits than a magical armor. This is especially the case if there are armors that the game recognizes as 'non-magical' but themselves provide benefits beyond your usual generic armors, like for example straight Plate Mail. In fact, I have two such set ups planned for both Halagrim and Cassandra. The one for Halagrim won't happen until some time later, and the one for Cassandra won't fall into place until much later. Still, Mithran's Cloak is one of the best items 'of Protection' out there, and having Cassandra wear a generic armor with this cloak is by no means a shabby interim set up.
The xp reward was enough for me to advance both Halagrim and the Black Thorn a level. I've had the Black Thorn work on his Pick Pocket skill since nearly maxing out his Find Traps and Open Locks skills. He's now ready to indulge in a little thievery. He pickpockets Orrick for the Ring of Free Action. Halagrim wears this ring for the rest of the game, and the reasoning is the same as for other D&D games I've played. If your party members are subjected to attacks that cause paralysis, like for example a Hold Person spell, you rely on your Cleric to bail them out with a Remove Paralysis spell. He cannot do this, however, if he himself has been paralyzed. It is therefore logical to immunize your Cleric from paralysis, so that he has a free hand to come to his comrades' aid.
The Black Thorn also pickpockets Orrick for the Amulet of Metaspell Influence (+1 2nd level spell), which Lanatir then wears as an interim amulet.
Now I go to Conlan's and buy the Black Bow (+3 damage, +4 THAC0) from him. It will be the relatively best bow that the Black Thorn will have for quite some time.
I then pickpocket Oswald for the Ring of Protection +2. Halagrim will wear this. He ultimately has a different armor and a different ring in mind, but this will do for now.
Larrel and the Astrolabe
Now I return to the library, and go up to the next level of the Labelas Tower. I speak to Garelith, and give him all 4 Pieces of Broken Machinery to restore the Astrolabe.
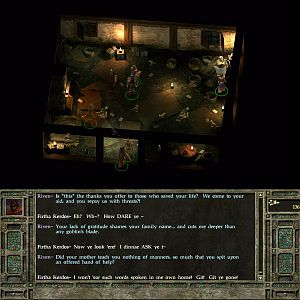
The remainder of the video is me getting from Larrel his take on past events. When I show him the Diary of Evayne, this provokes an angry verbal outburst from Larrel.
I will speak to him again concerning the Heartstone Gem, which brings me to Chapter 4.