-

- Forums
- Chatrooms
- Gallery
- Gameplay Videos
- Upload
- Articles
- Mod Reviews
- Shop SP: Games, Movies, Books
|
|
Origins | Ostagar | Lothering | Circle Tower | Warden's Keep (DLC) | Return to Ostagar (DLC) | Stone Prisoner (DLC) | Brecilian Forest | Redcliffe | The Urn of Sacred Ashes | Orzammar | Deep Roads | Denerim | Final Onslaught |
Lake Calenhad | Shopping Around | Apprentice Quarters | Senior Mage Quarters Random Encounters |
THE FADE
Weisshaupt
The next part of the video involves an illusion of Duncan and the Grey Warden fortress of Weisshaupt. This fight shouldn't be very difficult, but just in case, a nearby Lyrium Vein will boost both health and mana/stamina. My recommendation is to take out the Mage first, then Duncan, and then save the archer for last.
The next video involves me speaking with Niall.
Now I take the portal, and kill a Rage Demon in fairly short order. I speak with the Mouse afterwards, and learn the ability to transform into a Mouse that can crawl through the Mouse Holes in this part of the game.
The rest is following a linear path with the odd fight against either a lone Lesser Rage Demon or a lone Lesser Shade, neither of which should be particularly difficult. If you really are having trouble, just click on a Lyrium Vein when you need it.
Burning Tower
Note that there are several walls of fire here that cannot be passed without dying unless you learn another alternative form.
First I crawl through the Mouse Hole to my left and get a permanent +1 to Cunning.
I return and then go through the door to the east. I go through another door on the right-hand side, and through a mouse hole. I have to fight against two Burning Templars on the other side. This is easy enough for me with Cone of Cold followed by single-target spells. If you need it, there is a nearby Lyrium Vein.
I continue forward. Note that Massive Doors cannot be opened until you've learned the Stone Golem form. I go up the stairs for now.
I then make my way through the large central grid of the Tower. I have to frequently fight monsters like Burning Hounds or Burning Templars. Either Cone of Cold plus single-target spells or Cone of Cold plus Shock works.
Now it's through the Mouse Hole on the east side of the central grid. It is time to fight a Templar Dreamer and a Rage Demon. Note that there is also a Lyrium Vein in this room. I wait until the Rage Demon closes so that I can hit both it and the Templar Dreamer with a Cone of Cold. I finish off the Rage Demon with Winter's Grasp, and then use Crushing Prison on the Templar Dreamer. The Dreamer gives me the power of the Burning Man form, which allows me to casts Fireballs and Flame Blasts, and allows me to pass through the walls of fire without taking damage.
Mages Asunder
I begin by crawling through the Mouse Hole just to my left. I get a permanent +1 to Strength, and then return the way I came.
I then go through the Mouse Hole further ahead. I show how the Mouse Form can be used to sneak into ideal position before starting a fight. I get behind two Mages so that they're in a straight line. I then revert back to human form, and hit them right away with Cone of Cold + Shock.
I then go to the next room. At 2:00 I begin to show a fairly frequent tactical theme. Whether or not your Grey Warden is a mage, you can often use Fireball from your Burning Man form to either kill a group of mages outright or at least grab the initiative after knocking them off their feet. I can't use the nearby font until I've acquired the Spirit Man form.
I show this theme again in the next room at 3:00. I use Fireball to get the jump on the Mages. I notice that one of the Mages is using a powerful spell indicated by the timer above him. I respond by quickly reverting to my Elven form and then interrupting the spell with Winter's Grasp. The rest of the Mages are much easier to deal with after having weakened them with the Fireball.
In the next room, at 4:00, I start off with a Cone of Cold against the Servants. I follow up with Shock, and then finish off the Servant who's closer to dying with single-target spells. I then kill the other Servant instantly with Crushing Prison, which can Shatter a frozen opponent. Another servant attacks me as soon as I open the next door, but he's easily killed.
I use the Burning Man form to cross the wall of fire, but quickly revert to Elven form after I've gone across. At around 5:00 is a fight that can be pretty tough. It starts off with two Rage Demons, which I kill fairly easily with Cone of Cold + Shock. But then two more Rage Demons show up. I quickly kill one of them with Winter's Grasp + Arcane Bolt. I then doom the other with a Cone of Cold.
At 6:00 is a fight against a rather more durable group of Mages. Note that I have to settle for catching at least three of them with Fireball, and two of them managed to pick themselves back up. After that, it becomes a matter of using either Cone of Cold or single-target spells as the occasion warrants. I was also getting a bit low on Health and Mana, so I made use of the nearby Lyrium Vein to ensure I could finish off the remaining survivors.
At around 8:00 is another example of me getting the jump on another group of Mages with Fireball. The two Mage Instructors are more powerful than the others, so very often special measures need to be taken against them. Aldarion quickly reverts to Elven form in order to use Crushing Prison on the nearest Instructor. He then goes back into Burning Form, and positions himself to use Flame Blast on the two survivors. He then reverts back to Elven form in order to finish them off with single-target spells. The nearby Massive Door can't be opened without the Golem Form. I have to go up the stairs instead.
At around 9:25 is a key battle. Two Golems and a few Servants will be ganging up on a Cursed Dreamer. I wait until most of them form a solid line next to the Dreamer, and then hit them with a Cone of Cold + Shock. I pick off the weakened Servants with single-target spells, while using Crushing Prison to shatter the Golem. The fight is soon won. The Cursed Dreamer then gives me the ability to transform into a Stone Golem, which gives me access to a number of helpful combat powers, and also the ability to open Massive Doors.
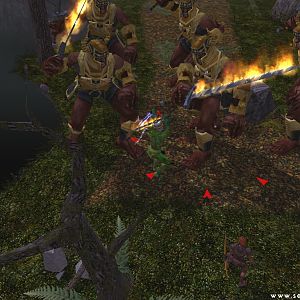
The Darkspawn Invasion
First, I proceed through a couple of Mouse Holes leading east to get an Essence of Cunning. I then return the way I came.
I next head north. Fights against small groups of Darkspawn will become quite frequent. My spells here usually suffice. If your Grey Warden is not a Mage, then the Golem's Quake followed by melee attacks should suffice to win many fights. Also keep an eye out for Lyrium Veins.
I win my first such fight against a pair of Hurlocks and a Genlock Alpha. A Font of Strength is on the other side of a Massive Door to the left, which can be opened by the Stone Golem Form's Hurl ability.
I continue to make my way through the hallways leading north, battling more Darkspawn along the way. Remember, the Burning Man form is needed to cross the walls of fire. My use of spells is always tailored to the situation. For example, at 5:50 the Darkspawn Emissary is too far to catch with the Cone of Cold. Instead, I show how Crushing Prison can be an effective way to deal with a single Mage, either killing him outright or taking him out of the battle long enough for me to finish him off before the Crushing Prison wears off. I then catch the oncoming Hurlocks with a Cone of Cold. I then show how the Golem Form abilities can complement my own. One of the Hurlocks resisted my follow up Shock. So I turned into the Golem, and then used Slam on the Hurlock that resisted my Shock (who thus had more health). A critical hit, like from Slam, will Shatter and instantly kill a frozen enemy.
I then go through the Mouse Hole to the left. I kill the Genlocks to the west.
I then go back the way I came. I go east and kill three more Darkspawn. Note how handy Quake can be when I get surrounded.
I then turn north and then west. On the other side of the door will be several Spirit Darkspawn attacking a Templar Spirit. I position myself for the Cone of Cold - Shock combo. And again, using Slam to do a Shatter followed by Quake does just as well here. After that, I reverted back to Elven form and positioned myself for another Cone of Cold. Once the battle is over, the Templar gives me the ability to adopt the Spirit Form. This form allows me to proceed through Spirit Doors, and to access certain attribute raisers that were previously unavailable. I make a start with the nearby Essence of Willpower.
Uthkiel the Crusher
From 10:30 onwards is a fight against a very large group of Darkspawn, after I open the Massive Door with Hurl. Fortunately, the first several are willing to lunge forward without any support with some encouragement from my Blizzard spell. I then go to the right of the door and let them come to me. I then continue to pelt them with spells as they come to me.
At some point I hit the remainder with a double shot of Blizzard and Cone of Cold. Next, I unleash a Quake from my Stone Golem Form after they close in and surround me. This suffices to kill them off, since they were previously weakened by my spells. I then nail the sole survivor with Crushing Prison once he comes forward.
The next fight is against the boss of this level, Uthkiel the Crusher. I hit him with spells, and retreat to just beyond the door. I then hit him with more spells, and retreat some more towards the Lyrium Vein. I dodge Uthkiel's Hurl first, and then use the Lyrium Vein to renew both my Health and my Mana. This suffices to kill him.
Yevena
The first part of the video involves going back to the Weisshaupt portion of the Fade, and then using my newly acquired Spirit Form to get a permanent +1 to willpower.
I then return to the Raw Fade. I tread the same path as before where I took the portals and found the Mouse, except this time I can use the Spirit Man Form to open a hidden door. This leads to a kind of marooned ship. I kill a couple of nearby Wisp Wraiths. I then help myself to an Essence of Dexterity.
Now it is time to head back to the section of the Fade where I first spoke to Niall. I can now use the Spirit Form to enter through the hidden door that's next to the Fade Pedestal. This leads to a battle with a Desire Demon, Yevenna, along with a couple of Lesser Shades. I grabbed the initiative with a carefully placed Fireball. I change into Golem Form as they close in on me, and use Quake. I next revert back to my natural form, and then position myself for Cone of Cold plus Shock. Yevena's fate is sealed after I get her with a Crushing Prison followed by other single-target spells. If you have trouble with this level, there is a Lyrium Vein here.
I use the Spirit Form to access the Essence of Willpower. I then find my way back and then speak to Niall some more.
Rhagos
Now I return to the Burning Tower in order to complete it and defeat its Demon. I initially start off at the Fade Pedestal near where I first acquired the Burning Man form.
First, I make my way back to the central grid. I use my Spirit Man form to go through the hidden door at the northwest corner of the grid. I then grab the Essence of Cunning and the Essence of Constitution.
I then return and then take the stairs to the south. I change into Golem form to open the Massive Door to the west of the stairs. I then grab the Essence of Magic.
I return to where I had first learned the Burning Man form. I use the Golem form to open the Massive Door to the north. Several Burning Templars and Burning Skeletons are coming straight for me. I start off with the Cone of Cold and Shock combo just as they are coming through the door. I then punctuate with Quake, and use Slam to further damage the enemy with the most health remaining. After that, it's a mop up.
I continue north. Rhagos is easily beaten with Crushing Prison and cold-based spells, both of which are available through the Spirit Form. I then grab the nearby Essence of Strength at 4:45.
Slavren
Now I return to Mages Asunder. I initially start at the Fade Pedestal near where I first acquired the Stone Golem form. I begin by going down the stairs across the room. I then use the Stone Golem form to open the Massive Door to my left. The third room down the adjoining hallway has an Essence of Magic.
I backtrack to where I first acquired the Stone Golem form. This time I take the stairs leading up. On the other side will be a couple of Mages and a Golem. I get the jump on them with Fireball. After the Mages have died, I kill the Golem with Cone of Cold + Slam from the Stone Golem form.
I use the Stone Golem form to open a door to the south. A couple of Chantry priests are on the other side. I remain in Golem form to use Quake on them, then follow up by reverting to Elven form in order to position myself and use Cone of Cold. This pretty much assures victory.
I then enter a central hub that adjoins four other rooms. The hub itself will have the odd Stone Golem. I can deal with a single Stone Golem easily enough by hitting it with Cone of Cold, turning myself into a Golem, and then Shattering the other Golem with my Slam power.
The room to the northeast will have two Mages and a Chantry Priest. I am able to take care of them after catching them with a well-placed Fireball from the Burning Man form.
The room to the southeast is challenging, because I'll have to fight three Stone Golems at once. I retreat with the idea of being able to get all three Golems in a row for the Cone of Cold spell. I then Shatter two of them, one with a Crushing Prison, the other with a Slam from the Stone Golem form. I have to go the distance to finish off the third surviving Golem. The room itself has a Font of Strength.
The room to the south has two Arcane Horrors. I use a Fireball from the Burning Man form to kill them outright.
Now I use the Spirit Man form to pass through a hidden door at the southeast corner of the room. I kill the Stone Golem on the other side. I use the Essence of Dexterity.
I continue through the Mouse Hole, and kill a couple more Stone Golems with familiar tactics. I help myself to an Essence of Cunning, an Essence of Constitution, and an Essence of Dexterity.
I backtrack through the Mouse Hole, and the Spirit Door, and then head south. The last part of the video is my fight against Slavren in order to complete this part of the Fade. Slavren proves easy enough with Crushing Prison followed by other single-target spells. Quake followed by Slam should work as well.
Wynne's Nightmare
The Burning Tower and Mages Asunder are now finished, which means I can access the Nightmare part of the Fade that is in between them. This is Wynne's nightmare, which involves her feeling guilty over letting her students down. The students are actually demonic spirits in disguise. They have Mage abilities, so I make a point of disabling all of them as fast as I can, one with Crushing Prison, the other two with Cone of Cold.
If you have trouble with any of the fights, keep in mind these Nightmares always have a Lyrium Vein handy.
Templars' Nightmare
Now I head over to the Templar's Nightmare. It makes sense to do this area last, since it does not itself yield any forms that I can learn or need.
I begin by going through the door to my right. I then open the door to the next room to the east. Three Abominations come after me, which I kill with standard tactics. I then crawl through the nearby Mouse Hole and then kill a Blight Wolf. I take the Essence of Dexterity.
I then backtrack, and go to the next room to the east. A Crushing Prison suffices to kill the Arcane Horror on the other side of the door.
I then go through the Mouse Hole in the northeast corner. I surprise the Ogre with a Cone of Cold, and then kill it instantly with a Slam from my Golem form. I also kill the Abomination that arrives just afterwards.
I go to the next room, where I defeat a single Abomination. I then use Burning Man to get past the wall of fire, and switch to Mouse to get through the Mouse Hole. I am able to get the jump on the two Abominations with Cone of Cold and other powers.
Verevel
Now I go through the Spirit Door. I set up the Abominations with Mind Blast, and then I hit them with Cone of Cold + Shock + Quake.
There is an Arcane Horror and a Skeleton on the other side of the Massive Door. I start off with Cone of Cold, and then Shatter them, the Arcane Horror with Crushing Prison, and the Skeleton with Slam.
I then go through the portal. The room on the other side is about to fill up with flames pretty quickly, so I'll need to change into the Burning Man right away. I rush through the next door and kill the two Abominations.
At 8:55 is another Arcane Horror and two Skeletons. They go down pretty easily to the fire spells of the Burning Man form, as well as a Crushing Prison on the Arcane Horror.
The last fight is against the Desire Demon, Verevel. It is easy enough if you can get the jump on her with Crushing Prison, which is available through your Spirit Form. I also do it just by combining Cone of Cold with single-target spells, including Paralyze.
I then grab the Essence of Cunning.
Alistair's Nightmare
In Alistair's dream, he's deluded into believing that he has been reunited with his sister, Goldanna. The ensuing fight against a few Skeletons shouldn't be all that difficult.
Leliana's Nightmare
Leliana's dream involves her praying before a Chantry Revered Mother. Once I snap her out of it, the Revered Mother reveals herself as a Shade.
The Sloth Demon
Now it's time to fight the Sloth Demon in order to escape the Fade. The Sloth Demon will progress through several different forms in this order: Ogre, Rage Demon, Abomination, Shade, and then its true self that resembles an Arcane Horror.
The key here is to have everyone stay on top of the Sloth Demon, whatever form it is in, while Wynne keeps everybody on the up and up with Heal and Group Heal and Lifeward when needed. Aldarion will chip in once in a while with Cone of Cold. If Wynne runs out of mana, she replenishes herself with one of the two available Lyrium Veins when needed, and before she quaffs any Lyrium Potions.
At one point the Rage Demon form uses a flaming gout attack that scores continuous fire damage to anyone that remains standing over its area of effect. So I have to move my characters to a different part of the area.
Once it gets to its Arcane Horror form, it can cast spells like Blizzard, Chain Lightning, and Crushing Prison. Blizzard can be especially difficult to contend with, since it makes reaching him so much more difficult. If you notice a 'meter' running above its head, it means that it is casting a high-level spell. Whenever possible, try to interrupt the casting. In past playthroughs I often had Wynne knock the Demon down with a Stone Fist when she noticed the 'running meter'. In this playthrough, Alistair managed to keep the Demon off-balance with his shield talents, so it never got to that point.
Now I Return to the Circle Tower.