-

- Forums
- Chatrooms
- Gallery
- Gameplay Videos
- Upload
- Articles
- Mod Reviews
- Shop SP: Games, Movies, Books

Origins | Ostagar | Lothering | Circle Tower | Warden's Keep (DLC) | Return to Ostagar (DLC) | Stone Prisoner (DLC) | Brecilian Forest | Redcliffe | The Urn of Sacred Ashes | Orzammar | Deep Roads | Denerim | Final Onslaught |
Lake Calenhad | Shopping Around | Apprentice Quarters | Senior Mage Quarters Random Encounters |
APPRENTICE QUARTERS
The Spot
First, one thing to keep in mind is that once you step through the doors, there's no coming back out until you see this very long quest through to its end. This is the reason I bought as many Health Poultices and Lyrium Potions as I could beforehand.
The initial hallway has two rooms, one after the other on the right hand side. An Apprentice's Locker in the second room provides a Codex entry that makes a reference to Dendri's Bed. After this I can now click on Dendri's Bed, which will be in the first room. It will contain various magical grenades and potions.
Wynne Joins
Shortly thereafter, I have Wynne join my party. Morrigan gives way to Wynne, who becomes a mandatory party member during the Circle Tower quest and will become one of my core party members for most of the game.
Once in the party, I have her use the other two Tomes of Arcane Technique that I bought to learn Spell Wisp and Lifeward. She also equips the items I saved up for her, the Ring of Ages, the Seal of Rat Red, and the Torch of Embers.
I also reset my scripts. Wynne gets rid of her use of Rejuvenate and such, but adds Spell Wisp and Rock Armor as active sustained abilities. Aldarion adds Miasma to start getting used to his role as the Arcane Warrior.
The video then concludes with Wynne opening the magical barrier.
Promises of Pride, Enchanter Gravid
I keep going, and fight more than one group of Abominations along the way. As you may notice, small scale fights like this aren't that much to worry about, especially when Wynne can use Heal or Group Heal as often as need be. Abominations at this point won't be too difficult, but keep in mind that they will explode with fire damage in a certain radius once they are killed. Aldarion of course looks out for opportunities to hit several of them at once with Cone of Cold.
One of the Abominations leaves behind a note that provides a Codex Entry for "Promises of Pride". Promises of Pride isn't really so much a quest unto itself, but rather a series of notes that provide background for what happened. The note in this case came from Enchanter Gravid, who apparently became the Abomination that left the note behind.
The video concludes with Aldarion adjusting his script a little bit. He gets rid of his scripted use of single-target spells, since he's transitioning into his role of Arcane Warrior. He also switches out Telekinetic Weapons for Frost Weapons for the time being, since many of the creatures here will be fire-based and will take extra damage from cold-based powers.
Summoning Sciences
I backtrack a little, and click on the Torn Book to get the quest called "Summoning Sciences" started. The resulting Codex entry will give me the clues I need. I need to r-click on things in a precise order. I hit the -tab- key when I need to find the next object in the order. The order is as follows:
First Exercise
R-Click on the Summoning Font.
R-Click on Tome of the Spirit.
R-Click on the Flames that indicate Summon the First. A Spirit Hog will appear and quickly die. I loot its body for a Garnet.
Second Exercise
R-Click on the Summoning Font.
R-Click on Rodercom's Uncommon Calling.
R-Click on the statue of Mage Gorvish.
R-Click on the Flames that indicate Summon the Second. A spirit known as a Trickster Whim will appear briefly, and then fade away.
Third Exercise
R-Click on the Summoning Font.
R-Click on Elvarne's Grand Bestiary.
R-Click on the Common Table.
R-Click on the Spiritium Etherialis.
R-Click on the statue of the Mage Gorvish.
R-Click on the Novice Phylactery.
R-Click on the Flames that indicate Summon the Third. A Fade Rifter will appear, who is actually pretty easy to take on by himself. Once dead, it leaves behind the Charged Mitts (+10% Lightning). Aldarion wears these as interim gloves.
Please note that fulfilling this quest is a prerequisite to being able to do the Unintended Consequences quest much later on, which will net a nice pair of boots for Wynne.
Greater Rage Demons and Abominations
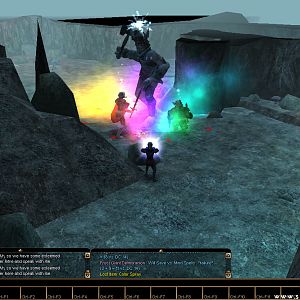
There will be a Greater Rage Demon and several Abominations on the other side of the door. It's a narrow doorway, so this is an opportunity to set up crowd-control. Aldarion uses Blizzard, which can be both an ongoing damage spell, and a source of crowd-control as well. Wynne adds Earthquake. Keep in mind that Earthquake really ups the 'aggro' on Wynne for any monsters that make it through, so be sure to deal with it if it happens. The party starts pecking away with missile attacks. The Greater Rage Demon makes it out first, and this plays into my plan. The Abominations manage to slog through, so the risk involved with casting Earthquake is about to become very real. But by then the party had already finished off the Greater Rage Demon. The Abominations zero in on Wynne, but she negates the risk by using Lifeward on herself. This buys enough time for her comrades to finish them off very quickly.
The table provides another Codex Entry that is relevant to the Summoning Sciences quest. A corpse on the floor also yields another Apprentice's Amulet (+1 armor, +5% cold resistance, +5% fire resistance).
Now I go up to the Senior Mage Quarters.


