-

- Forums
- Chatrooms
- Gallery
- Gameplay Videos
- Upload
- Articles
- Mod Reviews
- Shop SP: Games, Movies, Books
|
|
Origins | Ostagar | Lothering | Circle Tower | Warden's Keep (DLC) | Return to Ostagar (DLC) | Stone Prisoner (DLC) | Brecilian Forest | Redcliffe | The Urn of Sacred Ashes | Orzammar | Deep Roads | Denerim | Final Onslaught |
Lake Calenhad | Shopping Around | Apprentice Quarters | Senior Mage Quarters Random Encounters |
GREAT HALL
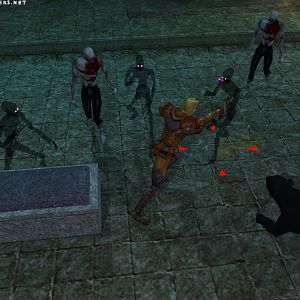
Arcane Horrors and Corpses
I start off looting a random item from a nearby chest, and then I go west. The large room to the west has a fight that involves two waves of skeletons attacking you. Once you kill off the first wave, an Arcane Horror will appear at the west door of the room. For this battle, I have everybody head straight to the west door and stay by it, so that the Arcane Horror will be within reach once the second wave starts. Once the west door opens, Alistair heads straight for the Arcane Horror. The Arcane Horror did manage to get off Chain Lightning, so Wynne casts Group Heal. Things also get hairy on account of the party getting surrounded by the now very numerous undead, so Leliana locks them down for a while with Captivating Song. Once the Arcane Horror falls, it becomes a matter of mopping up the Skeletons.
I take a moment to collect any Corpse Galls I can off the undead, since they'll be handy for a quest much later on.
Promises of Pride, Enchanter Lavus
The next room has a lot of Abominations. There's also a trap at the door, so I don't rush through. Instead, I set up both Blizzard and Earthquake. The result is that they can only come at me one or two at a time, allowing me to kill them piecemeal and already damaged. Note also that Aldarion makes a point of switching to his Wintersbreath staff when he casts Blizzard, both for the bonus cold damage and for the +3 bonus to Spellpower. There are another two Lesser Rage Demons in the room, which aren't that difficult. One of the Abominations leaves behind a note, Promises of Pride from Enchanter Lavus.
Promises of Pride, Enchanter Fonst
I continue west, and kill another Abomination. The Abomination leaves behind another Promises of Pride note, this time from Enchanter Fonst.
The room to the north introduces the party to a new kind of danger, Possessed Templars capable of using Holy Smite. Keep in mind that they'll usually single out mages for the use of this ability. In this case, there are only two of them, so Aldarion is able to quickly snap out of it and then help his comrades cut them down.
White Runestone
Now I take care of the monsters in the central room. There's a specific reason for this that I'll explain later. But for now, it's the recipe of Earthquake + Blizzard + Tempest. Note that I can have Aldarion temporarily shed his sustainables if I need him to get off more activated spells, like here. The set up serves to inflict steady damage on the monsters and it also prevents them from coming out all at once. This allows the party to kill them off piecemeal. The Abomination leaves behind a White Runestone that can be gifted to Alistair.
Shiver
Now I head back to the hallway where I was previously. The reason for this is that there's another room that has several Charmed Templars controlled by a Desire Demon. The Desire Demon can cast Winter's Grasp, Cone of Cold, and other spells. The Templars will all fire off Holy Smite if they see a Mage, and this can kill either Aldarion or Wynne outright. So I had Alistair open the door to their room, and lead them back to the Hall. The idea is that with just the right timing, I can get in some early damage and crowd control. Just as Alistair makes it back into the room, Aldarion drops a couple of his sustainables, drinks a Lesser Lyrium Potion, and then lets off both Blizzard and Tempest. Wynne also casts Earthquake once Alistair rounds the bend. Wynne knows that this will earn her a lot of 'aggro', so she puts a Lifeward on herself immediately thereafter. The Desire Demon is the first to make it through, so Aldarion drinks another Lesser Lyrium Potion and then hits the Demon with a Crushing Prison spell. I then train Alistair on the Demon and have him finish her off. The Templars manage to eventually make it out, and manage to get off a Holy Smite or two. They have, however, been significantly weakened by having to struggle their way through both Blizzard and Tempest. This fact, coupled with Wynne's use of healing spells once she recovers, ensures victory. This battle provides an example of how, even if your crowd-control zone doesn't keep everybody knocked down for the whole fight, it can still result in a divide and conquer process whereby you take out any stragglers that do happen to make it through without support.
Incidentally, the reason I took care of the undead in the central room first was because if I did this setup while they were still alive, they would have joined the fight alongside the Desire Demon and the Possessed Templars.
The Desire Demon leaves behind an amulet called Shiver (+20% cold resistance, -1 Dexterity).
Watchguard of the Reaching
The first point of the video consists of me clicking on Apprentices' Footlockers and Apprentices' Notes in order to obtain Codex entries that provide the clues for this quest. These can be found at various points throughout the first three levels of the tower.
The first step of this quest is to click on certain statues in a certain order: statue with a bowl, statue with sword up, statue with sword down, and then the statue with a shield in the central room. Now I head back down to the first level of the Tower.
I return to the first floor, near where Wynne first joined the party, and click on the door leading to the sealed off basement. Shah Whyrd is a particularly powerful Rage Demon who can use Flame Blast, Fireball, and an attack that involves having lava gout from the floor, requiring characters to stand somewhere else to avoid continuous fire damage. His attacks do quite severe damage in comparison to other Rage Demons, so it is imperative to seize the initiative. Wynne helps in this with a Glyph of Paralysis. Aldarion attempts to follow up with a Crushing Prison, which was resisted. Wynne's first spell was nonetheless still helpful in that it gave Aldarion and Alistair time to get on top of the Demon and keep it occupied. Leliana and Wynne fire away at a safe distance.
Now I go up to the Templar Quarters.