-

- Forums
- Chatrooms
- Gallery
- Gameplay Videos
- Upload
- Articles
- Mod Reviews
- Shop SP: Games, Movies, Books
Prologue | Chapter 1 | Chapter 2 | Chapter 3 | Chapter 4 | Chapter 5 | Tales of the Sword Coast | Chapter 6 | Chapter 7 | |
Ice Island | Balduran's Isle | Durlag's Tower - Above Ground | Durlag's Tower - Level 1 | Durlag's Tower - Level 2 | Durlag's Tower - Level 3 | Durlag's Tower - Level 4 | Cult of the Demon | |
DURLAG'S TOWER - LEVEL 1
The Four Warders
Now I begin to explore the underground levels. Note that Imoen uses her artifact book, and then guzzles a Potion of Perception. There are lots of traps throughout the underground level, and it often behooves me to have Imoen, 'stuck' as a character who dual-classed from Thief, to make use of her potions. I then go through the north door, leading to the first underground level.
As soon as I step through, a couple of Phase Spiders teleport in my midst, forcing me to kill them. Imoen then disarms a trap that's immediately ahead of the stairs.
The party then travels in a southwest direction. There is a large room where stand four Dwarven spirits who act as Warders against entry to the next level. I speak with each one once and learn that each has a certain theme: Fear, Avarice, Pride, and Love.
Just west of the Warders are a few containers, which include Potions of Master Thievery, Potions of Perception, a Potion of Fire Resistance, a scroll of Protection from Acid, a scroll of Protection from Lightning, 6 Antidotes, a Wand of Monster Summoning, and a Mallet Handle. This last item is a quest item that I'll need to make progress.
Mallet Head
Now I journey back towards the initial entrance to this level. I go to a room to the east. Imoen checks for traps and takes whatever loot I find useful.
I continue east, and enter a small library. Imoen again checks for traps. The item of note that I found here is a scroll of Cloudkill, which Avastrian scribes.
Now to the north and east will be another small library that has three Greater Dopplegangers. Like their lesser cousins, Greater Dopplegangers start off with Haste and Mirror Image in place. They do, however, have more hit points, better THAC0, and hit for more damage. They also start off combat with fear spells against the party. Yeslick casts Remove Fear on the party beforehand. As with standard Dopplegangers, Imoen's use of Remove Magic suffices to bring down their protections and make them vulnerable. Paradoxically this fact makes Greater Dopplegangers easier in SCS than they were in vanilla BG1.
The bookshelves here have a few odds and ends, including a couple of spell scrolls, as well as the Mallet Head. I will use this and the Mallet Handle very soon.
Gong Mallet
Now I go back the way I came. I find a hallway about due west. In the room at the other side will be a pair of Battle Horrors. Besides Wands of Paralyzation, a bolt of Lightning can wear them down too, especially if they bounce off the wall and the way they came to hit more than once. Just be sure to keep the party out of harm's way.
Now I enter the room itself. There will be a few trapped chests from which I obtain some more magical ammunition, as well as another Potion of Perception.
The adjacent room to the west has another trapped container, which yields more ammunition. The room also has a forge. Avastrian clicks on the forge in order to fuse the Mallet Handle and the Mallet Head into the Mallet Gong. This will be used very soon.
Durlag's Fear
The room to the south will have a few Ghasts. Hitting them from afar with missile weapons and then cutting them down once they reach me works well enough. The room has a cabinet that yields more magical ammunition, a Potion of Perception, and a Potion of Cloud Giant Strength. Imoen also opens up the secret doors of the room.
The party continues southwest, disarming a trap along the way. Once at the end of the hallway, the party is forced to kill another pair of Phase Spiders.
A small room to the west will have a Gong. Avastrian, with the Gong Mallet in his inventory, clicks on the Gong.
The party now makes their way back to large central room. Avastrian then speaks with the east Warder, who declares that the Fear riddle has now been solved.
Durlag's Pride
Avastrian sets up his Minor Spell Contingency, Blur combined with Mirror Image. Combining the protective features of both spells is often ideal for a Fighter/Mage who wades into the thick of things.
Now I go back down the western hallway, towards the southwest. There will be another room, just a little south of the Gong room. Avastrian clicks on each book in the room, learning of the past heroic deeds of Durlag. He then goes to the room across the hall. Durlag's sword now glows with pride.
The party returns to the large central room. Avastrian speaks with the west Warder, and the Pride riddle is now solved.
Grapes
Now I go back down the western hallway, towards the southwest. I continue south from the rooms that had Durlag's sword and the recordings on his deeds. There's another room to the south. Imoen disarms a trap leading south.
The room itself has a powerful Skeleton Warrior, who can be a dangerous opponent even for a full party. It can hit for a lot of damage, only takes partial damage from slashing or piercing damage, and has a lot of magic resistance. My tactic was to have Avastrian cast Mirror Image on himself, go forward, and lead the Skeleton Warrior back towards the rest of the party. This has the effect of making Avastrian the initial target of the monster. A Fighter/Mage with both Stoneskin and Mirror Image in place can very often absorb initial attacks from an oncoming enemy, especially a single oncoming enemy, with little to no danger. Jaheira casts Defensive Harmony just to be on the safe side. The party brings it down without getting hurt.
The party rests up, and Imoen guzzles another Potion of Perception. I now enter the room itself. Imoen disarms more traps. The loot here includes Arrows +2, 2 Oils of Speed, and a Potion of Freedom.
The continue continues east, and easily kills a pair of Mustard Jellies. There are now two hallways that branch off northeast and southeast.
The one northeast leads to a room filled with traps. Note however that one trap cannot be found or disarmed, so avoid this room as much as possible.
The one going southeast leads to another room. There are two chests on the west side, and another chest on the east side that will require a special key (to be found soon).
The two chests on the west side contain various potions, ammunition, and scrolls. One prize item is the Plate Mail +3 'The Practical Defense', which becomes Yeslick's armor for the rest of the game. Another item is Grapes, which is a quest item needed to solve the Love riddle.
Durlag's Avarice
Avastrian casts Mirror Image, and then goes towards a treasure trove room a little to the northeast. He leads a pair of Skeletons and a pair of Skeleton Warriors back to the rest of the party. The idea here is it's better to fight against monsters in a more wide open space than in a narrow hallway. In a narrow hallway, there's the risk of monsters being able to hit at one or two characters multiple times while the rest of the party can't help out. In a more open room, there's more space in which to gang up on one monster at a time. Yeslick protects himself with Armor of Faith once a Skeleton Warrior begins to target him. Jaheira casts Defensive Harmony, and this proves sufficient to minimize the risk.
The treasure trove has gold, potions, ammunition, many gems, an Odd Shaped Key, and a Glittering Beljuril Gem.
The Odd Shaped Key is used to open the drawer that couldn't be opened by the Pick Locks skill. The drawer itself has some Bullets +2, a scroll of Chaos, a Potion of Firebreath, and a switch for a machine, which is a quest item I'll use soon.
Jaheira casts Protection from Fire on Avastrian, as a precaution against fire traps. Avastrian then goes north through the room that was heavily trapped, and gives the Glittering Beljuril Gem to the north riddle. This solves the Avarice Riddle. Avastrian then regroups with the rest of the party.
Bottle of Wine
The party now continues a little east, and then north. The room to the north will have a pair of Flesh Golems. I won't be able to take them down one at a time the way I could in the caves by the sea, but Arrows and Bolts of Lightning still suffice to soften them up for when they do close in for melee combat.
I continue north. There's a room to the west that has two more Flesh Golems. They don't start off hostile, so I can the jump on them fairly quickly. The room has a mechanical engine. Avastrian uses the switch he found earlier to click on the top of the machine repeatedly in order to get it running.
A little to the north, along the hallway, will be a Skull Trap that can't be disarmed. The best way to deal with it is to have a single character (maybe one with magic resistance) absorb it so that it doesn't damage the whole party.
I continue north through the door. There will be a large room with a wine press in it. Now that I have the machine running, I click on the press repeatedly so that the Grapes are turned into a bottle of wine.
The video concludes with me making my way through secret doors to the left and back to the large central room.
Durlag's Love
I make a few preparations for an upcoming fight, including Haste, and using my Wand of Monster Summoning to bring up a few creatures a little to the northwest. I then give the south Warder the Bottle of Wine to solve the riddle of Durlag's Love.
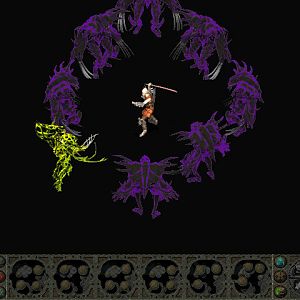
All four Warders reappear, this time to attack me. Avarice is a Dwarven Rogue who can disappear in order to go for backstabs. Fear appears as a wraith-type creature, and can cause fear or paralysis with his attacks. Love appears as a spellcaster. Durlag appears as a Dwarven warrior, and is the real threat. He pretty much hits every single time, and always for massive damage.
The point behind using the Wand of Monster Summoning was to hold up Pride for a little bit. Imoen and Yeslick begin to prime up Pride by lowering his saving throws through the use of Greater Malison and Doom respectively. The rest of the party begins attacking Love, and then Fear after Love has been killed.
Now that Pride has had his saving throws significantly lowered, Imoen begins to take her shots at Pride with her Wand of Paralyzation. She manages to hold him in place on the second try. This is the key linchpin in my strategy, to immobilize Pride.
Yeslick casts Freedom of Action in order to free up Jaheira. The party brings down Fear, and then the immobilized Pride. After that, Avarice is an easy mop up.
Love leaves behind a Wardstone that allows access to the the next level beneath Durlag's Tower.