-

- Forums
- Chatrooms
- Gallery
- Gameplay Videos
- Upload
- Articles
- Mod Reviews
- Shop SP: Games, Movies, Books
|
|
Black Raven Monastery | Eight Chambers | Underdark | Drider Caves | Z'Hinda Citadel |
DRIDER CAVES
Sorn and Nadal
Now I make my way towards the east side of the Caves and speak with a couple of Driders named Nadal and Sorn. They'll attack if I declare an intention to destroy whatever is creating the Driders. Well, they end up attacking me anyway, but it was inevitable anyway.
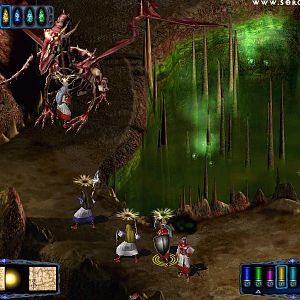
I then enter the Drider Caves. Here I'll get periodically swarmed by Drider Fighters, Drider Wizards, and Drider Priestesses. Not particularly difficult in small groups. Tithian switches over to his Moonblade with the idea of preventing Priestesses or Wizards from getting off any spells.
Ginafae
Here I explore the north side of the Caves, killing more Driders along the way. Don't worry about the traps. They only do a Web effect on a single character, and briefly at that, so they aren't a big deal. They certainly aren't worth risking your Rogue sticking his neck out too far.
In the northwest corner I find Malavon's sister, Ginafae, and get an xp bonus for convincing her to return to him.
Incandescent Blue Ioun Stone
In the southwest part of the caves will be a large number of Myconids. Myconids aren't dangerous at all in small numbers. But Lady Elanna finds it prudent it to spit out a couple of Chain Lightnings when they're this numerous, and thus have multiple chances of afflicting party members with fear or berserk states. A small container holds the Incandescent Blue Ioun Stone (+2 wisdom) that the Mind Flayer wants.
I head back to the Flayer. Once you find the stone you can now decide what to do about the Mind Flayer's quest. One option is to give it the Ioun Stone. It is however worth a good deal more experience points to refuse the Mind Flayer, which in itself gives an xp bonus, and then kill off it and its minions for more xp. Keep in mind that Mind Flayers can use a stun effect that affects a cone-like area. They will also try to teleport away if their hit points are brought low enough. So, surround it before starting things. Then try to use an attack (e.g. Stunning Blow) that can stun it or otherwise immobilize it, so that you can net the xp for killing it instead of letting it get away. After that mop up with its minions. The Mind Flayer will also leave behind the Mercy Killer Belt (+2 to Strength). This becomes a decent Strength-enhancing belt for Lord Markus.
Imphrailli Asserbai
On the south side of the Caves I will find the Red Wizard Transmuter, Imphrailli. I choose a non-confrontational dialogue choice with her, then put up more buffs like Mirror Images and Mass Haste, and then surround her. This way I get the jump on her. The rest of her creations should then be much easier. She'll leave behind:
I then take the Vials of Spores and the Silvery Vial, and then have Lady Elanna use the laboratory in order to create the Viciscamera poison.
Drider Lake
In the southeast corner is a lake where I'll have a massive battle against many Drider, who come at me from both the west and the east. I summon a few creatures beforehand, as this plays into a particular strategy that I have for this fight.
My spellcasters plant their crowd-control spells over the shoreline of the lake to the east. This makes sense as the shoreline provides a narrower path for the monsters on this side to reach my party. Once crowd-control is in place, Alliria and Lady Elanna crank out the offensive spells on the monsters to the east.
The warriors, helped out by all my summoned creatures, concentrate on the considerable number of Driders coming at me from the west. In this way I am able to deal with a massive two-pronged attack by having a plan for both the west and the east sides.
The Viciscamera
Now for my next major battle, the horde of Driders guarding the Viciscamera. I take the initiative by planting cloud-damage and crowd-control spells over the Drider cocoons. This is going to be a really long battle so I buff up to the max. I also have Alliria and Lady Elanna cast offensive spells repeatedly. Note, as Alliria shows, that Flame Strike is best used on a cluster of foes that are tightly packed together. She then fires away with her bow when she runs out of offensive spells. The others take out anybody who makes it out and towards me.
The Drider Priestesses and Wizards will also summon a lot of creatures whenever they can. When enough summoned foes appear, use Banishment if you have it. Failing that Chaos will work just as well.
After this battle I move northwards and take out a few remaining stragglers. Once they're all dead I use Imphrailli's potion to destroy the Viciscamera.
When all is said and done I go back to Malavon for my rewards, which will include:
Malavon informs me that the way to the nearby Citadel should now be accessible before departing.
Beelthot
Now it is time to kill the Mind Flayer guarding the Z'Hinda Citadel. Again, surround the Mind Flayer before starting combat. Akutagawa manages to hold the Flayer in place with his Stunning Fist, ensuring the party can kill the Flayer before it can teleport away. His minions are too spread out for offensive spells to be of much use, so I rely on summoned monsters instead to keep them occupied and to help bring them down faster.
The way is now open to the Z'Hinda Citadel.