-

- Forums
- Chatrooms
- Gallery
- Gameplay Videos
- Upload
- Articles
- Mod Reviews
- Shop SP: Games, Movies, Books
|
|
At the request of Lord Ulbrec, we have placed our lives in the
capable
hands of Oswald Fiddlebender. We are travelling over the mountains in his airship, heading for the Western Pass. While some of our band - notably Kei and Mordakai - are fascinated by this gnomish contraption, myself and the others could not touch ground soon enough. Even Captain Hedrons Wicked Wench would be a more welcome means of travel.
Still, our time aboard this ship of the skies has allowed us the chance to rest and heal in preparation for the next leg of our journey. But as to what that shall entail, only the gods can say.
Alia Shield-Maiden, the Annals of Halgren
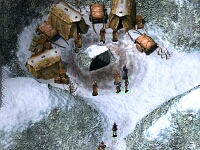
 Not surprisingly, the voyage on Oswald's airship is not a pleasant one. First you discover an unusual glacier blocking the Western pass. Then, an ice storm, which somehow seems to come from within the glacier, turns into a gale and dashes the airship to the ground. The crash landing knocks all of your party unconscious. You awaken to find that boring beetles have attacked the ship and carried off a number of items from Oswald's stores. After you slay them, you find Oswald in a strange trance, which you may be able to break by persistently speaking with him. Otherwise, he snaps out of when he hears you rummaging around his ship.
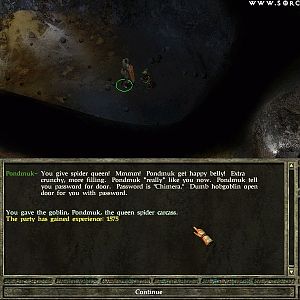
He will show you where to find his spell book, which contains the ingredients required for his ship-mending spell, and then sends you out to try to find the necessary components. When you return later in the game with the belladonna, thrym extract, 2 diamonds, some wood, and some iron (any non-magical weapon or broken weapon will do), place them on the table where you found Oswald's spell book. To activate the spell, go speak with Oswald again for your experience point reward. The spell takes a long time to take effect so the ship isn't going anywhere; Oswald will stay here for the rest of the chapter.
Before you leave to take care of the boring beetles, have a look around the ship, being careful to avoid traps. Among other useful items, you'll find an unidentified bottle that turns out to contain thrym extract - one of the first ingredients required to mend the ship.
When you set out from the ship, characters with the Wilderness Lore skill might make some intriguing observations. The beetle trail heads towards the south-west, while giant footprints and signs of organised patrols from the north-east. Most strange of all, several sets of tracks, originating mainly from the north-west and north-east, change form in mid-stride!
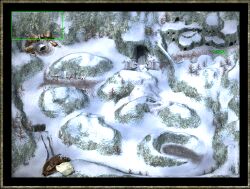
 When you venture out, watching for traps mysteriously laid in the snow, first head slightly north and west of the ship to find the boring beetles' nest. It is extremely fire-sensitive and can be destroyed almost instantly with a potion, spell or arrow that does fire damage. After destroying the nest to prevent further beetle attacks (1900 xp), search it to find the items the beetles had carried off from the ship while you were unconscious (1425 xp for finding the stolen equipment). Collect any boring beetle shells you find; Oswald will be able to use these to create lightweight plate mail, field plate mail, or full plate mail. You will also find some wood piles scattered about in this area; you need to collect at least one pile for the ship-mending spell.
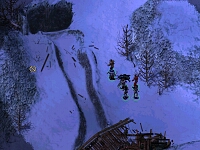
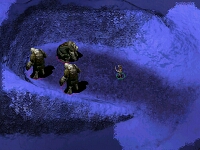
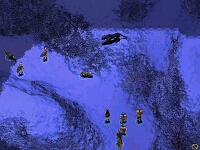
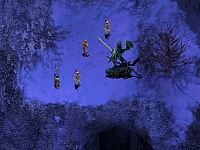
Now head east from the ship, and you will be attacked by Frost spiders when you get half-way across the map. Collect the fresh spider silk when you have slain them. You now have your third spell ingredient! Travel north from the area where the spiders attacked you to find Captain Yurst, lying amidst what looks like the corpses of priests. He tells you he is being killed by giants to the east, who are throwing boulders at him. Go to the east and slightly south to find Goublika and two Fomorian Giants - in addition to the fairly substantial experience from killing them, you get 4275 xp for protecting Captain Yurst from them. Offer Yurst a healing potion, potion of extra healing, or elixir of health for another 471 xp. He says he needs something further to staunch the bleeding; tell him you'll be back when you find something.
Now head slightly north and west until you find a campsite taken over by several tundra Yeti. When you've slain them, raid the camp to find an extensive array of potions and gems, a book on tending ivy, and a Periapt of Wound Closure. Take all of these, as well as the yeti pelts. You can sell the yeti pelts to Oswald for 350 gp, or have him make you Yeti Boots, Yeti Cloak, Yeti Scarf, Yeti Hat, or Yeti Gloves.
 Return to Captain Yurst and offer him the Periapt of Wound Closure for 1900 xp. He will tell you that he and the other Luskan relief forces camped near the wall of ice blocking their route, and were attacked by wyverns and a "dragon woman". They were scooped up and carried off through the air towards a temple carved from ice, but Yurst broke free and fell, landing on a pack of wolves. Interestingly, the "wolves" he refers to look more like human clerics now. Yurst is worried because reinforcements are due at any minute, and the rangers and druids of the region have trapped the foothills. The people of Andora have erected a magical barrier, but if you are immune to Auril's breath you should be able to pass it; Yurst tells you there is something in his gear that can help you with this. Then, having said his piece, Yurst dies, despite all your efforts. Retrieve the Periapt of Wound Closure and take the other items from his kit as he suggested: a spell scroll to help you resist cold, a simple necklace, and some gold pieces.
It's time to investigate those strange trails that change form in mid-stride. Move up to the north-west corner of the map to find a merchant named Beodaewn, along with up to five of his followers. They have set up shop in front of what looks like a wolf den. If you look carefully at the wolf den, any of your party members will be given the option of asking Beodaewn if he is aware of the nature of his campsite. Otherwise, only the ranger or druid will have this dialogue option. In any case, he will persuade the speaker that the wolves' den has long been abandoned, and only looks inhabited because he frequently moves equipment in and out of it. A cleric or paladin might challenge him on this, noting strange and disturbing holy symbols of Malar about the campsite. If you continue to press him on this, eventually you will get the dialogue option, "Die, Cultist!" at which point Beodaewn will turn into a werewolf and attack you. You can also reach this dialogue option, without observing that his shop is a wolves' den, by having your paladin speak to him and comment on the aura of evil that surrounds him. No matter how you get there, you'll get about 1900 xp for exposing him as a werewolf. At first, he is quite resistant to most forms of physical damage, but when you start to wear him down with magical and fire attacks he will become much more vulnerable. Overall, he's not a very tough fight.
 Depending on the time of day that you approach Beodaewn, you may have a somewhat different experience with him. At night, Beodaewn is likely to be alone. During the day, he is surrounded by most of his "followers", human clerics who look much like the "wolves" poor Captain Yurst fell on from the wyvern. They will also attack you, and Beodaewn will thoughtfully inform you that his followers can only change to wolf form at night. Curiously, they are tougher in human form and you'll get only half the experience points attacking one at night, in his werewolf form. If you speak to one in human form before you speak with Beodaewn (you may encounter one of his followers before reaching his camp), he will suggest you talk to Beodaewn about the help you need - repairing the ship and getting to the Western Pass. He may tell you that he hopes Beodaewn will lead him to "Birith Mal", before realising he's said too much, at which point he flees. A druid or ranger speaking with the follower can also talk to him about the importance of the moon in nature.
If you approach the camp at nightfall (around hour 18), you may see Beodaewn's followers skulking off in all directions. Follow one and watch him turn into a werewolf. Be sure to follow up by speaking with Beodaewn about this; this is yet another opportunity to expose him.
Before you pick a fight with Beodaewn, it is worth having a look at his wares. Beodaewn has a fairly limited, but interesting, selection of merchandise: magical bolts, a small number of (mainly offensive) spell scrolls, a spear +2, boots of stealth, some rings, lamp oil, scroll cases, a necklace of missiles, and the Bardic Horn of Valhalla. Unfortunately, none of these items can be stolen from him and they disappear when he is killed. He has only a small amount of gold and a Resurrection scroll on him. However, you can reach into the wolf cave behind him and pull out some gems, a large amount of gold, two types of magical ammunition and a necklace. Note that stealing from Beodaewn when he is alive - either by reaching into the wolf cave or into his nearly empty pockets - is almost a sure way to start a fight, thus exposing him as a werewolf.
If you killed Beodaewn at night, stay at the camp until morning. When his followers return, human once more, they will see that you have slain their leader and attack you. Thus you can clear out all of the cultists at once.
 On the eastern part of the map, past where you encountered Captain Yurst and the giant-kin, you'll find the druids and rangers that have been leaving those nasty little traps all over the place. As you approach them, you'll be addressed by a 'panther' named Odea. As it turns out, Odea is actually a druid in panther form. Odea warns you not to approach Andora. (You'll remember that Captain Yurst mentioned something about Andora as well). If you do, she says, you'll invoke the wrath of Auril, as carried out by Odea and her druids. Keep talking to her, and you'll learn that Andora is a village of Aurilites, druids and rangers that worship Auril, the goddess of winter. Odea will also mention the name Illium - the 'ruler' of Andora. The druids and rangers have made a deal with an unnamed group to make sure that no one gets through the village of Andora. If you're very inquisitive, Odea might also mention a strange 'cult' in the area - this is a reference to Beodaewn and his followers. You get the sense that Odea really doesn't want to fight, but if you press her she will defend her village.
At this point, you have several options. If you have good Charisma and/ or good Diplomacy skills, you might be able to persuade Odea to arrange a parley with Illium. When you do, the character who was speaking with Odea will be transported to the plateau in the north-central part of the map. Here you'll meet Illium Ar'Ghrenoir, the 'Protector of Andora'. (Note: If you're interested in a peaceful resolution with the druids and the rangers, do not arrange a meeting through Odea - this route leads inevitably to a battle).
Otherwise, after ending the conversation with Odea walk straight north through the lines of the druids and rangers - don't worry, they won't attack you at this point. Keep going until you reach the broken bridge. You'll find Illium standing over you on an archway.
Illium is not very happy that you're here, and he really wants you to go away. However, it's a good idea to keep talking to him as you can learn a number of things. First off, you find out that Illium himself is not an Aurilite, although he does act as their protector. It would seem he had a troubled childhood - some humans slaughtered his family in the Cloak Wood - and along with his mate Odea, he moved north and established the village of Andora. All of the druids and several of the rangers in Andora are Aurilites. Illium will mention a deal that he must honour, which is why he can't let you or anyone else through Andora. And, of course, the only way to reach the Ice Wall, which is blocking the Western Pass beyond, is through Andora. He can tell you that the Aurilites of Andora did not cause the ship to crash (and are, in fact, pointedly leaving the ship alone), but that they are 'working' for those who did bring it down. Illium might also tell you that they have Belladonna in Andora, one of the ingredients for Oswald's Mending Spell, but, of course, they won't sell you any. Illium doesn't have any more information to give you, but depending on who is talking to him there might be two more options you can pursue before ending the conversation. If you have arranged a parley with Illium through Odea, neither option will actually work. These non-violent options are only possible if you walked up to Illium yourself after speaking to Odea.
If the character speaking with him has a very high Initimidation score (about 10), you can try to scare Illium into letting you through. If it works, he will bring down the barrier and grudgingly let you into Andora. The other possibility is to have a ranger speak with Illium and try to persuade Illium that the path he is following is not 'our way'. Again, if it works, Illium brings down the barrier and you can go through Andora peacefully.
 Otherwise, if you arranged a parley with Illium through Odea, then the dragon-woman Sherincal appears on the plateau with you. She is disappointed with Illium for even speaking with you and, as his punishment, she kills Odea. Then she'll hit your character with a magical bolt and send you flying off the plateau - the bolt can do considerable amount of damage, and there's no way to avoid it. When next you meet the Andorans, they will attack you on sight, regardless of what Illium said - they blame you for Odea's death, as does Illium.
If you didn't arrange a parley through Odea, and instead just walked straight up to Illium, then when the conversation ends he and the other Andorans attack you immediately. It's a fairly tough fight, and is even tougher if Odea isn't already dead. The druids will cast entangle spells and several summoning spells, while the rangers attack with bows and swords. The battle is made a little more difficult because you are surrounded on all sides. Also, make sure that none of your party members accidently walks through the glowing blue barrier - anyone going through here will be in for quite a jolt.
When the fight is over, collect all the goodies from the fallen rangers and druids. From Odea you should get a magical cloak called Nature's Vengeance. You won't be able to reach Illium's stuff just yet. Now you're ready to move into the village of Andora. The blue barrier will still be up, and the only way to bring it down is to have someone go through it and trigger the trap. Make sure that the person who does go through has a lot of hit points - the barrier can do quite a lot of damage. Using the Protection from Cold scroll first will help.
If you were attacked by Illium, when you go into the village keep your eye out for a few Andorans that will still be hanging around. Most of these will be along the tops of houses and the village walls so you'll need to use distance weapons against them. When you're finished clearing out the main level, follow the street to the north east corner. The exit to the next map is here, as is a stairway up to the top level of the Andoran village - it's worth exploring.
When you come out of the stairwell on top you'll be attacked by the Aurilite Ranger Commander. Deal with him and then move along to the east. If you look very carefully, you'll see that you can actually go inside the eastern most house - careful, there are a couple of wolves waiting for you. There are also several little 'holes' in the ground (you will need to use the Alt key to be able to see them). Look inside for a variety of potions, ammunition, scrolls, and gems, including a diamond (one of the other components for Oswald's Mending Spell). Now, go around to the west side where Illium fell. You might have to fight a couple more rangers here. Search Illium's body for some more ammunition, a heavy crossbow (Hagnen's Folly), and the Belladonna you need for Oswald's spell.
With the village of Andora cleared out, you're ready to move on to the Ice Wall. If you have all of the components for Oswald's Mending spell, you will want to take care of that before you head out. You will also want to stop off at Oswald's if you're still waiting for any of the special items, or if you aren't fully stocked up with healing potions and other oddments. (Note: Most likely you won't need to buy any ammunition - in addition to what you have found on this map, you will find a lot more as you move onward).