-

- Forums
- Chatrooms
- Gallery
- Gameplay Videos
- Upload
- Articles
- Mod Reviews
- Shop SP: Games, Movies, Books

We have left the duergar tunnels behind us - though it felt good to have solid stone underfoot and overhead once again. As we made our way to the Black Raven Gates, we were once again confronted by agents of the Legion of the Chimera. It amazes me that the legion has risen to power with such pitiful allies.
Travelling through the mountains I have spied numerous large beasts soaring through the air. They have yet to fly close, and my dwarven eyes are not made for these bright skies, so I cannot determine what manner of beast they are.
The monastery looms ever closer now. I wonder what form of welcome awaits us behind those forbidding walls...
Alia Shield-Maiden, the Annals of Halgren
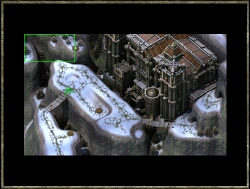 After leaving the River Caves, you will find yourself in a mountain valley with a large, impressive building to the north-east. A Wilderness Lore check will indicate a fair amount of traffic in the area by very large, bare humanoid feet, as well as signs of large, flying reptiles. You will also detect smoke coming from the large keep. To your immediate right you will see a large nest - it appears to have been trampled by the owners of those large feet.
Head north along the ridge on which you're standing until you see a foot bridge; it definitely looks to be in bad repair, so be careful crossing it. Good search skills will reveal areas of weakness on the bridge which you'll do well to avoid - unless you want a closer view of the valley floor below! On the other side of the bridge you'll see a couple of White Wyrms. Unlike your previous encounters, these particular Wyrms are not hostile and you can safely move past them on your way to the keep.
You still can't reach the keep yet, so head south to where you'll find another foot bridge. Along the way you will pass by another nest, only this one is being carefully watched by a White Wyrm. You can raid the nest for a White Wyrm's egg if you like, though you will anger all of the wyrms in the area. (For those with decent Alchemy skills, you may want to consider taking the egg. You can use the egg later on to create a rather good potion). Although this next bridge is in better shape than the last, you still want to be careful when crossing it; waiting on the other side are numerous Tundra Yeti and Ferocious Tundra Yeti. In addition to the ones you can see, several more will come out from the cave to the east. After you've dealt with the yetis, don't forget to collect their pelts - you can sell them for 350 gp each.
Looking around you will notice that there are no more bridges, and you still can't reach the keep. With no other options, head into the cave - you come out on the ledge above where you entered. In front of you is the door to the Black Raven Monastery.
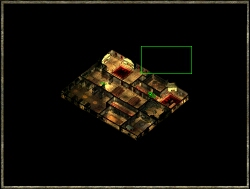 Inside the monastery you will find a group of monks milling about in what looks like a foyer of some sort. You'll be approached by a monk named Salisam Harbush who is interested in why you're here. If you accepted Barud Barzam's quest to slay all of the monks in the monastery, then one of your options is to tell Salisam this. Of course, if you do you will be attacked by all of the monks in the monastery. While you can be forthright and honest about it, there are better ways to go about this mission. When you tell him that you are here to use the passage to the Underdark within the monastery's bowels, Salisam says to go and speak with Aruma Blane, who currently controls the monastery. However, he asks that you return to him after speaking with her, regardless of her answer.
Before you go find Aruma, spend some time looking around the monastery. Your party will 'hear' bits of conversation from the various monks throughout the rooms; you will soon get the impression that all is not 'right' within the monastery's ranks.
Behind the door to your immediate left is a store room. The door is locked, and if you're of a certain persuasion, you can pick the lock and go inside - don't worry, the monks won't mind at all. Inside you'll find a thief named Ven who is posing as a monk. Ven is planning to rob the monastery, and asks if you'd like a "share" in exchange for not turning him in. If you accept, he disappears for now - you will run into him later. If you decline, you can either try to fight him right here, or take payment from him now in exchange for not exposing him. Blackmailing him nets you a small ring that he stole from a monk named Nonin (the ring is marked with the initials N.N.). Whatever option you chose, Ven will flee the room once the conversation ends. (Note: Making a deal with Ven has some very serious ramifications later in the chapter. Unless you have a very strong party with very good equipment, it is strongly recommended that you don't make the deal with Ven). There are a few containers here inside which you can find some ammunition and minor treasure, as well as Ryomaru's Harmless Staff.
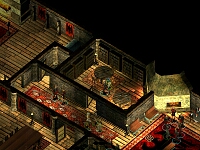 To the immediate north is the library, in which you'll find Bered. He can give you a fairly detailed account of the monastery's history, and also has an impressive selection of spell scrolls for sale. For the extremely wealthy adventurer, Bered also offers some very useful tomes and books, including How to be an Adventurer, a rare and valuable tome. Talking to some of the other monks, you might learn a little bit more about Aruma. You will also hear about Nonin, the monastery's healer. Whether you got the ring from Ven or not, you should go speak with Nonin. You can find him in the kitchens to the north and west.
At first, Nonin doesn't have much to say to you, other than offering you healing aid. When you end the conversation, however, he stops to ask you about a ring he has lost. (Note: You may need to speak with him a second time to trigger it). If you offer him a similar ring from your inventory instead of the real one, he explains it's not his but gives you the key to the storeroom and whatever is inside. If you are able to return his real ring (the one marked with N.N.) he'll be very happy, giving you three potions of extra healing (3900 xp for returning Nonin's ring). Nonin is the only full-service merchant in the monastery, and will buy almost anything except ammunition.
In the large dormitory to the left of the kitchen, a young monk named Sersa will offer you an opportunity to rest for a small cost. If you ask her why she's practicing martial arts in her room instead of in the dojo, she says Svaltid has refused to help train her further. A character with 9 or more points in Diplomacy can persuade Svaltid to resume training Sersa for an experience point bonus, and from that point onwards Sersa will let you rest for free.
You'll find Aruma in the southern corner of the monastery, speaking with Dolon Daemba. When you speak with her, she's very clear that you can't have access to the passage under the monastery; it's only open to Black Raven monks, and they aren't accepting any new initiates at the moment. If you speak with Dolon, he tells you that he is an emissary sent by the Legion of the Chimera to try and persuade the Black Raven Monks into supporting them.
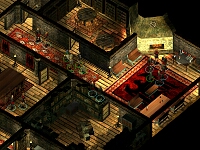 Go back to Salisam and tell him about your conversation with Aruma. He's not surprised, and wants to make you an offer. Aruma is not the true leader of the monastery; that position belongs to someone named Ormis. At Dolon's request, Ormis has gone to the Severed Hand to meet with the leaders of the legion, while Dolon remained here as a hostage. Since Ormis has been gone, Aruma has slowly been exerting her own power under Dolon's influence. Salisam leads a group of monks who wish to supplant Aruma and end Dolon's corruption, but they need your help. In exchange, Salisam will allow you to take the challenge of the Eight Chambers - if you succeed in the challenge, you will be an associate monk and will then have access to the passage to the Underdark.
Knowing that Dolon is a member of the Legion, you might want to go and check out his quarters. You'll find them just north-west of Aruma's chambers. The door is locked but easily picked. Inside is a locked chest, inside which you'll find some gems, gold and very important letters. The letters describe Dolon's mission to persuade Aruma to the legion's cause by spreading dissent within the monastery.
At this point, your path through the monastery can take several different directions. Take care in choosing your path; the experience points you earn vary greatly with each choice. Ultimately, you either need to kill Aruma and get the key to the Underdark passage, or you need to persuade either Aruma or Salisam (whichever is in charge at the end of the day) to let you take the challenge of the Eight Chambers. To help you decide, the three paths are described below, starting with the path that will earn you the most experience, and ending with the least.
If you wish to help Salisam Harbush in stopping the corrupting influence on Aruma, then go show him Dolon's letters. This is just the evidence that Salisam has been looking for, and he wants you to take them to Aruma. When you show them to Aruma, she is quite taken aback by this new development, and angry with Dolon. After much discussion, and much apologising from Dolon, the two lovers decide to run away together, leaving the monastery in Salisam's hands (2925 xp for removing the corrupted Aruma from power). Salisam will now allow you to take the challenge of the Eight Chambers.
If you would rather help Aruma, then when you next speak with her, reveal Salisam's plan to have her removed from power. After verifying your story, she banishes Salisam and his co-conspirators from the monastery, then gives you permission to take the challenge of the Eight Chambers. Salisam and his group are now just outside of the monastery. If you confront them, you can either fight them or convince them that your ultimate goal, stopping the legion, is far more important than the monastery's politics.
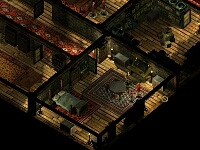 You can still reveal Dolon's letters to Aruma, only this time she says she knows all about them and doesn't have a problem with it. Instead, Aruma is quite upset with you for breaking into Dolon's room. She will give you the option to flee or fight, but if you have good diplomacy you can explain that you were only doing it for the good of the monastery, in which case all is forgiven. Otherwise, you can fight all of the monks right now, or be sent outside to confront Salisam before returning to fight the rest of the monks. (Note: If you chose this path, as well as showing the letters to Aruma, you can still take the challenges by stealthily returning after you flee the monastery - just don't let Aruma see you!)
The final path is for those who are set on completing Barud's quest to slay the monks. Although you could have told the monks earlier that you are here to kill them all (in which case you will immediately begin fighting them), there is a better way to do it for roleplaying purposes. Get the letters from Dolon's room and show them to Salisam. Then go back and tell Aruma about Salisam's plans to overthrow her. When Salisam and his cohorts have been banished, show Aruma the letters - you can also show them to Dolon, though it doesn't make much of a difference. Aruma, now very unhappy with you, gives you the choice to fight or flee (there might be another option that allows you to talk your way out of it, in which case you must complete the Eight Chambers). Choosing to fight begins the battle right now. If you flee, you are sent outside where you are confronted by Salisam. You can fight him or talk your way out it; it isn't necessary to kill Salisam and his group to complete Barud's quest. When you re-enter the monastery, the monks will only become hostile once Aruma sees you.
The monks are not very tough at all - although there are quite a lot of them. However, you can loot some very good treasure from them. On Dolon you will find a Ring of Charm, a Short Sword +3, Bracers of Defense + 3, Cloak of Protection +1, Long Sword +2, and a Wand of Melf's Acid Arrow. From Aruma you will get the Raven Tomb key. Inside Aruma's chambers you will also find Bracers of Defense +2, some Arrows +3 and the Hammer of Lucerne. You have to clear the entire monastery of all monks, so check each room carefully. The Raven Tomb is on the bottom level of the monastery, where you will also find one last monk. Before entering the Tomb, return to Barud in the River Caves and claim your reward - if you don't do this now, you will most definitely miss your chance, so don't delay! When you tell Barud that you killed all of the monks, you'll receive 2300 xp, the Armor of Warding, the Hammer of Darkness, a Heavy Crossbow +3, the Staff of Invisibility +1, several gems and some gold. Now return to the Monastery and enter the Raven Tomb.
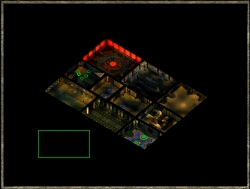 When you are ready to face the eight chambers, head downstairs and speak with Morohem. Only one party member will be able to face the challenge of each room - your other party members will not be able to assist them! The character facing the challenge must be stripped of all equipment before taking the challenge, placing their equipment in the hollow area in the central room. Until the character is stripped, you cant undertake the challenge - if you ask him, Morohem will strip the character for you. All spell and potion effects are removed as the character enters each chamber, so dont bother trying to prepare beforehand. Once you begin the ordeal, you can rest in between each chamber by asking Morohem to watch over you. Note that you cant rest here anymore after completing all eight chambers. Somewhere inside each chamber is a container in which you will be able to find a very modest selection of weapons to use.
Inside the Chamber of Stone you will see five levers. You need to pull five levers in the correct sequence before you can leave the chamber. If you make a mistake in the sequence by pulling the wrong lever, you will have to start all over again. Now for the tricky part: you will know when you have selected the correct lever in the sequence when stone monks appear - and you have to fight the monks. As you progress in the sequence, one more stone monk will appear. The correct sequence of levers is: Lever 1 (1 monk); Lever 5 (2 monks); Lever 3 (3 monks); Lever 2 (4 monks); Lever 4 (Exit). (2300 xp for mastering the Chamber of Stone).
In the Chamber of Shadows you will find six large portals, each shrouded in a little green cloud. To complete this chamber, you must navigate through the system of portals, moving from one to the next, in the correct order. If you move through the wrong portal, a shadow monk appears that you will have to fight. As with the Chamber of Stone, when you make a mistake in the sequence you must start from the beginning. However, you will only have to fight one shadow monk at a time. The correct sequence to complete this chamber is: north-east, south-east, north-west, south-west. (2300 xp for mastering the Chamber of Shadows).
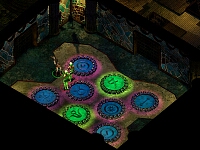 On the floor of the Chamber of Sorcery are eight glowing circles on the floor, and two crystal monks. In order to complete this challenge, the character will have to defeat both crystal monks. The two monks will periodically disappear and then reappear on the two green pedestals, at which point a bolt of lighting is cast at the character. Just before the monks disappear, one of the circles will glow brighter than the others. If your character can reach it before the monks reappear, Protection from Lightning will be cast on the character. However, even with Protection from Lightning, you will need a good tank to withstand the lightning and defeat the monks. A high-level rogue or monk should be able to evade the lightning, but probably wont be able to do much damage to the crystal monks. (2300 xp for mastering the Chamber of Sorcery).
Inside the Chamber of Clockwork are three pedestals; on each pedestal is a clockwork monk. In order to complete this chamber, you must destroy all three monks. Take care moving around the cogs on the floor of the chamber as they inflict damage. Also, when any of the monks is brought down to Almost Dead, you will see a countdown begin from ten; when it reaches zero, the monk explodes like a fireball. Just as the countdown begins, one of the pedestals will briefly flash purple. If you can get your character to that pedestal before the monk explodes, they will be protected from the fireball's damage. (2300 xp for mastering the Chamber of Clockwork).
Within the Chamber of Sand, you will be attacked by two monks that come out from the sand. There are four panels in the room, with a single lever on each. When you pull a lever, a line of flame shoots out from the panel to the opposite wall. You can use these flame bursts to destroy the monks. However, you cant use the same lever twice in a row! So you must move about the room, going from one lever to the next, with the monks following behind you. The monks themselves have very high damage resistance, except to the flames. A fast-moving character, such as one with the Dash feat, is very useful here. (2300 xp for mastering the Chamber of Sand).
Every inch of the Chamber of Silk is covered in spider webs. From out of the walls you will be assaulted by a seemingly endless barrage of Poisonweb Spiders. The spiders' bite causes poison, but the poison does wear off. When youve killed the last spider, you have completed the chamber. (2300 xp for mastering the Chamber of Silk).
Inside the Chamber of Battle you will find an iron monk. There is also a blue dais on the floor and two switches on the back wall. The iron monk cannot be killed - instead, you must bring it down to Almost Dead, at which point it will collapse on the floor like a troll. However, you must lure the monk onto the dais before it collapses. Once this happens, quickly cross to the wall and click on the right-hand switch. This opens a door on the north-east side. In the next chamber are two more iron monks and two more daises. These must be defeated in the exact same manner - one per dais- then click the left-hand switch. However, dont take your time! The iron monks will revive if theyre left too long. (2300 xp for mastering the Chamber of Battle).
Within the Chamber of Immolation are two brass monks that will attack you from the centre of the room. The monks inflict both bludgeoning and fire damage with each hit. In addition to the monks, the character will have to avoid the pillars of flame that periodically strike down from the ceiling. The flame-strikes are preceded by a glowing orange circle, so keep your eyes open. Another difficulty with this room is that your weapons are on the opposite wall from where you first enter the chamber, so unless you want to fight unarmed you have to get to them very quickly. Be careful not to get cornered as you will have nowhere to run from the flame strikes; choose a position that gives you lots of room to manoeuvre. (2300 xp for mastering the Chamber of Immolation).
When you have finished the last of the chambers, go talk with Salisam (3900 xp). When he learns that you have finished the Eight Chambers, he will unlock the door to the Raven Tomb.
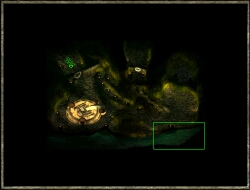 The Raven Tomb itself is quite large, though there isnt much happening here. With the Raven Key in hand, open the big doors and head inside. Inside this first large room youll see a large platform displaying the sarcophagus of Valas the Black Raven. You should also notice that the platform is guarded by four Iron Golems. If you made a deal with Ven, the thief disguised as a monk, he re-appears at this point, ready to make his big theft. As you watch, Ven strolls up to the coffin and steals the contents before leaving you to deal with the golems.
If you didnt make a deal with Ven, he doesnt show up at all. You may still want to try stealing from the tomb, but you will have to deal with the golems. Once you open the coffin the four golems come immediately to life. The golems are very, very difficult to defeat! Each golem can emit a cloud of poisonous gas once, usually near the beginning of combat. In addition to being immune to most magic, they have a very high armour class (26), can do extensive damage in combat, and have very good damage resistance. Their damage resistance is so good, in fact, that unless you have a +3 weapon, they are essentially immune to any type of damage (they absorb the first 50 points of damage of every hit). Also note that while an electrical attack will slow the golems, fire attacks actually heal them. For most parties, provoking or fighting the golems is not a good idea. (Note: If you find yourself stuck with this option, before you open the door to the tomb you can still return to either Salisam or Aruma and let them know that there is a thief disguised as a monk that they need to deal with- this will prevent him from appearing and awakening the golems). Inside the coffin youll find Bracers of Defense +4 and the Shackles of Roa.
If you dont feel like fighting the Iron Golems, and Ven hasnt made an appearance, then just walk past the golems. If you don't try to rob the tomb, they will not awaken to thrash your party. Make your way south through the tomb, and then east. Here you will find a ramp that leads north up to the Underdark passage way. Before you open this next door, you may want to take some time out to rest and heal your party if you havent already done so.
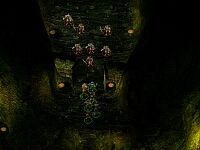 The moment you open the door, you are confronted by an angry duergar mob. If you have already killed the duergar at the outpost, this is a relatively small group of guards. If you didn't kill them, however, you will find that you are flanked. In addition to the guards in front of you, Barud Barzam and the rest of the duergar attack from behind. Turns out that they really dont plan on letting you enter the Underdark; even if you helped Barud by slaying all of the monks, they still turn against you. The duergar themselves arent all that tough, unless you are caught between two groups of them: half above you through the doors, the other half at the bottom of the ramp. The best tactic is to fight your way through the doorway; the duergar below you will be slower moving up the ramp. From inside the doorway you can maneuver your weaker party members towards the walls, thereby keeping them out of harms way, more or less.
Cleaning up after the fight, you will find a rather decent selection of items including the Black Urchin, the Skirling Skull, and Valorfoe. When youve mopped-up after the duergar, head down the passage and exit to next map: the Underdark.

