-

- Forums
- Chatrooms
- Gallery
- Gameplay Videos
- Upload
- Articles
- Mod Reviews
- Shop SP: Games, Movies, Books
|
|
This temple seems more a madhouse than a shrine. Every aspect of this place is geared to a single goal: the destruction of Kuldahar and the Ten-Towns. Of the three sisters who reign here, two have already met their ends at our hands, and even their dying words were of revenge. It seems such a waste, to build ones life around an event long-since forgotten.
As we wander this puzzling place, I cant help but think that its architect would find a warm welcome at the hearth of a certain industrious gnome. They would have much to share, our Oswald and this Nickademus.
Alia Shield-Maiden, the Annals of Halgren
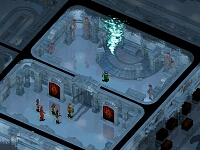
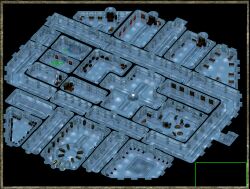 You are transported to a small room on the second level of the Ice Temple. When you arrive, be very careful moving around! Notice the shadow overlaid on the floor - this is a very nasty trap, and it cant be disarmed by normal means. It also stays active, doing repeated damage upon being sprung, until it is disarmed. The north central door is locked and stays locked until it is opened by the same mechanism that disarms the trap. The door is marked by a symbol of a lightning bolt - this is a clue as to how the door opens and will make more sense later on. For now, ignore it, and open the door on the west side of the room.
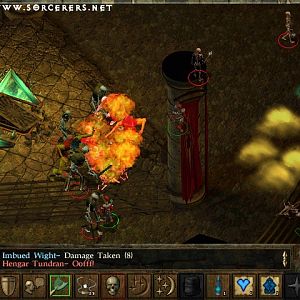
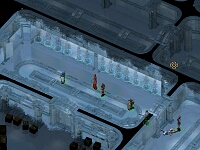
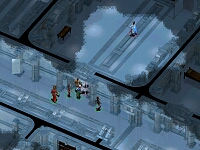
Outside in the corridor youll encounter some Aurilites and a Polar bear. Throughout this level youll encounter groups such as this, and they do wander so dont expect to see them in the same place all the time. Youll also notice mirrors placed around the level that have been charred by lightning. When youve finished with the first group, head north and follow the hallway when it turns west. Theres a door on the north side that youll want to open, but check it for traps first. This is Cathins bedchamber, inside which youll note a large collection of antique weapons and armour, most of which you cant take. There are two containers here as well: one contains ammunition and some scrolls; the second contains an assortment of non-magical weapons. Several of the weapons are masterwork items that you might find useful (they are lighter than usual, and grant a +1 to attack rolls).
To the immediate east is another bed chamber, this one belonging to Lysara. When you go inside youll find an Ice Golem Champion guarding her armoire. After youve dealt with the golem, check the container for Lysaras notebook and a small assortment of treasure.
The door just south of Lysaras chamber is locked. Youll also notice that it is frozen over and a tree branch has been stuffed in the lock. For now, leave it and keep going along the passageway. The doorway to the north leads to a stairwell that leads back up to the first level and comes out in the circular room with the Ice Trolls.
 The next door on the south side leads to a very large chamber, and contains a very strange object. But first you need to get rid of several Aurilites, a Soarsman and a Cult of the Dragon Necromancer. Other creatures from nearby rooms might also come and join the fun, so keep your eyes open.
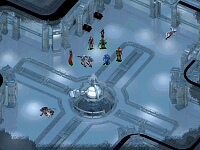
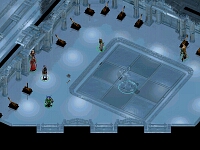
When youve cleared out the room, take a look at the device in the centre of the chamber. There are also two levers in the north-west corner of the room, near where you entered. The Prism Device gathers light from above and uses it to discharge a bolt of lightning in the direction it is aimed - such as all of those charred mirrors you've been seeing.
Now move down to the south end of the chamber and find the door on the west side. Open and head inside. Here you find another bed chamber, and the occupant is still inside sleeping. This is Nickademus, the architect of the Ice Temple and a very important man to get to know. Since you dont want to wait for him to wake, go and speak to him. It doesnt work at first, but he will get up in a moment or two and begin speaking with you.
As the person who built the temple, Nickademus can give you information about all the strange and bizarre things that you find. He can explain how the prism device works, as well as its various uses (it will unlock 4 doors and disarm 2 traps). He can also give you a few details about the Kuldahar painting upstairs - mainly the rooms and areas that it can take you to. You can also come back to him whenever youve found something new that you want to know about. Plus you can ask him to watch over you while you rest.
 You should also ask him about the spirit Aeij-Kellnzt. Not only will he give you some information about the spirit, but you can also ask him for help in dealing with the spirit. He will offer you aid only once, and asks for an unspecified favour to be carried out at a later date. You probably want to hold off on this for now - some of the aid is very short lived. He will offer you one of three things: some magical assistance in fighting the spirit; insight from his own experiences; or some of the magic items hes gathered over the years. The magical assistance consists of various protection spells cast on each party member. If you ask him to share his wisdom with you, the party will receive 5175 xp. Finally, the treasure consists of a scroll (Summon Monster IV), a Rogue Stone, Iron Rations, a Returning Frost Dart, five scrolls of Protection From Electricity, a Ring of Protection From Electricity and a Delay Poison Potion. (Note: If you already robbed the cabinet beside Nickademus' bed, then he doesnt have anything to give you. Plus you will only have found half of the items listed).
When youve learned all you can from Nickademus, go back into the main chamber, and then head into the eastern adjoining chamber. Here youll find various components of a machine which doesnt seem to be working at the moment. There are also two bodies on the floor, but they dont hold any valuables. You may find an Aurilite or two in here, and possibly a Soarsman. Search the north wall of this room for a secret door - its trapped, and you cant disarm it. (Note: Several doors on this level are trapped with Unholy Blight. If you have any evil party members they be unharmed by this type of trap). When you open the door, youll find a small library, along with a Cult of the Dragon necromancer and a couple of Soarsmen. The bookshelves are filled with various histories and tales if youre interested. Other than that, theres not much of interest here.
From the central chamber, head back through the north doorway and turn right. The door to the immediate north is locked and can only be opened with a specific key. Youll also notice that the phrase Oria Battle Square Master has been carved onto the door frame. Since you dont have the key, keep moving along the hallway. Theres a large room in the north east corner that has a few more Aurilites waiting for you. Empty the room and head south. About halfway down the hallway you come across some more Aurilites, along with some polar bears, all standing in front of another set of stairs. The stairs head back to the first floor, exiting by the Kuldahar painting, just in case you want to go back upstairs.
Keep following the hallway, now heading south and then turning west. Youll find a door on the south side of the wall. This is one of two entrances to the next major room. You can reach the other by moving just a little further west to a doorway that opens into a small chamber. On the eastern side of this chamber is the other entrance.
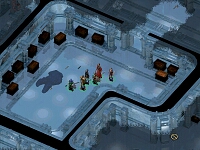
 When you go inside, youll find several Aurilites and an Ice Golem Champion. Theres another golem in the room as well, but its not hostile so dont worry about it for now. Clear out the occupants and go inside for a better look. The walls of the chamber are lined with levers; in the centre of the room is a 3x3 grid of squares, on which the golem is standing. Trying to figure out how all of this works on your own will take quite some time - luckily, you can go back to Nickademus and ask him about it. Hell tell you that this is the Battle Room, and will go on to explain how it works.
Notice the three switches in the south west corner. One of them is called the mode activator and it does just that: activates and deactivates the current mode. The other two switches are used to select one of three modes: the first is for temple maintenance; the second is the inner sanctum, or ethereal mode, which Nickademus created just for Oria; and the third is for battle squares. Selecting the first two modes is obvious enough; to select mode three you need to push both the mode one and mode two levers. The remaining switches are used only for battle square mode, and allow you to select one of ten ranks. Mode one is only useful if there is something broken in the temple (like the prism device, if you happened to aim it in the wrong direction). Mode two seems to be inoperable at the moment. For the moment, only mode three is of any use.
Nickademus will also explain the rules of Battle Squares to you. Its essentially a full-contact version of tic-tac-toe. To win the game you need to claim three consecutive squares. In addition, there are five levels for each of the ten ranks. For level one you need just three squares; level two is four squares; level three is five squares; level four is six squares; and, level five is seven squares. When you complete all five levels of a rank, you have completed the rank (and will receive experience points for doing so). Mastery of the battle room is achieved by completing all ten ranks. Now this may seem easy, but its not quite all that straight forward. Remember that claiming three squares in a row (including diagonally) ends the game. So, if you need level two of a rank, the fourth square you claim must be the one that ends the game; the last square you earn must always be the one that completes the line of three squares. (For examples of the patterns needed to win each level, click here). The other part about the game is that its single combat; whichever of your characters activates the battle square mode will be the one in combat.
You may have begun to put two and two together at this point. Remember what was marked on the door to Orias room? In order to get the key to Orias bedchamber, you need to play Battle Squares at least once, and win. While the difficulty of your opponents increases with the rank and with the level of your party, it also varies within a given rank. Even on rank one, there are a few opponents that could pose a major problem for some of your party members, so choose wisely when deciding who youre going to send in and be sure that character has a large supply of healing and protective potions. You can play the game for as long as you like, but its really only necessary to win once. Although each time you win you will receive a minor award, usually gold, gems, ammunition, or experience points, you only receive experience for completing a whole rank. You can't win a second prize by repeating a rank or victory. Most of the items you receive as a reward for completing each rank will help you achieve higher ranks, so be sure to identify and use them immediately whenever possible and not just tuck them in a Bag of Holding for later.
Battle strategy will vary depending on which character is fighting, but there are a few rules that will benefit any type of character. First, summoned creatures are of no use, because the Ice Golem Champion will simply catch them and send them into the segregated room with your other party members. The door to this room vanishes while the game is in progress, so there is no way for your party members or any summoned creatures to escape. Similarly, spells cast in that room will not affect the character playing battle squares, even if the spell is one like Static Charge that normally is not confined to the area in which it was cast. It is essential to destroy the monster as quickly as possible because you are more likely to fail by taking too long than you are by being killed. The feats Power Attack and Maximize Attack are both useful here. Don't waste time using healing spells or potions in mid-fight either; if you are in bad enough shape that you have to stop and heal yourself, you probably aren't going to win this square anyway.
At the higher ranks of the game, you will start to see a lot of demons, specifically Cornugons, appear as opponents. This can be a serious problem, because they have a tendency to teleport into the locked room with the other party members. The Club of Disruption that you win at Rank 6 is invaluable in destroying the demon before they can do this. If it does happen, and it is not a square you must win to complete the rank, it's probably best to have someone in the room with the demon cast Invisibility Sphere and just wait it out. If they do kill the demon, the Ice Golem Champion often does not recognise this and the game is stopped dead. If this happens, all you can do is flip the activation switch and restart the rank from the beginning. This problem can also happen with efreet.
Here is the complete list of prizes you will win for completing each rank of Battle Squares:
Rank One: Dragon's Belt
Rank Two: Potion of Holy Transference
Rank Three: Abishai Hide Armour
Rank Four: Boots of Grounding
Rank Five: Throwing Axe of Shocking Burst
Rank Six: Club of Disruption
Rank Seven: Ice Spear
Rank Eight: Composite Longbow of Empowerment
Rank Nine: Wand of the Dead
Rank Ten: Brilliant Short Sword
Battle Square Master (all ten ranks): Bracers of Icelandic Pearl
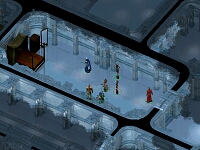
Before you head back north to Orias chamber, there are a couple more rooms you probably want to check out on the south side. To the west of the Battle Room is a strange looking room whose walls are lined with coffins. Its also filled with about a dozen Shadows. For the most part they arent much of a problem, but they can be annoying; a clerics Turn Undead ability will make very short work of them! At the back of the room, three coffins have already been marked out for the high priestesses; it seems someones been expecting you. Check along the west wall near the north end of the room for a secret door - youll want to open this door. Go on through into the next chamber. There might be some Aurilites and/ or Barbarian warriors hanging around that youll need to take care of.
 This next room is quite interesting; a giant mirror spans the entire north wall, and a number of people seem to be trapped within it. During your conversation with Nickademus, he might have mentioned something about a Mirror of Life Trapping. Well, now youve found it. If you look a little closer, youll notice that the people trapped inside are members of the Talisman. Remember that note you found when you first entered the Ice Temple? This is what happened to Brisbaines mercenary band, the Talisman. However, they arent happy to see you - strange, as you have the power to free them or leave them here forever. Some of them will even threaten to harm you
when they finally manage to find a way out of here. At the western end of the room youll also notice three other mirrors. Two of these are selectable, and the third is another of the charred mirrors that youve seen around. Careful with the selectable mirrors; they both break when you click on them, but have different effects. Breaking the lower mirror will inflict bad luck on whoever broke it (it wears off eventually), and there are a few items behind it. Breaking the upper mirror will free the Talisman - but they arent very grateful. Instead, they attack you - none of them is very tough, but fighting all dozen or so of them can be a pain. Luckily, theyre all very susceptible to spells like web, entangle, sleep, hold, confusion, chaos and similar spells. And its worth the effort for the loot! Among other items, youll find the Bastards Son, an Adventurers Robe, the Flail of the Defender, and a Ring of Regeneration.
This next room is quite interesting; a giant mirror spans the entire north wall, and a number of people seem to be trapped within it. During your conversation with Nickademus, he might have mentioned something about a Mirror of Life Trapping. Well, now youve found it. If you look a little closer, youll notice that the people trapped inside are members of the Talisman. Remember that note you found when you first entered the Ice Temple? This is what happened to Brisbaines mercenary band, the Talisman. However, they arent happy to see you - strange, as you have the power to free them or leave them here forever. Some of them will even threaten to harm you
when they finally manage to find a way out of here. At the western end of the room youll also notice three other mirrors. Two of these are selectable, and the third is another of the charred mirrors that youve seen around. Careful with the selectable mirrors; they both break when you click on them, but have different effects. Breaking the lower mirror will inflict bad luck on whoever broke it (it wears off eventually), and there are a few items behind it. Breaking the upper mirror will free the Talisman - but they arent very grateful. Instead, they attack you - none of them is very tough, but fighting all dozen or so of them can be a pain. Luckily, theyre all very susceptible to spells like web, entangle, sleep, hold, confusion, chaos and similar spells. And its worth the effort for the loot! Among other items, youll find the Bastards Son, an Adventurers Robe, the Flail of the Defender, and a Ring of Regeneration.
The south door of this room is locked. Its marked with a lightning bolt symbol, which should give you a clue as to how it is opened. For now, leave the room and head back to the the main chamber. If you want, you can chat with Nickademus some more - he might tell you how the Talisman ended up in the Mirror of Life Trapping. More importantly, however, you now have the key to Orias chamber.
 As soon as you open the door to Orias chamber, youll be attacked by three Winter Wolves and, of course, Oria. For someone who is the master of the Battle Room, she doesnt put up much of a fight - the winter wolves are actually your main problem here. When Oria has sustained a fair amount of damage, she stops the battle and begins talking to you. Apparently shes had enough, and threatens to destory everything around her by breaking her Staff of Power. You can talk to her about it, but it always ends the same: Oria breaks the staff, and in a puff of magic fire she is gone. It would seem that her words were true, except that youre still here.
Finish off any wolves that might be left, and begin cleaning up the immediate area. Youll notice very quickly that not only has Orias body disappeared, but everything she was carrying as well! In a few moments, you learn why. Oria reappears, this time as Orias Essence: an ethereal form of the High Priestess Oria. She cries out in triumph that her ethereal Inner Sanctum is working now, and as a result she is now invincible. Oria then attacks you, but wont be able to damage you much, if at all. However, she is completely impervious to any harm from weapons or magic. If you remember your conversation with Nickademus, you might recall his comments about the Battle Room; the second mode is for the Inner Sanctum, an ethereal realm he created specifically for Oria. It would seem that this is now functioning. Take one party member and, leaving the rest attacking Orias Essence, quickly go down to the Battle Room and activate the Inner Sanctum (select mode 2 with the upper lever and then activate the current mode). There will be a brief flash and then youll start seeing the results of your attacks on Oria - she wont last long once you can hit her.
When you have defeated Orias Essence, deactivate mode 2. You can loot her belongings for some decent scrolls, a Travellers Robe, and a Wand of Magic Missiles. Dont forget to go back into her chambers where you will find some more scrolls, ammunition and some additional loot. Youll also find another dead cat - perhaps you are on the trail of something?
With Oria defeated, you find that only a handful of rooms still remain closed to you. The door south of the room with the giant Mirror of Life Trapping, as you may recall, was marked with a lightning bolt, indicating that it can only be opened using the Prism Device. So go back into the central chamber, and using the south lever (the lower of the two) change the prisms direction until it is facing south. Make sure that there is no one standing in the way of the prism! Its safest to always place your whole party behind the prism when firing. If you have followed the path the lightning bolt will take, youll have noticed already that it must go through the secret door in the room with the coffins. If that door is closed, then the bolt stops dead. When youre ready, fire away! The bolt does move quite slowly so keep an eye out as you move south to the door.
When you get there, youll find it unlocked. Inside are several chests, all of which contain at least a few items. Watch out for the Ice Golem Champion standing at the back of the room. The most important item you will find is Nathaniels Bag of Holding - unfortunately, you cant use it.
 With this room cleared out, youre ready to move on to the next secret room. For this one, youll need to go back upstairs to the Kuldahar Painting. The quickest route is to take the east stairwell up to the first level, which will bring you to the painting. Speak to the painting again, and you should see at least one or two more responses than were previously available. One of them should begin "In Aurils name, from winters veil...". When you choose this response, the stairs will transport you to the room with the frozen door and the tree branch stuck in the lock (just north east of the central chamber). This is a secret treasury room, and is well worth the effort to find it! And, like the other treasury, it is guarded by an Ice Golem Champion. All of the chests in the room are trapped, along with the door, so be careful when youre leaving. However, as you make the rounds, you should be able to collect roughly 6000 or 7000 gp, along with several gems and ammunition. You will also find a ring that, when identified, turns out to be Nathaniels Ring of the Ram. Unlike his bag of holding, you can actually use this ring - and you dont necessarily have to give it back to him.
Now, with both of the treasuries cleared out, theres only one area left that is locked: the door marked with the shadow where you first entered this level.
As youve probably already figured out, this last door can only be opened by using the prism device. So head back to the central chamber. This would also be a good time to take Nickademus up on his offer of help. But first, unlock the door. You may have noticed that the mirror just outside of the north entrance to the central chamber can be rotated; youll need to turn it so that it faces west in order to fire the lightning bolt in the right direction. When the mirror is facing west, aim the prism device north and fire - just be sure that theres no one in the way! Now go ask Nickademus for help. Hell give you three options: aid against Caged Fury; the wisdom of his experiences; or, a selection of his collected items. All three options have their benefits, so there really isnt a best choice. Once youve made your choice, head over to the now unlocked altar room.
When you arrive youll see that the shadow trap has been removed and the door is unlocked. But dont rush in just yet. Be advised that when your conversation with Caged Fury ends, he will unleash a fairly powerful bolt of lightning, damaging whoever is in the doorway. In addition, the door to the altar room will close and a wind storm will be released that can also cause some damage. At about the same time, a group of Aurilites, polar bears and winter wolves will appear in the hallway and attack you. So choose carefully when deciding who will be the one to talk to Caged Fury. When youre ready, send in one party member and several healing potions.
 The altar will immediately begin addressing you, still posing as the spirit of Auril. Insulting the spirit results in an ice storm being unleashed, so try not to take that route. As well, ending the conversation prematurely results in a bolt of lightning being released. At first the spirit demands that you quench its thirst with more sacrifices. As soon as the option presents itself, youll want to invoke the true name of Caged Fury and banish him from the altar. Alternatively, if the person speaking to him has a high Intidimidate skill, they can also try to provoke Caged Fury to leave the altar and face you directly. Either way you will have succeeded in driving the spirit from the altar (4725 xp). (Note: If you did not learn the true name of the spirit, then the second method may be the only way you can drive the spirit from the altar). As soon as the spirit leaves the altar, the door closes behind you, a bolt of lightning will be unleased, and a whirlwind emerges from the altar. You cannot damage the whirlwind, so just try to stay out of the way as best you can. In the meantime, the shadow trap will once again be activated - make sure none of your party members accidentally steps on it. And, as already mentioned, youll be attacked by a group of enemies in the hallway.
The whirlwind eventually disappears, and the door once again opens. When you finish off the group of Aurilites, youre ready to head back upstairs to Nathaniel and the abishai. Clear up any rooms that may be left and then go speak to Nathaniel upstairs.
Return Nathaniels bag of holding to him for a decent reward (3150 xp), and tell him that youve defeated the three High Priestesses and the spirit Caged Fury (4725 xp). Finally, you may also choose to give him back his ring (2300 xp). Nathaniel says that he will now be able to make a hole in the glacier so that you can get through the pass and head to Kuldahar. Meanwhile, hell go back to Oswald and they will fly around, warning the Ten-Towns, and meet up with you in Kuldahar. He says hell meet you outside when youre ready to leave. If you have not yet repaired Oswald's airship, you can give the ingredients for the mending spell to Nathaniel and he will take them to Oswald for you.
Now go and inform Xhaan that youve driven the spirit from the altar - but remember to be fully healed when you do! (3150 xp for freeing Xhaan and the rest of the Abishai).
As soon as you leave the Ice Temple you will be transported to the north central area of the Ice Wall map. Here youll see Nathaniel blast away at the ice wall until a group of soldiers appear and walk towards you.
You are greeted by two captains: Rahm Dammel of Luskan, and Ingrath Mariner of Neverwinter. You can chat briefly with them, mostly receiving some amusingly-phrased flattery from Rahm, as well as getting a few new bits of information. You may also have letters for the two captains from Targos. If you exposed the doppleganger spy in Targos with the aid of Denham Fisher, then you may remember the name of Ingrath Mariner - Denham gave you a special note to give to the captain, and youll soon find out whether hes a spy or not.
When youve finished speaking with the captains, you should make a trip to see Zack Boosenburry. Not only will you be able to clear out your inventory, but you can also help Zack with his investigation of the Ice Temple (4725 xp). Also, if you still need to pick up any items from Oswald (such as any special armour or items you asked him to make) now would be the time to do it - you wont get another chance. When youre ready, head back to the opening Nathaniel made in the ice wall and go on through to start Chapter 3.